The Ultimate Guide to Yo-Yos Biscuits for Savvy Parents
Hey there, wonderful parents! Are you on the hunt for that perfect treat to sweeten up your family’s snack time? Look no further than the whimsical world of Yo-Yos biscuits! ?? These melt-in-your-mouth delights are not only delicious but also a fun way to introduce the little ones to the joys of baking. So, grab your aprons and let’s embark on a yummy journey into the land of Yo-Yos!
What Are Yo-Yos Biscuits?
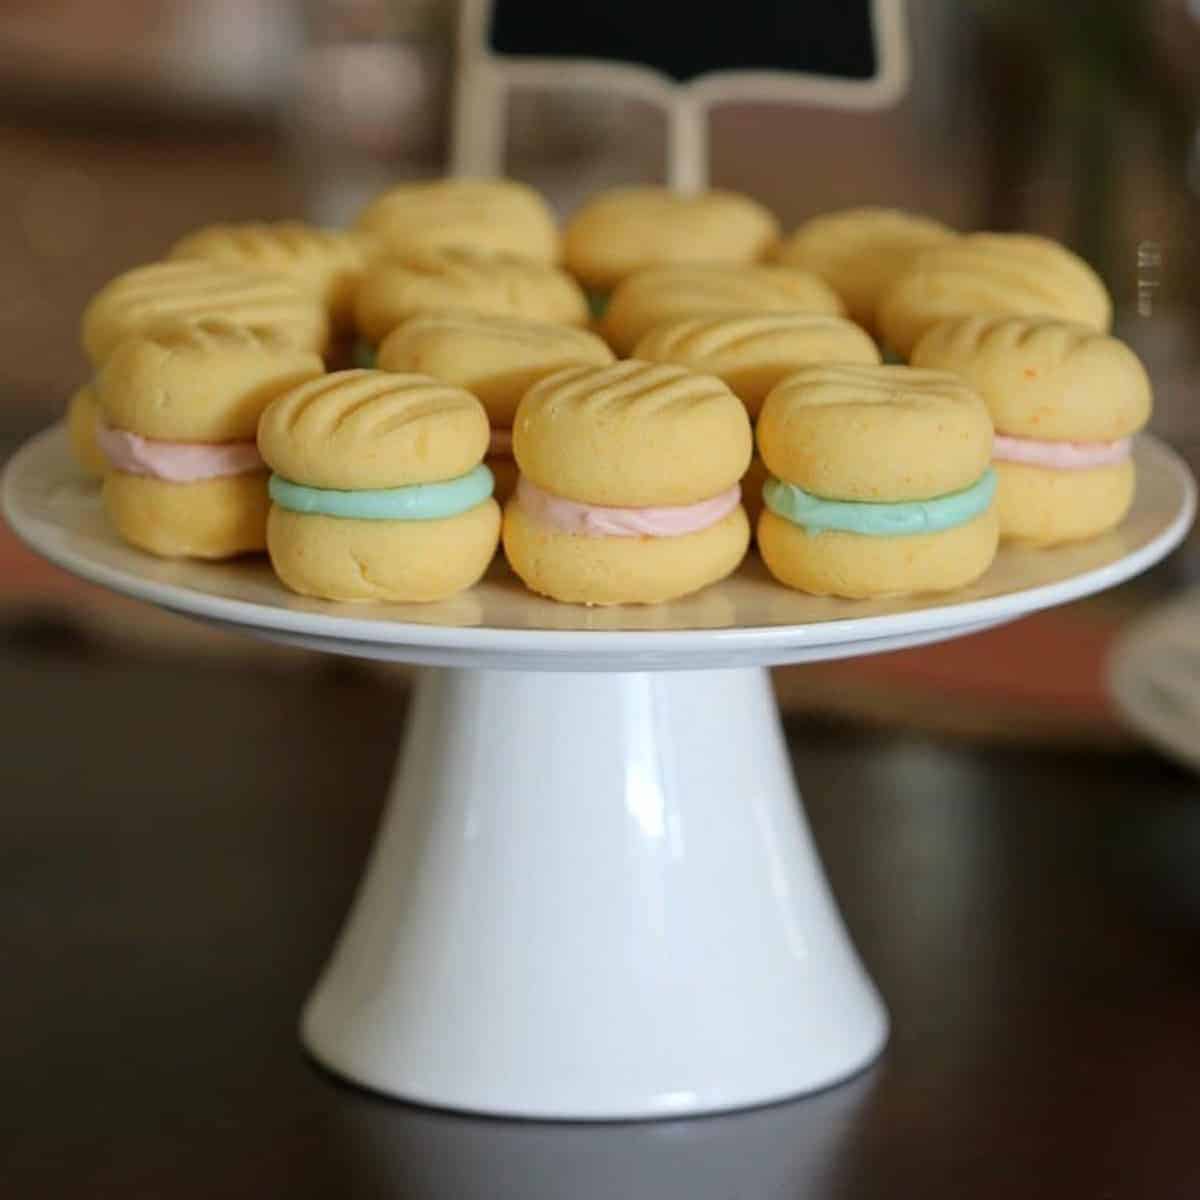
Yo-Yos biscuits, also known as “melting moments” in some parts of the globe, are buttery, tender cookies that will make your taste buds dance with joy. They hail from Australia, known for their delectable baked goods, and have become a classic treat that families adore worldwide. Yo-Yos often come sandwiched with a creamy filling that simply elevates the experience to a whole new level of scrumptious.
Benefits of Baking Yo-Yos Biscuits at Home
When you decide to take on the delightful task of baking Yo-Yos at home with your kiddos, you’re in for a world of benefits:
- Quality Time: Baking together provides an incredible opportunity to bond and make heartfelt memories.
- Education: Your children can learn about measurements, ingredients, and the science behind baking—a delicious lesson indeed!
- Customization: You can tweak recipes to suit dietary needs or personal taste preferences. A win for picky eaters and health-conscious parents!
- Nutritional Control: Baking at home means knowing exactly what’s going into your biscuits—no hidden nasties here!
Choosing the Right Ingredients for Your Yo-Yos Biscuits
Ready to start baking? The secret to the best Yo-Yos lies in choosing quality ingredients. Here’s a quick rundown:
- Butter: The heart and soul of Yo-Yos biscuits. Opt for good-quality, unsalted butter for that rich, creamy taste.
- Flour: Plain or all-purpose flour works wonders, providing the structure for your cookies.
- Sugar: Icing sugar is commonly used for its fine texture, contributing to the cookies’ delicate crumb.
- Custard Powder: A secret ingredient that gives Yo-Yos their signature flavor and melt-in-your-mouth texture.
- Filling: Traditionally, a buttercream filling is used, but feel free to explore with jam, chocolate, or even lemon curd!
Now, let’s whisk our way to the fun part—making those awesome Yo-Yos biscuits! But before we get our hands doughy, remember that creating these cookies is not just about following a recipe; it’s about enjoying the process and embracing the little imperfections that come with homemade goodies. Whether they’re a bit wonky or your icing design isn’t quite “Instagram perfect,” the love poured into them is what truly matters, and trust me, they’ll still taste amazing!
Baking Yo-Yos biscuits with kids is undoubtedly a sweet adventure. Not only does it teach them valuable skills, but it also sparks creativity and offers endless possibilities for customization. Stay tuned as we dive into the step-by-step process of making Yo-Yos biscuits, complete with pro tips to ensure your baking success. Let’s make some magic in the kitchen and create treats that are as beautiful as they are delicious!

5 Essential Tips for Baking the Perfect Yo-Yos Biscuits
Thrilled to see your excitement, dear parents! Here’s your comprehensive, step-by-step guide to making those perfect Yo-Yos biscuits. But before diving into the dough, here are five golden tips to prepare you for a smooth baking experience:
1. Measuring Matters
Teach your little ones the importance of accuracy in baking. Use measuring cups and spoons to introduce them to the concept of precise proportions. We all love a bit of extra butter, but sticking to the recipe ensures those Yo-Yos come out just right. Get ready to measure out joy by the teaspoon!
2. Room-Temperature Ingredients
For those creamy delights, make sure your butter is at room temperature. This ensures a smooth batter that blends beautifully. Get the kiddos to press a finger into the butter to test its readiness — if it indents easily without melting, it’s game on for baking!
3. Dough Consistency is Key
After mixing up your dough, it should be firm yet pliable. If it’s too soft, a little chill time in the refrigerator will make it just right for shaping. Let the kids mold their own creations — after all, each biscuit is a masterpiece in the making!
4. Evenly Sized Equals Evenly Baked
Consistency is as important in size as it is in the dough. Use a cookie scoop or a tablespoon to portion out the dough, then have fun rolling it into balls. The uniformity means each Yo-Yo bakes evenly, ensuring every bite is as good as the last.
5. Filling Fun and Flavors
The filling is where you can let your imagination soar. Experiment with different flavors and let the children choose their favorites. From classic buttercream to tangy lemon or sweet chocolate, the possibilities are as vast as their creativity.
Equipped with these pearls of wisdom, you’re now ready to start baking those adorable Yo-Yos biscuits. Imagine the delight in your kids’ eyes when they get to indulge in the treats they’ve made — it’ll be like watching little stars shine with pride.
Mustering up your inner pastry chef might seem daunting, but remember, it’s all about the fun you have along the way. So flour up those surfaces, set out your bowls, and let’s get ready to make some biscuit magic. Bring smiles to your family’s faces with every buttery, crumbly bite of homemade Yo-Yo biscuit goodness!
. For more information see here
Disclaimer
The articles available via our website provide general information only and we strongly urge readers to exercise caution and conduct their own thorough research and fact-checking. The information presented should not be taken as absolute truth, and, to the maximum extent permitted by law, we will not be held liable for any inaccuracies or errors in the content. It is essential for individuals to independently verify and validate the information before making any decisions or taking any actions based on the articles.


