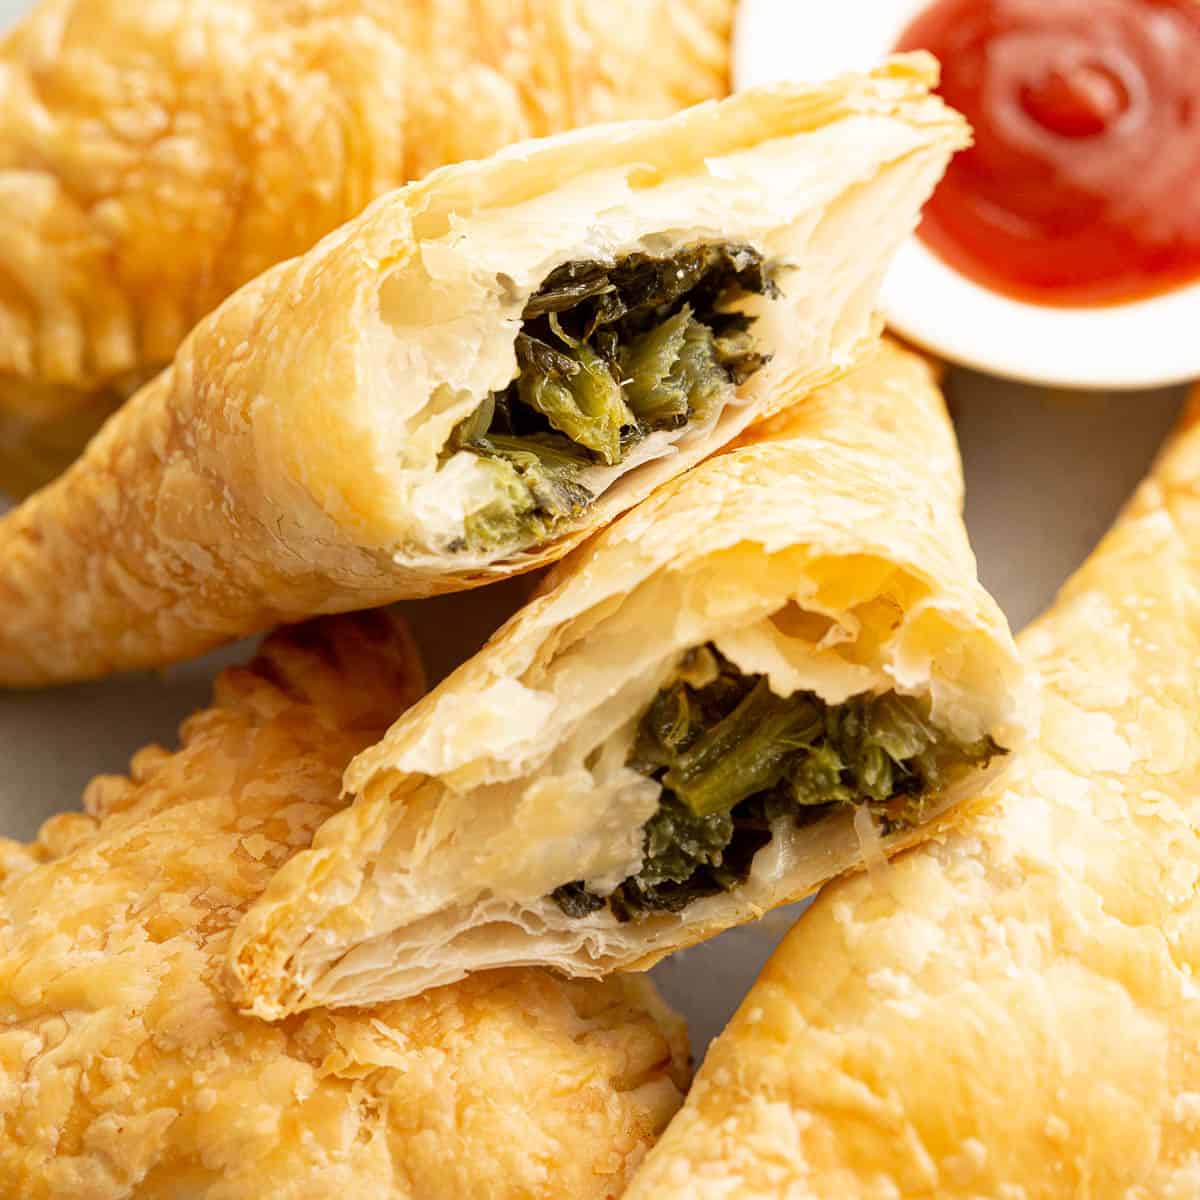
Delight Your Family with Homemade Spinach and Feta Triangles
Hello, awesome parents out there! Are you ready to introduce your family to a recipe that’s not just tasty but packed with goodness? Spinach and feta triangles, also fondly known as spanakopita, are a classic treat that blends nutritious spinach, creamy feta cheese, and flaky pastry into one delicious little package. Perfect for a snack, appetizer, or a light meal, these little pockets of joy are a surefire hit with kids and adults alike!
Why Spinach and Feta Triangles Will Spin your Family’s Taste Buds
Before we dive into the ‘how-to’, let’s talk about the ‘why’. Spinach is a super-veggie that has iron, vitamins, and antioxidants, and when combined with the calcium-rich feta cheese, you get a powerhouse of nutrition that’s hard to beat. But it’s not just about nutrition; it’s about taste, and these triangles tick all the right flavor boxes. Now, let’s roll up our sleeves and get ready to impress with this masterfully simple recipe that earns you ‘parent of the year’ points instantly!
The Ingredients List: What You’ll Need to Get Started
- Fresh spinach leaves – A bunch or two should do the trick!
- Crumbled feta cheese – Creamy goodness awaits.
- No-fuss phyllo pastry – Find this flaky delight in your supermarket’s freezer section.
- A couple of eggs – These will help bind your filling just right.
- Onion and garlic – For a flavor kick that sings.
- Olives or capers (optional) – If you want a briny twist.
- Nutmeg, salt, and pepper – Because seasoning is everything.
- Extra virgin olive oil or melted butter – To get that golden pastry glow!
Utensils & Equipment You’ll Need in this Culinary Adventure
Before you begin, let’s ensure you have the right kitchen wizardry tools on hand:
- A large frying pan
- A mixing bowl
- A pastry brush
- A sharp knife
- Baking sheets
- Parchment paper
With the ingredients and utensils at the ready, you’re all set to make magic in your kitchen! Now, let’s walk through the steps to create these mouthwatering triangles of happiness.
A Step-by-Step Guide to Crafting Perfect Spinach and Feta Triangles
1. Sautéing Your Greens: Making the Filling
To kick things off, give your spinach and herbs a good wash. Chop them finely – they’ll be much easier to work with. In your large frying pan, heat a bit of olive oil and sauté the chopped onions and garlic until they’re golden and fragrant. It’s time to add the spinach and watch as it wilts down to a fraction of its size. The aroma at this point is just heavenly!
2. Spinach Meets Feta: The Mix of Champions
Once your greens have cooled slightly, press out excess water (soggy pastry is a no-no!) and transfer to a mixing bowl. It’s here that you’ll create the filling’s foundation by combining spinach, crumbled feta, beaten eggs, and your seasoning. If your kitchen helpers are of the pint-sized variety, this is a great moment for them to jump in and help mix!
3. Phyllo Fun: Creating Your Pastry Masterpieces
Working with phyllo might seem daunting, but don’t worry! It’s about being gentle and swift. Lay out a sheet of phyllo, brush it lightly with olive oil or melted butter, then add another sheet on top. Cut these layers into strips, spoon your spinach-feta mix on one end, and fold into triangles. Remember to tuck and roll like you’re crafting a tiny envelope filled with pure joy.
The Baking Ballet: Crisp, Golden, Done!
Once your triangles are ready, arrange them on baking sheets lined with parchment paper. Give them one last loving brush with olive oil or butter for that tantalizing golden color. Pop them into a preheated oven and watch the magic happen. What comes out are amazing little pastries that are crispy on the outside, melt-in-your-mouth on the inside, and 100% kid-approved.
Stay tuned for more helpful tips on achieving the perfect crunch, alternative filling ideas for picky eaters, and creative ways to make this recipe work for special diets. But for now, preheat that oven and get ready to treat your family’s taste buds to the delightful world of spinach and feta triangles. Keep smiling and happy cooking!

Five Things Parents Should Know When Preparing Spinach and Feta Triangles
Choosing the Right Spinach
There are various types of spinach you might come across—baby spinach, flat-leaf, and savoy. For these triangles, any type will do, but remember, the fresher, the better. Organic spinach can be a great choice to minimize exposure to pesticides, which is especially important for developing little ones.
Handling Phyllo Dough with Care
Phyllo dough can dry out quickly, leading to cracks and tears. To prevent this, cover the unused sheets with a damp cloth as you work. If the little ones are helping, turn it into a game to see who can be the gentlest Phyllo handler!
Getting the Kids Involved
Kids are more inclined to eat something they’ve helped make. Let them wash the spinach, crumble the feta, or brush the pastry with butter. These tasks are safe and fun and can nurture a love for cooking.
Adjusting the Recipe to Dietary Needs
Whether you have someone with lactose intolerance or a gluten-free diet in your family, you can modify this recipe to suit their needs. There are dairy-free feta alternatives and gluten-free phyllo dough available in some stores, so everyone can enjoy these delicious triangles!
Freezing and Reheating
For those busy days when there’s no time to cook, you can prepare the spinach and feta triangles in advance, bake them halfway, and then freeze them. When you need a quick meal or snack, just pop them back in the oven to finish cooking. They’ll taste as fresh as if you made them that day!
Preparation Tips for Flawless Spinach and Feta Triangles
With ingredients and tips in mind, let’s prepare your kitchen for some baking fun! Clear some space, get your oven preheating, and let the anticipation build as you embark on this culinary journey. Along the way, you’ll find that cooking can be just as rewarding as sitting down to enjoy the scrumptious results.
Remember these final bits of advice: don’t overfill your triangles, as tempting as it might be, because that can lead to splitting during baking. Also, involve the kiddos in the process but keep safety first—hot ovens and sizzling pans are a ‘grown-ups only’ zone.
Now equipped with these pieces of wisdom, it’s time to create some kitchen memories. With every fold of phyllo and scoop of filling, think of the smiles and satisfaction that’ll light up your home. It’s not just about feeding tummies; it’s about feeding hearts and souls with home-cooked love. So, preheat that oven, set out your ingredients, and get ready for some flaky, cheesy, spinachy fun!
If you’ve found this guide helpful, don’t forget to check for more family-friendly recipes and cooking tips. Happy cooking!
For more great articles please see here. For more information see here
Disclaimer
The articles available via our website provide general information only and we strongly urge readers to exercise caution and conduct their own thorough research and fact-checking. The information presented should not be taken as absolute truth, and, to the maximum extent permitted by law, we will not be held liable for any inaccuracies or errors in the content. It is essential for individuals to independently verify and validate the information before making any decisions or taking any actions based on the articles.


