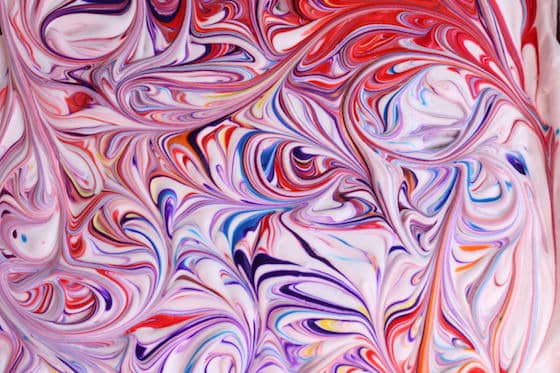
Create Dazzling Marbled Art: Marbling Paper with Shaving Cream for Beginners
Hey there, craft-loving parents and guardians! Are you ready to dive into a world of color, creativity, and giggles with your kids? Marbling paper with shaving cream is not only a blast, but it’s also super easy and delivers stunning results. Grab your aprons, because we’re about to embark on a whimsical art adventure that will surely become a favorite family pastime!
Why Marbling Paper with Shaving Cream is Awesome for Kids
Before we roll up our sleeves, let’s chat about why this activity is a total win-win:
- Stimulates Creativity: Marbling is like magic! Kids are fascinated by the swirling colors and the surprise of each unique design.
- Develops Fine Motor Skills: From spraying shaving cream to swirling colors, their little hands will be busy and their coordination getting a workout.
- Science in Action: Witness the principles of color mixing and hydrophobic reactions right before your eyes—a stealthy educational moment!
- Easy Clean-Up: Shaving cream is dispensable and washable, making the aftermath of your craft session worry-free.
- Materials at Hand: Most supplies are probably already in your home, ready to use, making this an anytime activity.
What You’ll Need to Get Started
Here’s your quick checklist for this colorful journey:
- Shaving cream (the foam kind, not gel)
- Liquid watercolors or food coloring
- A shallow tray or baking sheet
- Thick paper or cardstock (white works best)
- A ruler or a straight-edged object
- Toothpicks, skewers, or the end of a paintbrush
- Paper towels
- Optional: Wearable art smocks or old t-shirts to stay mess-free
Once you have your supplies, make sure to clear a table and lay down some newspaper or a plastic tablecloth. The more protected your space is, the more you can let loose and enjoy the marbling process!
Let’s Get Marbling: The Basic Process
With everything in place, you can start your artistic journey with these simple steps:
- Prep Your Tray: Fill your shallow tray or baking sheet with a layer of shaving cream. Aim for an even layer that’s about an inch thick. No need for perfection, though—that’s part of the charm!
- Drop the Colors: Let the kids choose their favorite colors and add drops of liquid watercolor or food coloring on top of the shaving cream. Experiment with different color combinations to see what results you’ll get.
- Make Swirly Patterns: Using a toothpick or skewer, encourage the kiddos to drag lines through the color drops, creating swirling patterns. There’s no right or wrong here—just swirling fun!
- Press the Paper: Gently lay the paper down on top of the colored shaving cream. Give it a little pat to ensure contact with the colors, then pull it off to reveal a beautiful, marbled design.
- Scrape Off the Cream: Use the ruler or straight edge to scrape off the excess shaving cream from the paper. What’s left behind? A vibrant, marbled masterpiece!
Repeat the process as many times as you like, changing colors and patterns to create a whole gallery of paper art. Remember to take breaks and let the paper dry completely for the best results!
Hey, don’t put away that ruler just yet! We’ve only just begun exploring the exciting world of marbling with shaving cream. Next up, we’ll dive into advanced techniques, tips for perfecting your designs, and ideas for using your marbled creations. So, stick around for more fun and be ready to transform those swirly dreams into reality!

5 Things Parents Should Know When Prepping for Paper Marbling with Shaving Cream
1. Set Up a Dedicated Craft Zone
The first step is to carve out a little corner of your home where creativity can run wild. Pick a space that’s comfortable for both you and the kids, with enough room to maneuver. An outdoor area or a room with tiled flooring can be ideal—if a little color goes astray, no worries!
2. Safety First!
While the materials are non-toxic and kid-friendly, it’s always good to remind the little artists not to put anything in their mouths. Also, if anyone in the family has sensitive skin, you might want to opt for a hypoallergenic shaving cream.
3. Dress for Mess
Even though our prime ingredient is easy to clean, dyes can be a bit more stubborn. Outfit your dynamic duo in clothes that have already seen their fair share of adventures, or protect their outfits with smocks or aprons.
4. Quality Time Over Perfect Outcomes
Remember, the objective is fun! Your child’s marbled paper might not always turn out like the Pinterest pictures, and that’s perfectly okay. It’s all about the experience and the joyful chaos of creating together.
5. The After-Party: Clean-Up
Once the marbling masterpiece is complete, clean-up should be a breeze. Shaving cream rinses off easily with water. However, don’t forget to wipe down surfaces and wash hands promptly to prevent any dye from staining skin or furniture. Involving kids in the clean-up can also be a fun and responsible end to the crafting session.
Armed with these insights, you’re all set to introduce the kiddos to the fantastic world of shaving cream marbling. Just imagine the pride in their eyes as they hold up their very own abstract creations. So, let’s make some art and make some memories!
See more great Things to Do with Kids in New Zealand here. For more information see here
Disclaimer
The articles available via our website provide general information only and we strongly urge readers to exercise caution and conduct their own thorough research and fact-checking. The information presented should not be taken as absolute truth, and, to the maximum extent permitted by law, we will not be held liable for any inaccuracies or errors in the content. It is essential for individuals to independently verify and validate the information before making any decisions or taking any actions based on the articles.


