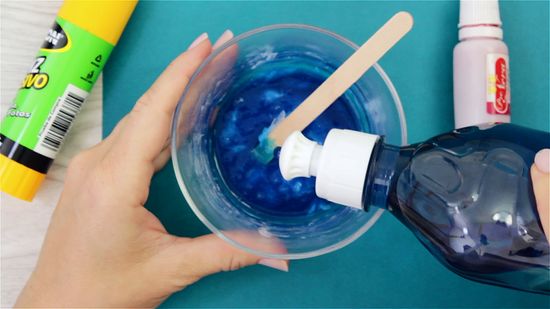
The Ultimate DIY Guide: Making Slime with Glue for Endless Fun at Home!
Welcome, wonderful parents! Are you ready to dive into the gooey world of slime-making with your kids? Making slime with glue is not just a fun activity; it’s a fantastic way to bond with your little ones and stir up their creative juices. In this comprehensive guide, we’ll walk through the magical process step by step, ensuring that you have as much fun making the slime as your kids will have playing with it. So, roll up your sleeves—it’s slime time!
What You’ll Need
- Glue: The star of the show—make sure it’s PVA glue, which is the primary ingredient for making good slime.
- Baking Soda: This acts as a stabilizer for your slime.
- Contact Lens Solution: Your activator that contains boric acid and sodium borate, turning the glue into slime.
- Food Coloring: Totally optional, but oh-so-fun for creating colorful slime!
- Glitter or Beads: For some extra sparkle or texture.
- A Bowl: To mix everything together.
- A Spoon or Craft Stick: For stirring up that slimy goodness.
Step-by-Step Slime Making
- Prepare Your Workspace: Lay down newspaper or a plastic sheet to protect your surfaces and get your ingredients all lined up.
- Pour the Glue: Start by pouring your glue into a bowl. How much you use will determine the quantity of slime you make, so feel free to adjust.
- Add Color and Extras: Mix in a few drops of food coloring, glitter, or beads for personalized slime flair. Stir until evenly mixed.
- Sprinkle in Baking Soda: Add a teaspoon of baking soda to the glue mixture. Mix it through until it’s fully incorporated.
- Add Your Activator: This is the magic moment! Slowly add in the contact lens solution, stirring constantly. You’ll see the mixture start to form into slime.
- Knead Your Slime: Once the mixture is less sticky, take it out of the bowl and begin kneading with your hands to achieve the perfect slime texture. If it’s still too sticky, add a bit more contact lens solution.
And there you have it! Your very own homemade slime! But don’t stop there! The fun part about making slime is that you can experiment with different colors, add-ins, and textures. Make a whole slime collection and watch your kids’ eyes light up with joy and wonder.
Slime Safety Tips
Before we move on to the next exciting section of our slime-making adventure, let’s talk safety. After all, the well-being of your little scientists is our top priority!
- Always supervise your kids during the slime-making process.
- Use safe, non-toxic ingredients and check for any allergies.
- Keep the slime away from young children who might be tempted to eat it.
- Wash hands thoroughly after playing with slime.
With these tips in mind, you’re well on your way to becoming the coolest slime-making family on the block. Up next, we’ll explore some fun variations of the classic slime recipe, including fluffy, buttery, and crunchy textures that your kids will adore. Stay tuned for more squishy fun!

5 Essential Preparations for Slime-Making with Glue
As we get into the nitty-gritty of slime creation, here are five things parents should know before embarking on this sticky, splendid journey:
- Choose the Right Glue: Opt for white school glue (PVA) as it is the most reliable type for slime-making. Clear glue can also be used for a translucent effect, but remember it might yield a slightly different texture.
- Quality of Ingredients: Ensure that the contact lens solution has boric acid and that the baking soda is fresh to guarantee slime success. Expired or alternative products might not give the same results and could frustrate the little ones.
- Pre-Measuring is Helpful: To ease the process, especially with younger kids, pre-measure the ingredients. This helps the activity flow smoothly and keeps the excitement high as the slime comes to life.
- Set Expectations: Slime-making can be hit or miss at times, with the possibility of not getting it right on the first try. Let your kids know this is about experimenting and enjoying the process, no matter the outcome.
- Post-activity Cleanup: Have a cleanup plan in place. Slime can get messy, and it’s not always easy to remove from fabrics and surfaces. Keep vinegar on hand, as it helps dissolve the slime for easier cleanup.
Get Creative: Variations on the Classic Slime
After mastering the basic slime recipe, you might want to dive into some more advanced slime creations! Here’s a sneak peek into how you can make variations that will leave your kids in awe:
- Fluffy Slime: By adding shaving cream into the mix, you create a puffy and soft texture that is a delight to squish.
- Butter Slime: The secret ingredient here is clay. Mixing in soft clay gives the slime a smooth and spreadable texture, just like butter!
- Crunchy Slime: You can add small plastic beads or foam balls for a satisfying crunchy texture that pops and crackles.
Each variation brings its unique twist and provides an opportunity to talk about measurements, chemical reactions, and texture differences. It’s vicarious learning through play—a win-win in the world of parenting!
Slime as a Sensory Play and Learning Tool
As much as slime is a playful substance, it’s also an engaging sensory experience. Here’s why this matters:
- Multisensory Exploration: Playing with slime can support motor skills development and sensory integration—important aspects of early childhood development.
- Creative Expression: Dyeing and customizing slime allows children to express their individuality and preferences.
- Stress Relief: The act of kneading and stretching slime can serve as a stress reliever for children, offering a soothing experience.
“Slime-Time” can even evolve into a recurring fun family activity, where each member gets to showcase their concoction. It’s a great way to keep the family engaged, encourage creativity, and create memorable experiences.
Rest assured, after trying out this delightful mix of science and fun, you’ll have not only created sticky masterpieces but also sticky memories that will cling to your hearts forever. So, embrace the mess, unleash the jars of glitter, and take pride in the blobs of goo that your little ones cherish. It’s all part of the grand adventure of making slime with glue!
Conclusion
By following this guide, parents can ensure a joy-filled, safe, and educational slime-making experience for their kids. Remember, the key is to enjoy the process as much as the product. Every batch of slime is as unique as the child creating it, and each moment you spend with them during this activity is an investment in happy memories. And who knows? You might just find yourself loving the squishy creation as much as they do. So go on, give it a whirl and let the good times roll—or should we say, stretch, pull, and squish!
See more great Things to Do with Kids in New Zealand here. For more information see here
Disclaimer
The articles available via our website provide general information only and we strongly urge readers to exercise caution and conduct their own thorough research and fact-checking. The information presented should not be taken as absolute truth, and, to the maximum extent permitted by law, we will not be held liable for any inaccuracies or errors in the content. It is essential for individuals to independently verify and validate the information before making any decisions or taking any actions based on the articles.


