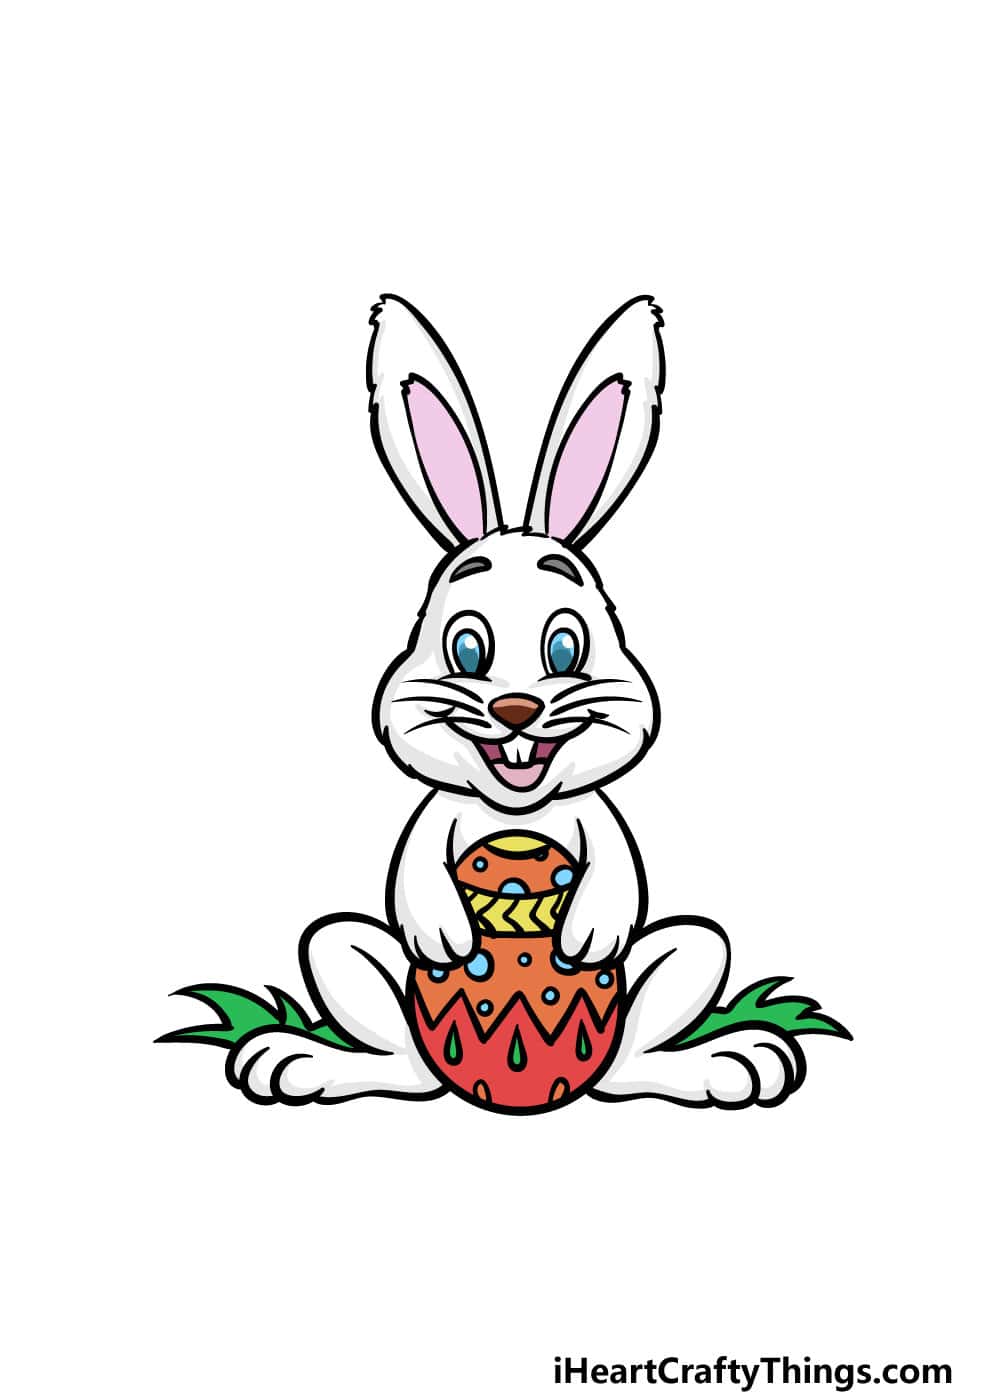
Draw the Perfect Easter Bunny: A Step-by-Step Guide for Parents and Kids
Hey there, creative families! Are you ready to hop into the festivity of Easter with some artsy fun? We have a delightful activity for you and your little ones that will not only spark creativity but also bring the joy of Easter into your home. Get ready to draw the cutest Easter bunny with this easy-to-follow guide designed for parents and budding artists. So, gather your pencils, colors, and drawing paper – it’s bunny time!
Why Drawing the Easter Bunny is a Great Activity for Kids
Drawing is much more than a simple pastime. It’s a way to enhance fine motor skills, express emotions, and let the imagination bloom. As Easter approaches, involving your children in drawing the iconic Easter bunny can add to the excitement of the holiday, create a wonderful bonding experience, and it can even be a fantastic decorating idea for Easter cards or artworks to adorn your home.
Ready to jump in? Let’s start with what you’ll need to embark on this adorable artistic adventure.
What You’ll Need to Draw Your Easter Bunny
- Drawing Paper: Smooth, good quality paper will make sure your bunnies look their best.
- Pencils: A standard HB pencil is perfect for sketching out your bunny.
- Eraser: Mistakes happen, and that’s okay! Keep an eraser handy to keep your drawing neat.
- Coloring Supplies: Crayons, colored pencils, markers, or even watercolors to bring your bunny to life.
- Sharpener: Keep your pencil sharp for those detailed lines.
Laying the Groundwork for Your Easter Bunny Drawing
Before you and your kids jump right in, let’s lay the groundwork. We’ll start by drawing simple shapes to form the base of our Easter bunny. This approach helps to simplify the process and makes it more manageable for kids.
Step 1: Sketching the Basic Shapes
Begin with a simple circle for the bunny’s head. Don’t press too hard with your pencil in case you need to make adjustments later. Add two ovals for the bunny’s body—one larger for the torso and a slightly smaller one for the rear.
Step 2: Adding Ears and Feet
Now, it’s time to give our bunny personality! Draw two long ovals atop the head for ears. Remember, Easter bunnies often have one floppy ear so feel free to play around with the shapes. Sketch two smaller ovals for the feet at the bottom of the larger body oval.
Bringing Your Bunny to Life with Details
With your basic shapes in place, you’ll start transforming those ovals and circles into a recognizable Easter bunny! Let’s add some character to our bunny.
Step 3: Crafting the Face
Inside the circular head, draw two circles for eyes, a triangle or a heart shape for the nose, and add a small mouth. Don’t forget the whiskers! They add a lot to the bunny’s charm.
Step 4: Fine-tuning the Body
Add depth to your bunny’s body by refining the shapes. Smooth the transition between the head and the body for a natural look and give some texture to the fur with light, short pencil strokes around the edges.
As you continue to work on your drawing, encourage your child to personalize their Easter bunny. They can add accessories like a bowtie, a cute jacket, or even draw the bunny holding a basket of Easter eggs. This encouragement of creativity is not only fun but also aids in their cognitive development.
Remember, practice makes perfect, so don’t worry if it takes a few tries to get your bunny just right. Art is about expression and enjoyment, after all. Keep at it, and you’ll soon have an Easter bunny drawing that everyone will adore.

5 Things Parents Should Know in Preparing for Drawing the Easter Bunny
1. Create a Conducive Environment
Set up a comfortable and well-lit space for your drawing session. A calm environment helps children to focus better and enjoy the drawing process. Ensure that all the materials are within easy reach to maintain a smooth flow of creativity.
2. Embrace the Mess
Art can be messy, and that’s part of the fun! Make sure to cover your workspace with newspaper or an old tablecloth. Have some wet wipes or a cloth at hand for easy cleanup. This takes the stress out of the activity and allows everyone to get fully immersed in their artwork.
3. Keep Instructions Simple
Use clear, simple instructions and demonstrate each step. Children have different learning paces, so be patient and offer guidance when needed. Try to use terms they will understand and be ready to show them how it’s done—children often learn best by watching and doing.
4. Encourage Individual Expression
While this guide provides structured steps, it’s important to encourage children to add their personal touch. Whether it’s a unique color choice or an imaginative accessory, these individual expressions make the drawing special and boost children’s confidence in their creativity.
5. Be Supportive and Positive
Affirmation goes a long way. Praise their effort and the progress they make, rather than focusing on perfection. Positive reinforcement will nurture their interest in art and help them to enjoy drawing as a means of self-expression.
Finalizing Your Easter Bunny Masterpiece
With the main drawing complete, it’s time to add the final touches to your Easter bunny!
Step 5: Coloring Your Bunny
Choose the colors you think will make your bunny pop. Use soft shades for a more realistic bunny or bright, vibrant colors for a fantastical one. Gently color in large areas with a steady hand, and then use bolder strokes or deeper colors for shading and adding dimension.
Step 6: Background and Context
Every bunny needs a beautiful spring setting! Encourage your child to draw a background. It could be a garden, a field of flowers, or whatever imaginative setting they dream up. Adding context to your bunny can also ignite storytelling and further enrich the drawing experience.
Step 7: Finishing Touches
Check the overall picture for any adjustments or additional details you’d like to add. Maybe your child envisions their bunny with stripes or polka dots, or perhaps there’s a need for some glimmer to indicate the shiny texture of an Easter egg. Feel free to get inventive!
There you have it: your very own hand-drawn Easter bunny is ready. You can frame it, stick it on the fridge, or even use it as a greeting card front. The possibilities are endless — just like the smiles it’s sure to bring. Drawing together is not just about the final piece; it’s about the time spent together, learning, laughing, and creating memories. So, enjoy every moment of this Easter art adventure!
Displaying Your Art
After all your hard work, why not have an art show at home? Hang up everyone’s drawings and have a little celebration of your artistic achievements. It’s amazing how displaying art can boost a young artist’s confidence.
And don’t forget, the joy of Easter can be found in these precious moments with family. So, revel in the fun, and who knows, this might just become a cherished Easter tradition for years to come!
Happy drawing, and may your Easter be filled with color and joy!
See more great Things to Do with Kids in New Zealand here. For more information see here
Disclaimer
The articles available via our website provide general information only and we strongly urge readers to exercise caution and conduct their own thorough research and fact-checking. The information presented should not be taken as absolute truth, and, to the maximum extent permitted by law, we will not be held liable for any inaccuracies or errors in the content. It is essential for individuals to independently verify and validate the information before making any decisions or taking any actions based on the articles.


