
Unleash Creativity with Shaving Cream Painting: The Ultimate Parent’s Guide
Hooray for creativity! Are you looking for a splashy new way to engage your kiddos in art and sensory play? Look no further, because shaving cream painting is here to turn any dull afternoon into a vibrant art fest! Not only is this activity a fabulous way to inspire young minds, but it’s also an affordable and easy-to-clean-up adventure that promises heaps of giggly, colorful fun for the whole family.
What is Shaving Cream Painting?
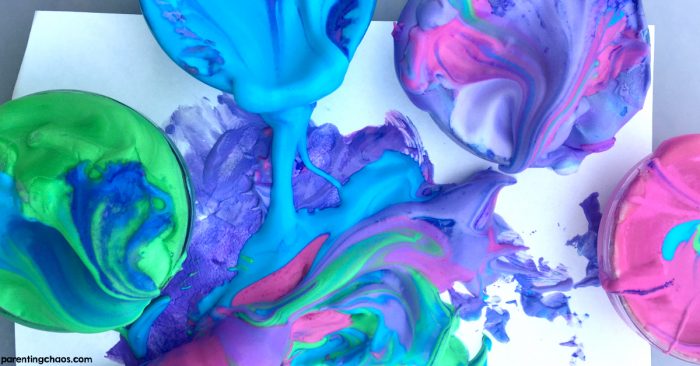
Imagine fluffy clouds of shaving cream, dancing with swirls of rainbow hues, all ready to be transformed into spectacular marbled art. Shaving cream painting is a sensory activity that lets children (and why not, adults too!) mix shaving cream with food coloring or paint to create dreamy patterns. Once they press paper onto their creamy canvas, the result is a one-of-a-kind print that looks as if it was plucked from an enchanted storybook.
Why Shaving Cream Painting Rocks for Children’s Development
Oh, the benefits abound! Shaving cream painting is not just a feast for the eyes; it’s also packed with developmental goodies for your child. As they squish, swirl, and spread, they’re honing their fine motor skills, exploring color mixing, and getting a sensory workout. This art form also fosters creativity, encourages exploratory play, and can be a calming experience for many children. Plus, it’s a fantastic way to bond and create lasting memories.
Before We Start: Safety Tips and Setting Up
- Select a Suitable Shaving Cream: Opt for a basic, fragrance-free shaving cream to minimize the risk of skin irritation, especially for those with sensitive skin.
- Keep it Edible: Although shaving cream isn’t meant for consumption, occasionally little ones might sneak a taste. Consider using whipped cream as an edible alternative!
- Protect Your Surfaces: Cover your table with a plastic sheet or old newspapers for an easy clean-up.
- Wear Play Clothes: This can get messy, so dress in old clothes that you don’t mind getting a little bit of color on.
- Ventilation Is Key: Some shaving creams have a strong odor, so make sure the room is well-ventilated.
Gathering Your Materials
One of the best parts about shaving cream painting is that you don’t need a bunch of fancy art supplies. Here’s a simple list to get you started on this frothy journey:
- Shaving cream (or whipped cream for little tasters)
- Food coloring, acrylic paint, or liquid watercolors
- Thick paper or cardstock to hold your masterpiece
- A ruler or a plastic scraper to smooth the shaving cream
- Popsicle sticks, toothpicks, or Q-tips for swirling
- A tray or baking sheet to contain the fluff
- Plastic tablecloth or newspapers
- Paper towels or a cloth for clean-up
Creating Your Shaving Cream Art Studio
Let’s roll up our sleeves and dive into setting up the perfect space for shaving cream painting. Choose a spot where everyone can gather around, like the kitchen table, and spread out your plastic tablecloth or newspapers. Place the tray or baking sheet in the center as your main canvas and have paper towels at the ready for any runaway spills. A quick note: It’s okay to let things get a little messy – that’s where half the joy comes from!
Step-by-Step Guide to Shaving Cream Painting Fun
- Prepare the Canvas: Fill the tray with a layer of shaving cream. Aim for an even coat, but expect a few mountains and valleys – they add character!
- Add Drops of Color: Let your little ones select their favorite colors and add drops onto the shaving cream.
- Swirly Twirly Time: Use the popsicle sticks or Q-tips to make swirly patterns. Watch as they mix and marble in front of your eyes – it’s like magic!
- Press and Peel: Gently lay a piece of paper on top of your swirled creation. Give it a soft pat, let it sit for a moment, and then peel it back to reveal the art.
- Scrape Away Excess: Use the ruler or plastic scraper to remove the extra shaving cream from the paper.
The Grand Finale: Drying and Displaying Your Artwork
Once the scraping’s complete, lay your stunning prints flat to dry. This can take a little while, so be patient – great art takes time! As the masterpieces dry, they’ll turn from a creamy texture to a smooth, paper finish. Once dry, you can proudly display your children’s work on walls, refrigerators, or frame them as keepsakes. The best part? When you’re finished, the clean-up is a breeze! Simply wash away any excess cream from surfaces and toss the paper coverings.
Ready, Set, Paint!
Now that your set-up is complete and you’ve got all the knowledge you need, it’s time to jump into the frothy, fluffy world of shaving cream painting. Get ready to make some dazzling, squishy art with your little ones. Don’t forget to snap photos, make memories, and most importantly, have a whale of a time exploring your creative sides together!
Unleash Creativity with Shaving Cream Painting: The Ultimate Parent’s Guide
Welcome, dear parents, to the whimsical world of shaving cream painting! It’s time to set aside those regular paintbrushes and enter a realm where sensory play and artistic creativity frolic hand in hand. Shaving cream painting is not only about making beautiful art; it’s about embarking on a joyous adventure that caters to the development of your children while creating irreplaceable memories together. Let this cheerful guide lead you through a fluffy cloud of information and tips to make shaving cream painting a regular highlight in your family’s fun times!
Five Things Every Parent Should Know Before Diving In
- Non-Toxic is the Way to Go: Opt for a shaving cream that’s non-toxic and free from strong fragrances. Remember, little hands will be diving into this stuff!
- Dress for Success: The success we mean is a fun mess, so pop your kids (and maybe even yourself) into old clothes or smocks to avoid laundry-time heartaches.
- Cover Up: Use a wipeable tablecloth or plastic sheets to cover play areas. This makes for lightning-fast cleanup, leaving more time for laughter and less for chores.
- Simple Supplies: Raid your home for tools to enhance the fun: cookie cutters, combs, or sponges can all create exciting textures in your child’s artwork.
- Patience Pays Off: The artwork needs time to dry, and yes, the transition from foamy to fabulous takes a little waiting. But oh, the results are worth it – your mini-Monet’s creations will be fridge-worthy in no time!
Create Your At-Home Art Studio
Transforming a corner of your home into a temporary art oasis is easier than you think. A kitchen table can become a creativity hub just by laying down a protective surface. Have all your materials at hand, and remember, it doesn’t have to be picture-perfect. A space that allows for freedom of movement and expression is ideal for spur-of-the-moment artistry!
The Art-making Process: Let’s Get Messy!
Once you’ve got your supplies in place, let your little artists squeeze, dollop, and drop their chosen colors onto the foamy canvas. Encourage them to swirl and design to their heart’s content. The surprise comes when the paper is lifted, and their amazed eyes get to see the unique blends and patterns they’ve made. It’s about the process, not just the result, so giggle together as you enjoy each squishy moment!
Awareness and Inclusivity: Everyone Can Play!
Shaving cream painting is a fantastic activity for children of all abilities. It provides tactile stimulation that can be beneficial for sensory processing and can be adapted to suit individual needs. Explore and embrace the limitless possibilities of inclusivity in art!
When the Fun’s Done: Easy Clean-up and Art Storage
Clean-up can be almost as fun as the painting itself, especially if you turn it into a water play activity. Let your child rinse their tiny hands under a gentle stream of water or, weather permitting, take the clean-up outside for some added splashing fun. Display completed works with clips on a string, or create an art wall where each new piece adds to a growing gallery of family creativity.
Safety first, Safety Always
Even in the throes of artistic adventures, safety is a priority. Ensure materials are non-toxic and supervise the mixing and playing, especially with younger children who might be tempted by the colors to take a taste.
The Shaving Cream Painting Guide Summary
There you have it, a rainbow of reasons to embrace the joyful mess that is shaving cream painting. From set-up to clean-up, remember the key is fun and exploration. Each color swirled on the cream is a pathway to creativity, and each giggle is a stepping stone to learning. Unwind and get ready to make some art (and maybe a little bit of a mess)!
See more great Things to Do with Kids in New Zealand here. For more information see here
Disclaimer
The articles available via our website provide general information only and we strongly urge readers to exercise caution and conduct their own thorough research and fact-checking. The information presented should not be taken as absolute truth, and, to the maximum extent permitted by law, we will not be held liable for any inaccuracies or errors in the content. It is essential for individuals to independently verify and validate the information before making any decisions or taking any actions based on the articles.


