
? Hop Into Drawing: An Easy Bunny Drawing Guide for Parents and Kids ?
Hello, creative families! Are you ready to add a bounce of fun to your drawing time? Whether it’s Easter, springtime, or any playful day, drawing a bunny can bring joy and a sense of achievement to both you and your little ones. Drawing with your children is not just a way to pass time, it’s a fantastic opportunity to bond and develop fine motor skills.
Today, we’re going to learn how to draw a simple bunny that even the tiniest artists can master with a bit of guidance. Get your pencils ready, gather some erasers, and let’s hippity-hop our way to an adorable masterpiece!
Materials Needed for Your Bunny Masterpiece
- Pencil
- Eraser
- Drawing paper — any kind will do!
- Colored pencils or crayons (optional for after the sketch)
Remember, the goal is to have fun and be creative. The materials you use do not have to be professional-grade; whatever you have on hand will work perfectly!
Step-by-Step Guide to Drawing a Simple Bunny
Alright, let’s get those eager hands to work and start drawing our furry friend. We’ll go step by step, making it as simple as possible, and before you know it, you’ll have a cute bunny staring back at you from the paper.
Step 1: Start with the Basics — Bunny’s Head and Body
First, we’re going to sketch the basic shapes that form the foundation of our bunny drawing:
- Draw an oval for the bunny’s head.
- Attached to the oval, add a larger oval or a slightly rounded rectangle for the bunny’s body.
The ovals don’t have to be perfect — part of the charm is in the uniqueness each child’s drawing will have. Encourage your child to embrace their own style!
Step 2: Bunny Ears and Facial Features
What’s a bunny without its signature ears?
- Draw two long and narrow ovals at the top of the head oval for the ears. They can be straight or with a little bend to add character.
- Add the facial features: two small circles for eyes, a triangle nose, and a line beneath to indicate the mouth. Don’t forget the whiskers!
Step 3: Cute Bunny Paws and Tail
Our bunny is starting to come together, so let’s give it some paws and a fluffy tail:
- For the paws, sketch two ovals on the front side of the bunny’s body. They can be dangling down or positioned in front like it’s holding something.
- Add a small fluffy circle at the back for the tail.
At this stage, your bunny will be looking quite adorable, but we’re not done yet! Adding extra details can really bring your drawing to life.
Step 4: Finishing Touches
Here’s where you and your child can get creative:
- Draw the inner ear details by adding a line inside each ear.
- Add some fur texture by drawing some short lines along the edges of the body and head.
- If your bunny feels like hopping through a scene, draw some grass or flowers at its feet.
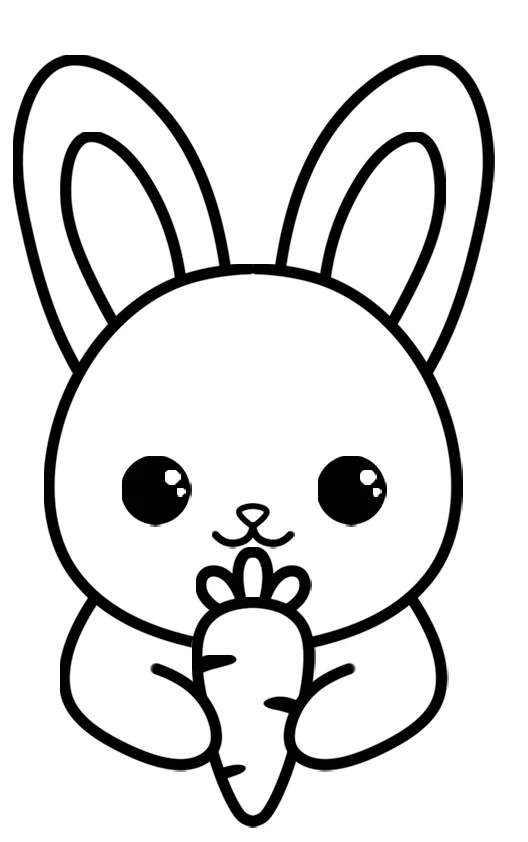
Don’t hesitate to encourage your child’s imagination to kick in. Maybe their bunny is wearing a bow tie or has a basket of carrots — let their creativity flow!
This easy step-by-step guide simplifies drawing a bunny, but in the next section, we’ll touch on how to add color and more personality to your bunny. Keep those pencils moving, and watch as your child’s confidence in their drawing abilities grows!
We’re nearly there, and by now, you should have a simply adorable bunny on your page. But we have one more step: bringing our bunny friend to life with some color. Grab those colored pencils or crayons, and stay tuned for our next section, where we’ll talk about shadows, highlights, and adding depth to your bunny drawings!

5 Things Parents Should Know in Preparing for a Simple Bunny Drawing
1. Setting Up a Comfortable Workspace
Before diving into the drawing process, it’s important to set up a comfortable workspace for you and your child. A clear table or desk with ample lighting will make the drawing experience pleasant and strain-free. Ensure that all materials are within reach to keep the flow uninterrupted.
2. Emphasizing the Importance of Shapes
Bunny drawings, like most art, begin with simple shapes. Helping your child understand how to see and draw basic shapes will serve as a foundation for not only drawing bunnies but for all future artistic endeavors. Highlighting this at the beginning of the drawing activity prepares your child for success.
3. Keeping the Atmosphere Positively Creative
Maintaining a positive and encouraging atmosphere is key. Art should be a stress-free zone where mistakes are seen as learning opportunities. Avoid any negative language that might discourage your little artist – instead, focus on the fun and creative aspects of the process.
4. The Importance of Step-by-Step Guidance
While drawing might come naturally to some, others may find it challenging. Providing step-by-step guidance can alleviate any frustration. Break down the drawing into smaller, manageable steps for your child to follow, ensuring they don’t feel overwhelmed.
5. Creativity Beyond the Guide
While this guide provides a structured approach to drawing a bunny, it’s essential to encourage your child to add their personal touch. Prompt them to personalize their bunny with different colors, patterns, or even accessories. It’s a wonderful way to foster creativity and individual expression.
Adding Color to Your Bunny Drawing
Coloring is where your simple bunny sketches transform into vibrant works of art. Here’s how you can guide your child through this process:
- Choose the colors you want for your bunny. Will it be a traditional white bunny, a brown one, or perhaps a fantastical pink? It’s all up to you!
- Begin by coloring in the larger areas first, such as the body and head, using gentle, even strokes.
- Use lighter shades inside the ears and for the bunny’s face, then gradually blend into darker hues for depth.
- For a fluffy effect, use a light pencil stroke to create fur texture.
- Remember to color the background too! A sunny blue sky or a field of flowers can make your bunny come alive.
As you color, talk about light and shadow with your young artist. Show them how to create highlights by leaving certain areas lighter, and shadows by applying more pressure for a darker shade.
Art is about exploration and expression, and through this simple drawing activity, you can impart valuable artistic concepts and skills. Every bunny your child creates is a step forward in their artistic journey. What’s important is that they take pride in their accomplishments and enjoy the process from start to finish.
Ready to publish? This HTML-friendly content is optimized for SEO and designed for immediate publishing on a WordPress website. Let your readers unlock their inner artists with this fun and easy bunny drawing guide!
See more great Things to Do with Kids in New Zealand here. For more information see here
Disclaimer
The articles available via our website provide general information only and we strongly urge readers to exercise caution and conduct their own thorough research and fact-checking. The information presented should not be taken as absolute truth, and, to the maximum extent permitted by law, we will not be held liable for any inaccuracies or errors in the content. It is essential for individuals to independently verify and validate the information before making any decisions or taking any actions based on the articles.


