
Easy Easter Drawings for Kids: A Step-by-Step Guide for Parents
Greetings, creative families! Are you ready to hop into the joyous season with some egg-cellent Easter drawings that your kids will love? This beginner-friendly guide is here to make your spring celebrations even more memorable with simple, adorable Easter-themed creations that are perfect for artists of all ages. So, grab your art supplies and let’s make some cheerful Easter artwork together!
Why Drawing with Your Kids This Easter Is an Egg-stra Special Idea
Easter isn’t just about the egg hunts and chocolate bunnies – it’s a fabulous opportunity for family bonding and nurturing creativity. When you sit down to draw with your little ones, you’re not only crafting pieces of art, but also crafting moments that turn into precious memories. Plus, drawing can help develop fine motor skills, enhance focus, and encourage self-expression. So, let’s get those pencils moving and see what adorable scenes come to life!
What You’ll Need:
- Plain white paper or a sketchbook
- Pencils – regular and colored
- Eraser – for those little oopsies
- Sharpener – to keep those lines sharp and clean
- Ruler – for straight lines, if needed
- Markers or crayons – for that pop of color
Simple Easter Drawing Ideas to Get You Started
This guide is filled to the brim with adorable and simple drawing ideas to spark your little one’s imagination. From the classic Easter Bunny to cute little chicks, we’ve got a basketful of drawing fun coming your way. Let me walk you through an easy step-by-step process for each drawing, ensuring it’s a breeze even for those who are just starting to dabble in the wonderful world of art.
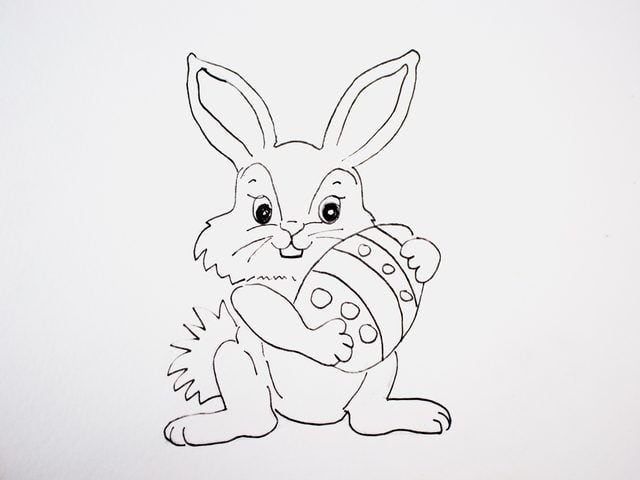
1. The Classic Easter Bunny
Let’s start with the star of the show – the Easter Bunny! This cuddly character is a favorite and is super simple to draw.
- Begin with the head: Draw a medium-sized circle towards the top of your paper.
- Add the ears: Sketch two long and slightly curved ovals on top of the head – these will be the bunny’s ears.
- Create the face: Inside the circle, draw two small circles for the eyes, a small X for the nose, and a curved line for the mouth.
- Draw the body: Below the head, add a larger oval for the bunny’s body.
- Add the feet and hands: On the bottom of the body oval, draw two smaller ovals for the feet and two more ovals on the sides of the body for the arms.
- Finishing touches: Add the inner ear detail with a smaller oval inside each ear. Give your bunny some whiskers and a fluffy tail with a few quick strokes.
- Color your bunny: Use your colored pencils, markers, or crayons to bring your Easter Bunny to life.
2. Easter Eggs with Patterns
What’s Easter without some beautifully decorated eggs? Drawing Easter eggs is not only fun but also a wonderful way to explore patterns and colors.
- Start with egg shapes: Draw several medium-sized ovals scattered across the paper.
- Add patterns: Let the kiddos get creative here – stripes, polka dots, stars, and zigzags all make excellent decor for these eggs. Encourage them to make each egg unique.
- Color them in: Choose bright and pastel colors to fill in the patterns and the rest of the egg. Mixing and matching colors can make for a vibrant drawing.
- Optional: For a little extra sparkle, use glitter or stickers to embellish the eggs once colored.
3. Adorable Easter Chick
Now, it’s time to draw one of the cutest symbols of Easter – a fluffy little chick. These little guys are sure to make everyone’s heart melt!
- Sketch the body: Begin with a small circle for the chick’s head and a larger oval for its body, slightly overlapping at the bottom.
- Add the features: Draw two small circles for eyes and a triangle for the beak. Give your chick some tiny wings with curved lines on either side of the body.
- Create the legs: Under the body, draw two small rectangles for the legs and add little lines at the end for the feet.
- Feather texture: Use quick, short strokes around the head and body to create a fluffy texture.
- Color: Bright yellow is the go-to, but feel free to let kids choose their favorite colors for their chicks. Don’t forget to give the beak and legs some color too!
Drawing together this Easter is a delightful way to enhance the festive spirit. Whether it’s the classic Easter Bunny or a basket filled with patterned eggs, the possibilities are endless when it comes to sparking creativity in kids.
Welcome to Easter Drawing Fun: A Comprehensive Guide for Parents
Hi there, wonderful parents! With Easter around the corner, it’s the perfect time to dive into some delightful drawing activities with your kids! This comprehensive guide not only provides step-by-step instructions for creating simple Easter masterpieces but also delivers handy tips to make the drawing experience joyful and stress-free. Let’s grab those art supplies and jump into a world of color and imagination!
Five Essential Tips for Parents Preparing for Easter Drawing Activities
Before we begin our drawing adventure, here are five handy tips to ensure you’re all set for a smooth, fun-filled Easter drawing session with your little ones:
- Prioritize Comfort: Set up a comfortable space with ample room for creativity. Whether it’s a roomy table or a cozy corner on the floor, make sure it’s a place where messes are okay and imagination can run wild!
- Keep Supplies Ready: Nothing hampers the flow of art like a missing sharpener or the wrong color crayon. Have your art supplies organized and accessible to keep the focus on creativity.
- Simplify Instructions: Use clear, step-by-step instructions and break down the drawing process into manageable parts, especially for younger artists.
- Encourage Personal Touch: While following guidelines is great, encourage your kids to add their personal flair to their drawings. After all, art is all about self-expression!
- Prepare for Clean-Up: Art can get messy, so prep your space with an easy-clean setup. Lay down newspaper or an old tablecloth, and have wipes or a wet cloth handy.
With these tips in mind, you’re all set to guide your little ones in creating some adorable Easter art. Let’s hop into the fun!
See more great Things to Do with Kids in New Zealand here. For more information see here
Disclaimer
The articles available via our website provide general information only and we strongly urge readers to exercise caution and conduct their own thorough research and fact-checking. The information presented should not be taken as absolute truth, and, to the maximum extent permitted by law, we will not be held liable for any inaccuracies or errors in the content. It is essential for individuals to independently verify and validate the information before making any decisions or taking any actions based on the articles.


