
How to Make Spectacular Marbled Paper with Shaving Cream: A Creative Guide for Parents!
Hey there, creative families! Are you ready to dive into the whimsical world of marbling with shaving cream? Get ready to roll up your sleeves and create some dazzling designs that will have the kiddos gleeful with excitement. In this guide, we’ll walk you through the vibrant process of marbling, turning an ordinary afternoon into a showcase of imagination and fun.
A World of Color Awaits: Why Marbling with Shaving Cream Rocks!
Marbling with shaving cream is not just a blast for the little ones; it’s also packed with hidden benefits! Firstly, it’s a wonderful sensory activity that fosters fine motor skills as your children mix and meld those lovely patterns. Secondly, it sparks creativity and originality, as every piece turns out unique. And on top of that, it’s a fantastic way to teach color mixing and the magic behind art and science!
Prepping for a Marbling Adventure: What You’ll Need
- Plain shaving cream. Stick to the foam kind—gel won’t work for this task.
- Liquid watercolors or food coloring for those vibrant hues.
- Sturdy paper, like card stock or watercolor paper, to showcase your masterpiece.
- A ruler or a straight-edged tool to make the designs.
- A shallow tray, larger than your paper.
- A scraper, like an old credit card or a piece of cardboard, to clean off excess cream.
- Other funky tools for design-making: toothpicks, combs, or even the end of a paintbrush!
Step-by-Step Guide to Marbling Fun
Before we get our hands messy, let’s run through the basics. We’re going to spread shaving cream in the tray, dot it with color, swirl those colors into mind-blowing designs, press our paper into the creamy canvas, and then scrape off the excess to reveal our marbled marvels. Easy peasy and oh so pleasing!
Step 1: Set Your Creative Stage
Cover the work area with newspapers or a tablecloth because things might get a little funky. Lay out all your tools and materials within easy reach, and don those aprons. We’re about to get artsy!
Step 2: Fluffy Clouds of Potential
Squirt a generous layer of shaving cream into the tray. You’ll want enough to completely cover the bottom, making a foamy bed about an inch thick.
Step 3: Splashing in the Color Pond
Gently sprinkle drops of liquid watercolor or food coloring all over the shaving cream. Mix and match colors to your heart’s desire, but don’t go overboard—a few drops of each color is more than enough to create a rainbow effect.
Step 4: Swirls and Twirls
Here’s where the magic happens! Take your ruler or tool of choice and lightly drag it through the foam to create swirling patterns. Encourage the kiddos to try different movements – zigzags, loops, or spirals; anything goes in this amazing art of shaving cream marbling.
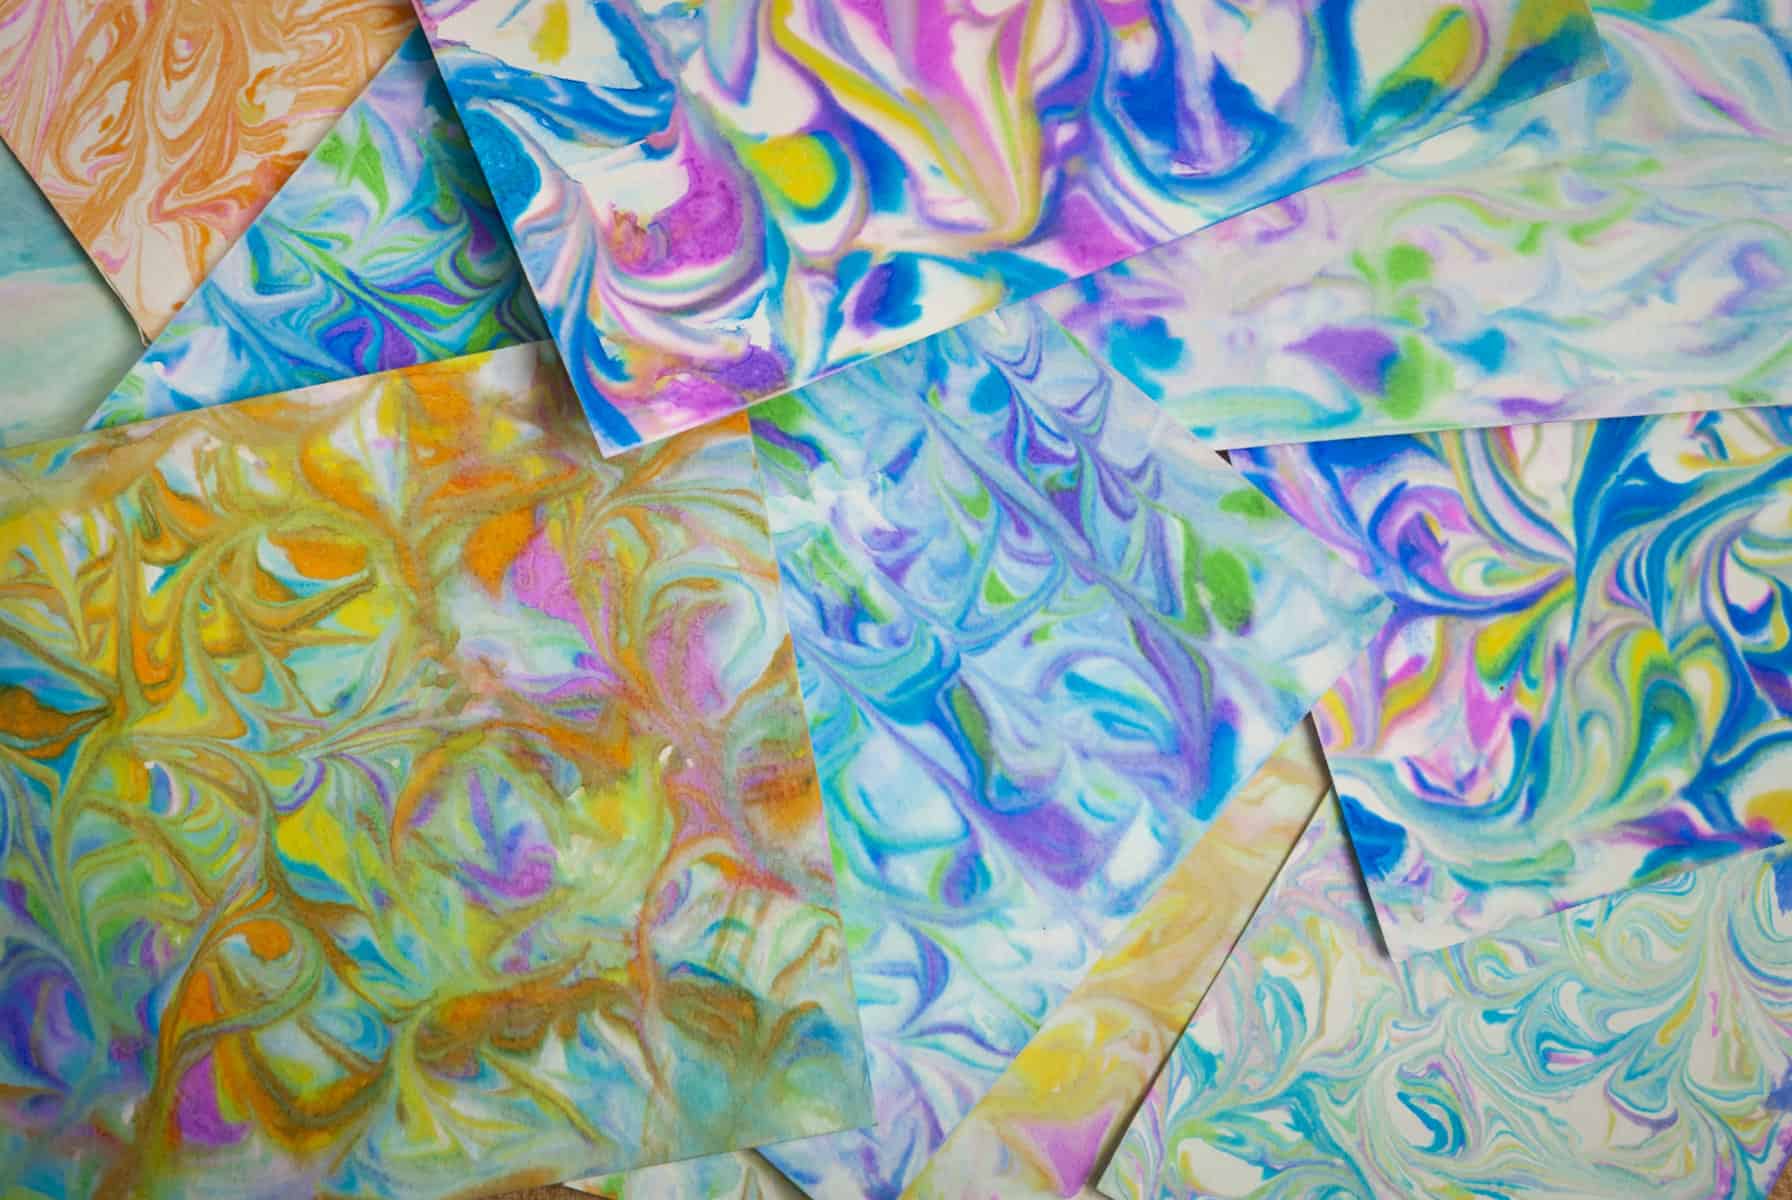
One of the best things about marbling with shaving cream is the sheer simplicity of the process, paired with the potential for such complex and beautiful outcomes. The designs are reminiscent of intricate, swirling galaxies or the bleeding colors of a sunset sky. They evoke a sense of wonder, tapping into your child’s fascination with the beauty of randomness and the excitement of hands-on creation. Whether you’re spending a lazy Sunday afternoon or looking for a unique party activity, marbling with shaving cream offers a delightful experience for parents and children alike.
Stay tuned for more delightful details and additional creative twists in the next installment of our marbling guide. Happy marbling, everyone!
Five Important Things Parents Should Know Before Marbling with Shaving Cream
Preparation is key when it comes to creating a smooth and fuss-free marbling session with your kids. To ensure that your marbling adventure is as enjoyable as possible, here are five essential things parents should keep in mind:
1. Safety First: Non-Toxic Materials
Ensure that all materials used are non-toxic and safe for children. This includes the shaving cream and any colors or additives you plan to use. Always check labels for any potential allergens or harmful chemicals and opt for food coloring or non-toxic liquid watercolors to mix into the shaving cream. Safety glasses or goggles can also be worn as a fun accessory and to protect little eyes.
2. Dress for the Mess
Marbling is a wonderfully messy activity, so dress your children and yourself in old clothes or smocks that you don’t mind getting stained. Cover the work surface with old newspapers or a plastic tablecloth to catch spills. Keep a stack of paper towels or a damp cloth nearby for quick clean-ups of hands and surfaces as you go along.
3. Trial Runs & Test Swatches
Before diving in with your masterpiece, do a few test prints to get a handle on how the colors spread and how the shaving cream behaves. Experiment with how much color to add, what tools create the best patterns, and how long to let the paper sit before removing it. Small swatches can build confidence and guide the experience for you and your kids.
4. Embrace the Uniqueness of Each Print
Part of the beauty of marbling with shaving cream is its unpredictable nature and the unique outcome of each print. Let your children know that their art doesn’t need to be perfect. Encouraging them to enjoy the process and embrace their individual expressions will set the stage for a stress-free and joyful crafting experience.
5. Post-Marbling Plan: Drying Space & Storage
Before starting, designate a safe area where the freshly marbled papers can lay flat to dry without being disturbed. It’s also a good idea to have some kind of storage solution, like a portfolio or flat boxes, ready for the finished artworks. This foresight will prevent any smudging or damage to their wonderful creations.
Armed with these handy tips, you’re all set to foster a fun, educational, and memorable marbling experience. Remember, the goal is not just to create beautiful artworks, but also to build beautiful memories with your children. So let the colors flow, the patterns emerge, and the giggles abound as you embark on your marbling adventure!
See more great Things to Do with Kids in New Zealand here. For more information see here
Disclaimer
The articles available via our website provide general information only and we strongly urge readers to exercise caution and conduct their own thorough research and fact-checking. The information presented should not be taken as absolute truth, and, to the maximum extent permitted by law, we will not be held liable for any inaccuracies or errors in the content. It is essential for individuals to independently verify and validate the information before making any decisions or taking any actions based on the articles.


