
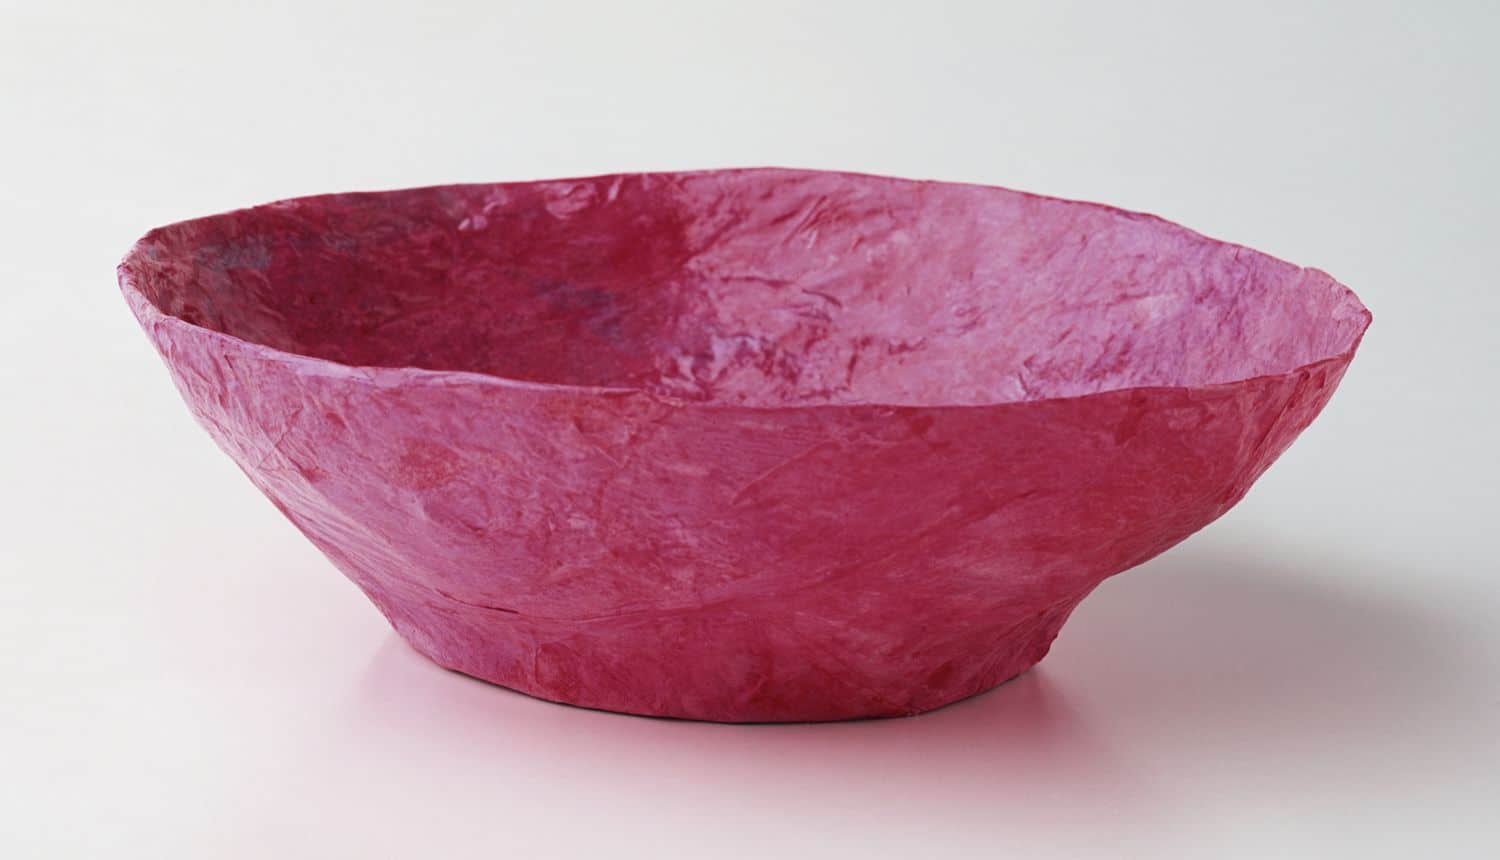
Craft a Memory: DIY Paper Mache Bowls with Your Kids
Hello crafty parents and fun-loving families! Ready to roll up your sleeves and dive into the delightful world of paper mache? Making paper mache bowls is not just a great way to spend quality time with your kids but also an awesome opportunity to help them learn about recycling, creativity, and the joy of making something with their own hands. Let’s get started with this step-by-step guide that will make the process as smooth as a clay pot!
What You’ll Need to Get Started
- Newspaper or old paper
- Flour & water (for the paste)
- Balloons
- A large bowl
- Paintbrush
- Paints and decorations (optional)
- Clear varnish (optional)
Pro Tip: If you’re allergic to gluten or simply prefer a different type of adhesive, feel free to use a gluten-free flour or a ready-made paper mache paste that can be easily purchased at your local craft store.
Step-by-Step Guide to Making Paper Mache Bowls
1. Prep Your Workspace
Start by covering your workspace with newspaper or a tablecloth – things might get messy! This is a learning process for the little ones and a perfect opportunity to talk about the importance of tidiness, even when having fun.
2. Blow Up Your Balloon
Inflate a balloon to the desired size of your bowl. This will act as the mould. The bigger the balloon, the larger your bowl will be. Once the balloon is inflated, place it knot-side down in the large bowl to keep it steady while you work. If you’re feeling adventurous, try different balloon shapes to create unique bowl designs!
3. Make the Paper Mache Paste
Mix one part flour to two parts water in a bowl to create your paper mache paste. The mixture should have the consistency of pancake batter – not too thick, not too runny. If you want a stronger paste, cook the mixture on the stove, stirring constantly until it thickens, then let it cool before using.
4. Tear and Dip the Paper
Tear the newspaper into strips, around 1 inch wide. Dip the strips into the paste, slide them between your fingers to remove excess paste, then smoothly apply them to the balloon. Overlap the strips and smooth out any bubbles or wrinkles.
5. Layer Up
For a sturdy bowl, apply at least three layers of paper mache, allowing each layer to dry completely before applying the next. This could take a few hours to an overnight dry, depending on the humidity and temperature of your crafting area. Patience is key, and this is an excellent moment to teach the kiddos about waiting for a good outcome!
As the first part of our paper mache bowl adventure wraps up, imagine the fun you and your little crafters will have choosing colors and patterns for your creations. Stay tuned for the next steps where we’ll dive into painting and decorating our bowls to make them truly one-of-a-kind. Crafting not only bonds the family together; it creates lasting memories and teaches valuable skills. So, grab your materials, gather your eager assistants, and prepare for an artful adventure that will bring smiles and a sense of accomplishment to everyone involved!
5 Things Parents Should Know When Preparing for Paper Mache Bowls
6. Safety First
Before embarking on your paper mache journey, remember that safety is paramount. Make sure the workspace is child-friendly, with no sharp objects or toxic materials within reach. Keep a damp cloth handy for easy clean-up of sticky fingers and accidental spills. Having a safe environment sets the foundation for a stress-free crafting experience.
7. Manage Expectations
Children, full of excitement and imagination, may have high expectations for their craft. It’s important to manage these expectations by explaining that the results will vary and perfection isn’t the goal. Emphasize that the real treasure lies in the fun of creation and the time spent together. This approach nurtures their creativity without the pressure of making a ‘perfect’ item.
8. Dress for Mess
No crafting session is complete without a little mess. Ensure kids are dressed in clothes that can get dirty, or provide them with aprons or old shirts to cover up their outfits. This way, they can freely enjoy the process without worrying about stains. Plus, it saves you the hassle of tough laundry challenges later on.
9. Time Management
Paper mache is not a rush job – it requires drying time between layers. Schedule your crafting session when you have ample time for this drying process. Depending on your climate, consider using a fan or a dehumidifier to speed up drying, especially if you live in a damp or humid area. Breaking up the project into stages can also make it more manageable for younger kids with shorter attention spans.
10. Upcycling and Sustainability
Last but not least, seize this opportunity to teach your kids about the values of recycling and sustainability. Explain how using old newspapers and materials can give them a new life as a beautiful object. Encourage them to think of other ways they can reuse materials at home, fostering a green mindset from an early age.
Now that you’re armed with the knowledge and tips you need, it’s time to gather your materials and set sail on this fabulous crafting voyage. Watch as the simple act of layering paper and paste turns into a vessel of creativity, all while creating those heartwarming memories that last a lifetime!
Remember, the journey of crafting is filled with learning opportunities for both you and your children. Through the medium of paper mache bowls, you’re not just creating art – you’re building skills, memories, and possibly the start of a new family tradition!
After completing the bowls, you can let them air-dry or use a hairdryer for a quicker result. Once fully dry, you can go wild with colors and decorations. Use acrylic paint for a waterproof finish, glue on sequins, apply tissue paper for a stained-glass effect, or draw intricate designs with markers. The sky is the limit, and no matter what you choose, you’ll make something unique and full of love.
And don’t forget, if you’ve opted for a clear varnish, applying it will make your bowls durable and usable for light items like keys or jewelry. Just make sure the varnish is non-toxic, especially if younger kids are involved.
Ready for the next crafting challenge? Wonderful! Stay creative and let the fun continue as you craft a legacy of joy and connection with every dab of paste and sprinkle of glitter.
See more great Things to Do with Kids in New Zealand here. For more information see here
Disclaimer
The articles available via our website provide general information only and we strongly urge readers to exercise caution and conduct their own thorough research and fact-checking. The information presented should not be taken as absolute truth, and, to the maximum extent permitted by law, we will not be held liable for any inaccuracies or errors in the content. It is essential for individuals to independently verify and validate the information before making any decisions or taking any actions based on the articles.


:max_bytes(150000):strip_icc()/GettyImages-117982503-58406ecf5f9b5851e592e20e.jpg)