
Easy Easter Bunny Drawings: A Fun Guide for Parents and Kids
Hey there, creative families! Are you hopping with excitement as Easter approaches? Looking for an activity to keep your little bunnies engaged in some crafty fun? Well, you’ve landed in the perfect place! We’ve prepared a super easy and joyful guide to help you and your kids draw the cutest Easter Bunny ever. No need to worry if your drawing skills are a bit rusty; we’ve got you covered with step-by-step instructions that will make this a memorable and laughter-filled family activity.
Getting Started with Bunny Basics
Before we jump into the world of drawing, let’s make sure you have all you need. A few simple supplies will set the stage for a fantastic drawing adventure:
- Paper: Any kind, although plain white drawing paper or construction paper works best for showcasing your masterpieces.
- Pencils: Good ol’ HB pencils are great for sketching. If you’d like, keep an eraser handy for those inevitable oops moments!
- Coloring Supplies: Crayons, colored pencils, or markers will bring your bunny to life with a pop of color.
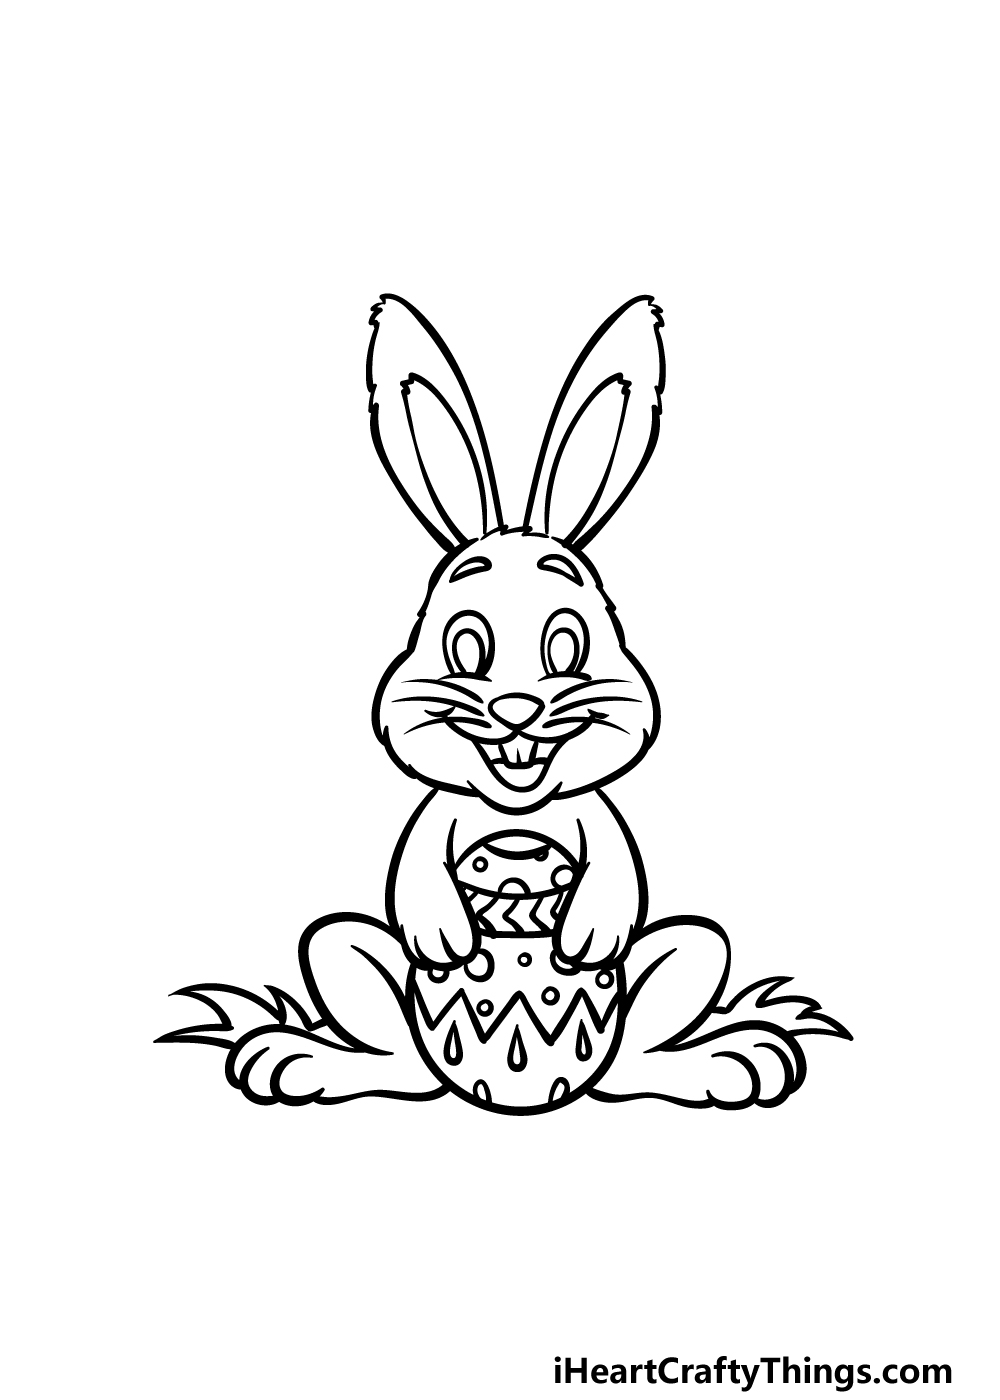
Step-by-Step Easter Bunny Drawing for Kids
Ready to draw? Follow along as we create a simple Easter Bunny that’s as sweet as a jellybean!
Step 1: Sketching the Face
Begin with the bunny’s face. Draw a large oval shape to create a fluffy face. This will be the base for those adorable bunny features. Encourage your kids to try their hand at this initial shape – it doesn’t need to be perfect, that’s the beauty of hand-drawn art!
Step 2: Adding the Ears
What’s a bunny without its signature ears? Draw two long, upright ovals on top of the head. Remember, bunnies’ ears are usually longer than their face, so don’t be afraid to make them stand tall!
Step 3: Crafting the Eyes and Nose
Now for some character! In the center of the face, add two small circles for the eyes, and just below, draw a gentle upside-down triangle for the nose. A tip for the eyes: leave a little white dot to make them glisten with bunny brightness.
Add Some Exciting Extras
Once you’ve nailed down your basic bunny, you can personalize it with some festive extras. How about a cute bow tie, a colorful Easter egg, or even some delightful whiskers? The sky’s the limit!
Remember, drawing with your little ones isn’t just about the final picture; it’s about spending precious moments together, laughing at your quirky art, and making memories that last far beyond the spring season. So, grab those pencils, and let’s hop into the world of Easter Bunny drawings!
We’ve just gotten started, and there’s so much more to explore as we continue this delightful drawing journey. Stick with us, and we’ll dive deeper into the art of the Easter Bunny, exploring fun variations and tips to ensure that your drawings are the fluffiest, bounciest, and most joyful additions to your Easter celebrations!
Drawing an Easter Bunny is a fantastic way to bond with your children and nurture their creative spark. As you prepare for the big hop into bunny drawing, remember to embrace the imperfections and enjoy the process. In our next section, we’ll discover how to add character and charm to your bunnies, ensuring that each one has a personality as unique as the little hands drawing them. Stay tuned for more fun!

Five Key Tips for Parents Preparing for Easter Bunny Drawings
Now that we’re all set to draw, let’s go over five essential tips that parents should keep in mind to make this drawing session a breeze. Don’t worry, it’s nothing too fancy, just a little bit of prep to make your Easter Bunny drawing activity as smooth as a chocolate egg!
1. Create a Drawing-friendly Environment
Set up a space where everyone can comfortably draw. A clean table with ample room for paper and drawing supplies is perfect. If you have younger children, protective coverings for the table can prevent any mishaps from becoming stressful. A relaxed atmosphere will let creativity flow like a springtime stream!
2. Embrace the Learning Curve
Remember that drawing is a skill, and it takes time to develop. If your little ones (or you!) are finding it challenging, that’s okay! Encourage everyone to enjoy the process, not just the outcome. Celebrate each step, even if it’s not picture-perfect. After all, every bunny is unique!
3. Encourage Individuality
While we’ll be providing steps to draw a basic bunny, encourage your children to add their personal touch. A top hat, a superhero cape, or even bunny slippers can turn a simple drawing into a personalized masterpiece. This nurtures creativity and makes each artwork special.
4. Stay Organized
Keep your drawing area tidy by having containers or cups for pencils and crayons. Trust us, it’s way easier than searching for that runaway green crayon under the table when it’s time to color the grass! Plus, it teaches kids the importance of organization. Who knew drawing could be such a learning experience?
5. Take Breaks and Keep it Fun
Little artists might need a break now and then. Don’t rush the drawing session, and be sure to take little “wiggle breaks” or a snack intermission. Keep the vibe light-hearted and fun, with plenty of encouragement and a few bunny jokes along the way. What’s a bunny’s favorite music? Hip-hop, of course!
Armed with these tips, you’re now fully equipped to make this Easter drawing activity a favorite family tradition for years to come. So, don that imaginary artist’s beret, ready those pencils, and let the bunny magic begin!
Exploring Easter Bunny Variations
After mastering the basic Easter Bunny drawing, you’ll find there are endless ways to add variety and spice up the design. From cartoonish to realistic, tiny to huge, the rabbit hole of creativity is deep! Keep an eye out for our next sections where we’ll share how to draw bunnies in different styles and poses, making each drawing session a new adventure. Who knows, you might just end up with a whole warren of artistic bunnies!
So, grab your art supplies, and let the joy of drawing bring the spirit of Easter into your home. With a sprinkle of imagination and a dose of fun, your family is on its way to creating the hoppiest Easter art ever. What a delightful way to celebrate this egg-citing season! Let’s hop to it!
See more great Things to Do with Kids in New Zealand here. For more information see here
Disclaimer
The articles available via our website provide general information only and we strongly urge readers to exercise caution and conduct their own thorough research and fact-checking. The information presented should not be taken as absolute truth, and, to the maximum extent permitted by law, we will not be held liable for any inaccuracies or errors in the content. It is essential for individuals to independently verify and validate the information before making any decisions or taking any actions based on the articles.


