
Easy Non-Cook Playdough Recipe for Endless Family Fun!
Hey there, supermoms and superbros! Are you ready to impress your little ones with a colorful, squishy surprise? ? Look no further because we’ve got the perfect easy peasy non-cook playdough recipe that will leave your kiddos smiling and squealing with joy!
First things first, playdough is like the Swiss Army knife of childhood development. It’s great for enhancing fine motor skills, spurring creativity, and keeping kids engaged for hours. And the best part? Making it at home is a piece of cake – literally! Our DIY non-cook playdough recipe is not only a safe bet for your little tykes, but it’s also quick, inexpensive, and you probably have all the ingredients right in your kitchen cupboard. ?
Why Go for Non-Cook Playdough?
Non-cook playdough is a fantastic choice for a fun-filled DIY project. Here’s why:
- Safe for kids: No heat means no burns, making it super safe for children to be hands-on in the making process.
- Instant fun: Forget about waiting around for the dough to cool. Dive right into playtime as soon as it’s mixed!
- No fuss, no muss: This recipe is incredibly simple and clean-up is a breeze.
- Customizable: Let the imagination run wild with colors, scents, and even glitter. The sky’s the limit!
Gather Your Supplies!
Before we roll up our sleeves and get to the fun, let’s make sure we have everything we need. Here’s your non-cook playdough toolkit:
- 2 cups of plain flour (all-purpose)
- 2 tablespoons of vegetable oil (coconut oil works too!)
- 1/2 cup of salt
- 2 tablespoons of cream of tartar (for elasticity)
- Up to 1.5 cups of boiling water (adding in increments until it feels just right)
- Food coloring (gel food coloring works best for vibrant colors)
- Optional: scents such as vanilla or peppermint extract for sensory play
- Optional: glitter for that sparkly magic touch
Step By Step: Let’s Make It!
Okay, the stage is set and it’s showtime. Here’s your step-by-step guide to create the ultimate playdough masterpiece:
- Objects”>
Now that we’ve covered the initial steps, let’s move on to the actual recipe. You’ll find that making playdough with your kids is not only exciting, but it’s also a special bonding activity that sparks joy for both you and your little ones. So, are you ready to get your hands dough-y? Let’s dive right in!

5 Things Parents Should Know When Preparing Easy Non-Cook Playdough
As every caretaker knows, preparation is key! Here are five handy tips to ensure that your playdough-making adventure is a hit:
- Factor in Allergy Considerations: Double-check for any allergies that your children or their play pals might have. Our standard recipe is gluten-based, so if gluten is a no-go, you can substitute with a gluten-free flour mix.
- Avoid Salt Overload for Little Tasters: Playdough looks quite yummy to young uns, so if you have a little taster who might sneak a nibble, be mindful that the dough contains a fair amount of salt.
- Prevent Staining: Food coloring is wonderful for vibrant playdough, but it’s a pesky stainer. Make sure to cover surfaces and wear aprons. Opt for washable food coloring or natural dyes to keep clean-up easy.
- Choose the Right Consistency: Get a feel for the dough as you mix it. Add the boiling water incrementally and stop when the dough is neither too sticky nor too dry. It should be just right for small hands to mold.
- Store Properly: Non-cook playdough can last quite a while if stored properly. Use an airtight container or a zip bag to keep it fresh and ready for the next play session. This keeps it from drying out and gives you more bang for your buck!
Step By Step: Ready, Set, Dough!
- Mix the dry ingredients — flour, salt, and cream of tartar — together in a large mixing bowl.
- Add in your vegetable oil and give it a quick stir.
- Slowly pour in the boiling water. Remember, it’s hot, so this part is just for the grown-ups! Mix with a spoon to start with and then knead with your hands.
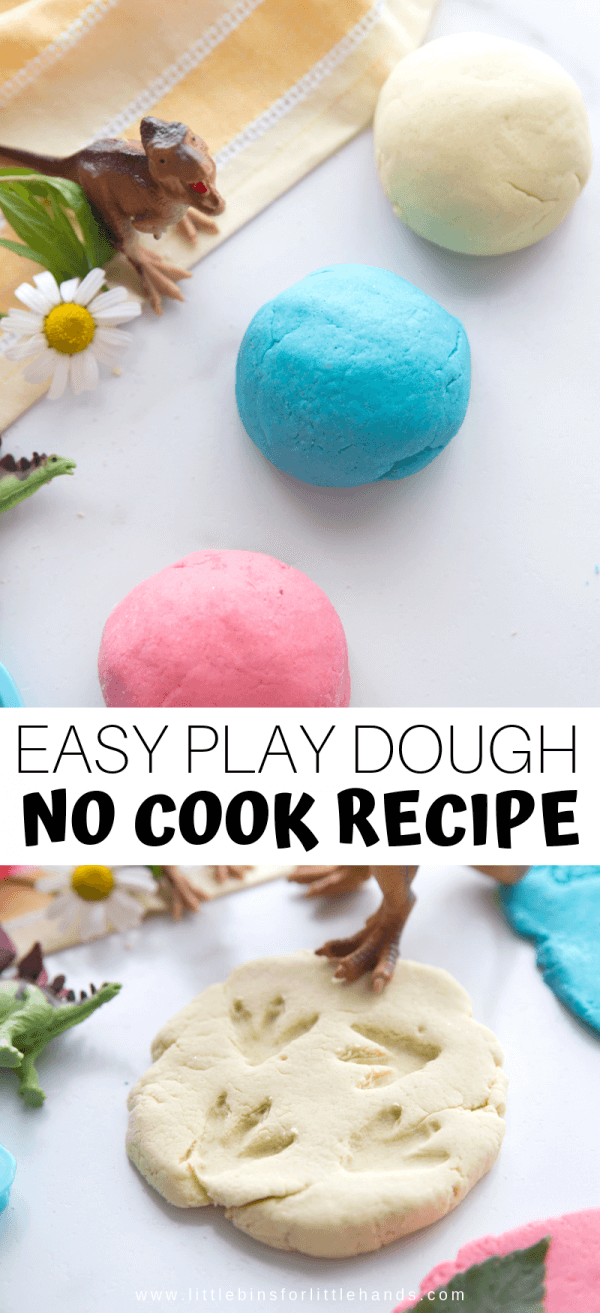
- Once it’s cooled down a tad but is still warm, split the dough into balls for different colors.
- Make a little well in the center of each ball and add a few drops of your chosen food coloring. You can now mix the color into the dough, wearing gloves to avoid stained hands.
- If you’re adding scents or glitter, now is the time! Embed them into the mixture to create a magical sensory experience for the kids.
- Knead each ball until the color is fully incorporated and the dough is smooth and stretchy. It’s like magic watching the playdough come to life!
And voilà! You’ve done it! You deserve a high-five, a pat on the back, and quite frankly, a superhero cape because you’ve just created the most epic, custom-made, non-cook playdough! It’s time to set those imaginations free and watch as your kids sculpt, roll, and craft to their hearts’ content. Plus, the memories you’ll make together are just as priceless as the masterpieces they’ll create. Enjoy!
Remember, this homemade playdough isn’t just for tiny tots. It’s perfect for school projects, playdates, and even DIY gifts made with love. The journey from kitchen cupboard to majestic playdough creations has never been more delightful. Happy crafting!