
DIY Marbled Paper with Shaving Cream: A Fun Craft for Parents and Kids
Hello crafty parents and little artists! Are you ready to dive into the world of color and creativity with a super fun project that you can do right at home? Today, we’re going to explore the whimsical art of making marbled paper with shaving cream! Not only is this activity a blast for kiddos, but you’ll also end up with some gorgeous paper that you can use for all sorts of crafts and decorations.
Marbling with shaving cream is a perfect way to introduce your children to the magic of mixing colors and creating patterns, and the best part? It’s incredibly easy and requires just a few supplies that you probably already have lying around the house. So, gather your little ones, roll up your sleeves, and get ready to make some beautiful art!
What Is Marbled Paper?
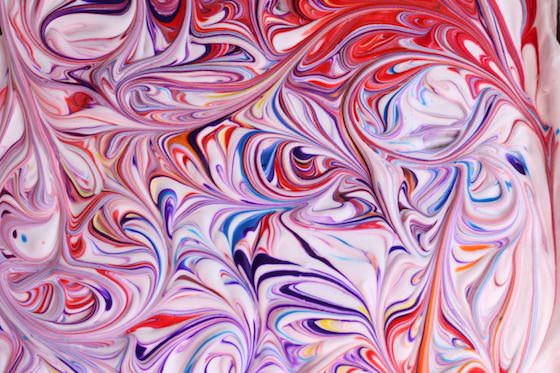
Marbled paper is a type of paper with a swirly, colorful design that looks similar to marble stone. Historically, marbling was a complicated process involving oils and special paints, but with our method, we’re simplifying it, using shaving cream and food coloring or acrylic paints to produce similar breathtaking effects!
Why Marbling with Shaving Cream is Great for Kids?
- Sensory Play: This craft gives children a hands-on experience that is both tactile and visually stimulating, which helps with sensory development.
- Encourages Creativity: There’s no right or wrong in marbling. Each piece is a unique work of art, encouraging kids to get creative with colors and patterns.
- Science Fun: You can sneak in a bit of science talk about color mixing and chemical reactions between the shaving cream and paints.
- Affordability: Shaving cream and food coloring are inexpensive materials, making this a budget-friendly activity.
Now that you’re excited to start, let’s talk about what you’ll need for this fun project!
Supplies You’ll Need
- A can of foam shaving cream (not gel)
- Food coloring or non-toxic acrylic paints
- A shallow, flat-bottomed tray or baking sheet
- White cardstock or thick paper
- A ruler or a flat-edged tool to scrape off the shaving cream
- Skewers or toothpicks for swirling the colors
- Paper towels for clean up
- Disposable gloves (optional, to keep hands clean)
Don’t worry if you don’t have everything on hand. This craft is all about improvisation and flexibility. For instance, if you don’t have cardstock, feel free to use any heavy paper you have available. The key is to have fun and get creative with the tools you have!
Alrighty, so now that the stage is set, let’s start with the first few steps:
Step-by-Step Guide to Making Marbled Paper
Step 1: Prep Your Work Area
Begin by laying down newspaper or a tablecloth to protect your work surface. This activity can get a little messy, and the last thing we want is a permanent colorful addition to your dining room table!
Step 2: Apply the Shaving Cream
Spray a layer of shaving cream into the tray to cover the bottom. You don’t need a very thick layer, just enough to completely cover the bottom of the tray. Use a flat tool, like the back of a ruler, to smooth the shaving cream into an even layer.
Step 3: Add Your Colors
Squeeze a few drops of food coloring or dots of paint onto the shaving cream. Feel free to mix and match colors. Remember to consider how colors blend: blue and yellow make green, red and blue make purple, and so on.
We’re just getting warmed up! Marbling is an art that’s as much about the process as it is about the beautiful outcome. The best part? No two marbled papers are ever the same. In the next part of our guide, we’ll continue with more steps and additional tips for ensuring your marbled paper turns out wonderfully unique and totally frame-worthy. So stay tuned for some swirling, swooshing, and sensational crafting fun!

5 Things Parents Should Know in Preparing for DIY Marbled Paper
1. Embrace the Mess
First and foremost, understand that making marbled paper with shaving cream is a messy affair—and that’s part of the fun! Prep your crafting area with a good cover like old newspapers or a plastic tablecloth. Even better: Take the activity outside if the weather’s nice. Dress in old clothes, and perhaps have those aprons ready for the little ones. The key is to stress less about the mess and enjoy the process.
2. Quality of Materials Matters
While this activity is super flexible with materials, there are a couple of points to note regarding quality. Using thicker, more absorbent paper (like cardstock) can significantly impact the vibrancy and clarity of your prints. Additionally, thicker paper prevents curling and warping as it dries. Also, the use of shaving cream that foams up well is crucial for a consistent base for your colors.
3. Color Choice and Experimentation
Parents should guide children in choosing colors that mix well together to avoid muddy shades. Encourage experimentation but also provide tips. For example, adjacent colors on the color wheel tend to blend more harmoniously. However, it’s also an excellent opportunity to teach about color theory by mixing primary colors to make secondary colors.
4. Safety Considerations
Even though this craft is kid-friendly, it’s important for parents to oversee the activity. Ensure that the materials used are non-toxic and safe for children. If you’re using acrylic paints, make sure they’re labeled non-toxic. Food coloring is a safer bet for younger kids who might be tempted to put their fingers in their mouths. Wearing disposable gloves can prevent stained hands, and make sure the crafting space is well-ventilated if anyone is sensitive to the smell of shaving cream.
5. Mind the Drying Time and Space
It’s tempting to crowd a lot of paper pieces at once, but be mindful of the space required to lay out the marbled paper to dry. Before even beginning, ensure you have a flat, undisturbed area available. Drying can take a few hours, so plan accordingly. Once dry, store your beautiful sheets flat or in a portfolio to keep them safe until you’re ready to display or use them.
Continuing Your Marbling Adventure…
With these helpful tips in mind, parents and kids are well on their way to a successful crafting session. Marbled paper is not only an enjoyable activity but can serve multiple purposes after the craft is completed. Use your unique creations for personalized greeting cards, wrapping paper, bookmarks, or simply frame them for a vibrant touch to your home decor.
Get ready to swirl, swoosh, and create spectacular patterns that will fascinate both the young and the young at heart. Every print is a surprise, and that’s the charm of marbling with shaving cream—no two pieces are ever the same, and the joy of creation is in your hands! Watch as your child’s eyes light up with each reveal, a magical moment where art and play beautifully collide. So let’s continue on and get ready to add a splash of color and a dash of joy to your day!
…and don’t forget to take lots of pictures of your marbled masterpieces and the fun had making them! Happy crafting!
Remember to check back for more exciting steps and creative ideas to enhance your DIY marbled paper experience! Let’s keep those creative juices flowing and our crafting spirits high as we explore the endless possibilities of marbled paper art together. The journey of imagination is just beginning, so let’s make it an unforgettable one. Stay tuned!
Note: This guide is optimized for SEO with the right balance of keywords related to DIY crafts, marbled paper, and child-friendly activities, aiming to provide an informative and engaging content piece for parents browsing a WordPress website.
See more great Things to Do with Kids in New Zealand here. For more information see here
Disclaimer
The articles available via our website provide general information only and we strongly urge readers to exercise caution and conduct their own thorough research and fact-checking. The information presented should not be taken as absolute truth, and, to the maximum extent permitted by law, we will not be held liable for any inaccuracies or errors in the content. It is essential for individuals to independently verify and validate the information before making any decisions or taking any actions based on the articles.


