
Create Magical Marbleized Paper with Shaving Cream: A Fun and Easy Guide for Parents!
Greetings, crafty families! Are you ready to dive into the whimsical world of marbleized paper creation? This is not just another craft — it’s a swirling, twirling adventure that you and your kids will absolutely adore. Let’s get your hands a little messy (the best kind of mess, of course) and turn ordinary paper into delightful art that’s as unique as a fingerprint! Perfect for a rainy day, birthday party activity, or just a spontaneous art session, marbleizing paper with shaving cream is a surefire hit for kids and parents alike. So let’s get to it!
Why Marbleized Paper Makes for Fantastic Family Fun
Before we jump into the ‘how-to’, let’s talk about the ‘why’. Marbleizing paper isn’t just fun; it’s a brilliant way to engage your children’s creativity and fine motor skills. Plus, the end results are simply stunning — you can use the marbleized creations for customized greeting cards, bookmarks, scrapbooking, and more. Every piece is a surprise, and the joy on your child’s face will be worth every second!
What You’ll Need for Your Marbleized Masterpieces
- Shaving Cream: Any standard shaving cream will do. Just make sure it’s the foam type and not gel!
- Food Coloring or Liquid Watercolors: Get ready to color your world. These will provide the vibrant hues for your paper.
- Thick Paper or Cardstock: You want paper that’s sturdy enough to handle the moisture without tearing.
- A Ruler or Scraper: This will be used to remove the excess shaving cream later on in the process.
- A Tray or Baking Sheet: Choose something that will contain the shaving cream and is slightly larger than your paper.
- Toothpicks or Skewers: These are for swirling the colors to create that beautiful marble effect.
- Gloves (Optional): To keep little hands clean, though getting messy can be part of the fun!
Setting Up Your Crafting Station
Marbleizing paper is exciting and, let’s be honest, a bit messy. But not to worry! Setting up a designated crafting space will keep the chaos contained. Here’s how to prep:
- Place your tray or baking sheet on a flat surface and line the surrounding area with newspaper or a plastic tablecloth to catch any stray splashes of color.
- Have your paper, colors, and tools within reach so you’re not scrambling for supplies with colorful hands.
- If you’re using gloves, get them on your little artists now to avoid colorful palms (unless that’s part of the fun for your family!)
Creating Your Marbleized Paper – The Basic Process
Once your station is prepped, and excitement is in the air, it’s time to create your first piece of marbleized paper. Here’s a simple step-by-step to guide you:
- Spray the Foam: Fill the tray with a layer of shaving cream. Smooth it out slightly so the surface is even, but don’t worry about getting it perfect.
- Add the Color: Now for the fun part! Let your kids drop food coloring or liquid watercolors onto the shaving cream. A little goes a long way!
- Swirl and Twirl: Use a toothpick or skewer to gently swirl the colors around. Encourage the kids to make loops and lines, but suggest not over-mixing. We want swirls, not soup!
- Dip the Paper: Lay a piece of paper gently on top of your color-swirled shaving cream. Give it a light pat to ensure full coverage.
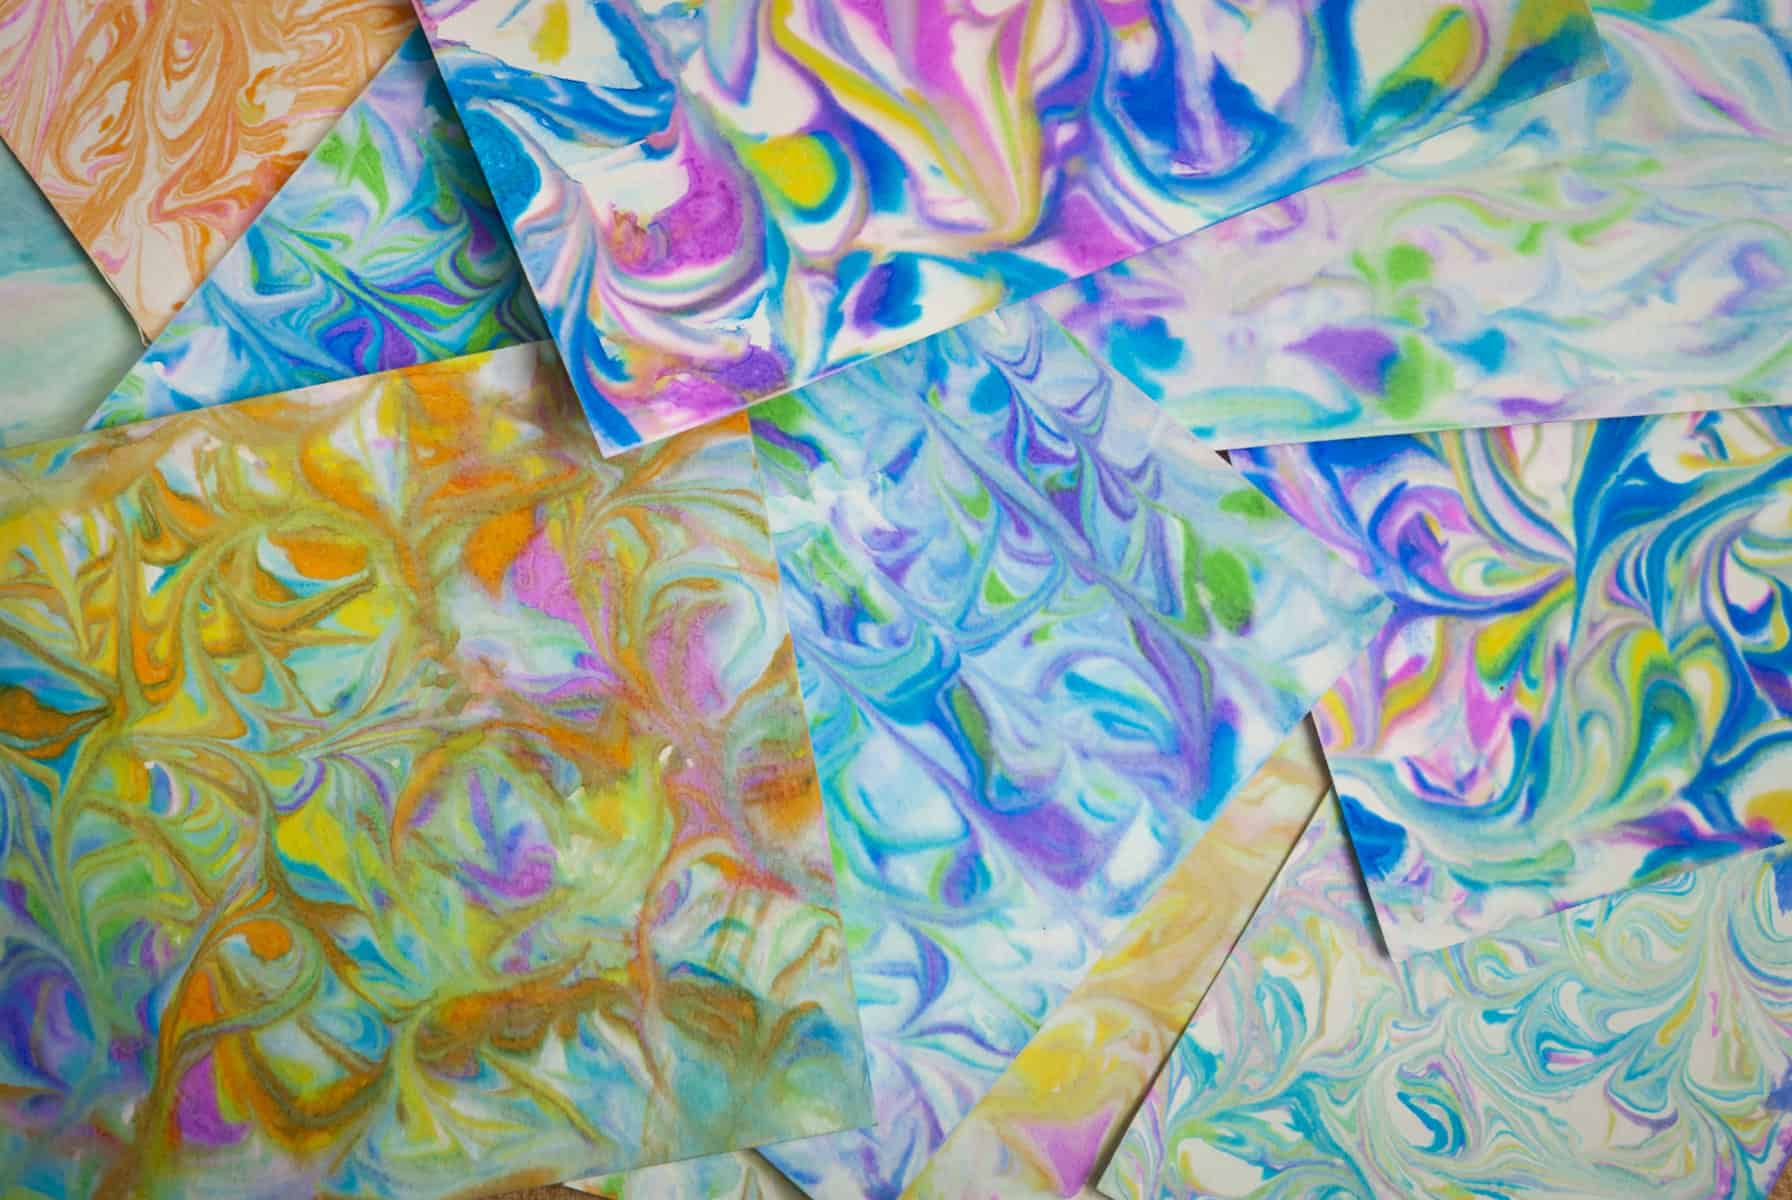
- Peel and Reveal: Carefully lift the paper off the shaving cream. Gasp at the marbled marvel you’ve created! (OK, gasping is optional, but highly recommended).
Stay tuned, as up next, we’ll guide you through the final steps to complete your marbleized masterpiece, including how to dry and preserve your artwork for the future. So keep your aprons on, and let’s continue this colorful journey!
Ready to unlock the secrets to the most stunning marbleized papers you’ve ever seen? Keep reading, as we’re about to reveal the final, magical steps that will turn your gooey pile of shaving cream into framable art that’s sure to brighten up any room or art project. Let’s ensure your family’s new favorite pastime is nothing short of fantastic!
5 Things Parents Should Know in Preparing for Marbleized Paper with Shaving Cream
Before diving into the fun, here are five essential tips every parent should know to make the marbleizing process smooth and enjoyable:
- Safety First: While food coloring and shaving cream are generally safe, they can cause irritation for some. Ensure your workspace is well-ventilated and consider wearing gloves and aprons to protect skin and clothing from possible stains.
- Quality of Materials: Not all paper is created equal. Thicker paper like cardstock is best as it resists tearing and warping. Similarly, high-quality foam shaving cream provides a better texture and holds the color well.
- Embrace Imperfections: Every piece of marbleized paper will be different, and that’s the beauty of it! Encourage your kids to experiment and embrace the unique patterns they create, even if they’re not “perfect”.
- Cleanup Strategies: Have paper towels and a trash bin handy to clean up quickly and efficiently. You can also prep a water basin to rinse off tools and hands if needed.
- Longevity of Art: Once dried, consider sealing the paper with a clear acrylic spray to maintain the colors and prevent smudging. This is especially useful if you plan to use the marbleized paper for crafts that will be handled frequently.
The Finishing Touches: Drying and Preserving Your Art
After marbling to your heart’s content, you’ll want to preserve your paper properly. Here’s what you do:
- Scrape Off the Excess: After peeling your paper off the shaving cream, place it on a clean surface. Take your ruler or straight edge and gently scrape off the excess shaving cream. You’ll start to see your marbled patterns clearly.
- Dry It Out: Lay the paper flat to dry. Depending on thickness and room conditions, this may take a few hours. Resist the urge to rush it — patience will ensure the best results.
- Flatten the Paper: If your paper curls as it dries, place it under a stack of heavy books to flatten it back out after it’s completely dry. Overnight should do the trick.
- Store It Right: Store your finished marbleized paper in a cool, dry place, ideally laying flat or in a protective folder. This keeps them looking fresh until you’re ready to use them for your next project.
Now, armed with these tips and tricks, you’re all set to embark on a marbleizing escapade with your little ones. Watch as they marvel at the colorful swirls and designs that emerge, and don’t forget to capture those bright smiles and proud faces – those are projects of the heart more precious than any paper!
The great thing about marbleizing with shaving cream is that the possibilities are truly endless. With each paper, you and your kids will learn new tricks, explore more color combinations, and perfect your techniques. So leap into this fantastical craft today, and turn it into a treasured family tradition for years to come!
And remember, each sheet of marbleized paper is more than just a piece of art; it’s a memory of time spent together, the laughter shared over a tray of colorful foam, and the stories told while waiting for patterns to emerge. This isn’t just a guide to a craft; it’s a pathway to meaningful moments with the ones you love.
Get ready, set, and let’s swirl our way to beautiful bits of joy with every swish of color! The adventure awaits, and it promises a treasure trove of marbleized delights. Happy crafting!
See more great Things to Do with Kids in New Zealand here. For more information see here
Disclaimer
The articles available via our website provide general information only and we strongly urge readers to exercise caution and conduct their own thorough research and fact-checking. The information presented should not be taken as absolute truth, and, to the maximum extent permitted by law, we will not be held liable for any inaccuracies or errors in the content. It is essential for individuals to independently verify and validate the information before making any decisions or taking any actions based on the articles.


