
Paper Marbling with Shaving Cream: A Fun and Easy Craft for Kids
Hello, lovely crafters and creative parents! Have you been searching for a delightful activity that’s as enjoyable as it is artistic for your little ones? Look no further! Today, we’re diving into the colorful world of paper marbling with shaving cream, a craft that’s perfect for children of all ages. Not only is it incredibly fun to do, but it’s also a great sensory activity that yields beautiful results. Are you ready to roll up your sleeves and make some marvelous marbled prints together? Let’s get started!
What is Paper Marbling with Shaving Cream?
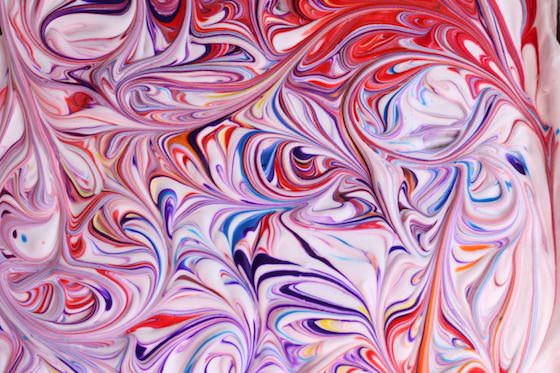
Paper marbling is a method of aqueous surface design that produces patterns similar to smooth marble or other stone. The patterns are the result of colors floating on a viscous solution and then carefully transferred to an absorbent surface – in our case, paper. Traditional marbling techniques have been around for centuries, but today, we’ve found a way to simplify this artisan craft with an everyday bathroom staple: shaving cream!
Why You and Your Kids Will Love Marbling with Shaving Cream
- It Sparks Creativity: This activity allows kids to experiment with colors and patterns, unleashing their inner artist.
- It’s Educational: Children learn about color mixing, chemical reactions, and the science behind hydrophobic and hydrophilic substances.
- So Easy to Set Up: With minimal materials needed, all of which are readily available, setup is a breeze.
- Quick and Satisfying Results: Unlike some crafts that require time to dry or complete, paper marbling delivers instant gratification.
Materials You’ll Need
Before we get our hands marbly, let’s ensure we have everything we need. This craft is splendid because it doesn’t ask for much. Here’s a quick list:
- A can of shaving cream – the foam kind, not gel!
- Liquid watercolor or food coloring
- Thick paper, like cardstock or construction paper, cut to a manageable size
- A ruler or a straight-edged scraper
- A shallow baking tray or a similar container
- Chopsticks, toothpicks, or a skewer for swirling the colors
- Paper towels or a cloth for cleaning up
Preparing Your Workspace
Now, before we begin, let’s prep our space. This craft can get a bit messy – in the most wonderful, laughter-filled way, of course! Make sure to cover the surface you’re working on with a sheet or tablecloth that you don’t mind getting stained. Wearing aprons or old clothes is also a good idea. If you can do this activity outside or in an area where clean-up is simple, even better. A bright, sunny day can enhance the drying time and overall experience!
All set? Brilliant! Your mini artists are just moments away from making their stunning creations.
Step-by-Step Guide to Paper Marbling with Shaving Cream
Creating marbled paper is a fantastic way to have fun with colors and enjoy a unique sensory experience. Let’s walk through the steps, and remember – there’s no right or wrong way to marble. Every piece your child creates will be a one-of-a-kind masterpiece! Here are the basic steps to get you started:
- Prep the Shaving Cream: Shake the can well, and fill your tray with a layer of shaving cream. Smooth it out so you have a nice, even surface to work on.
- Add Color: Drizzle your liquid watercolor or food coloring across the surface of the shaving cream. You can start with a few colors; later on, you may want to experiment with more.
- Make It Swirl: Using a chopstick or skewer, gently swirl the colors around. Encourage your children to make patterns and designs. Zig-zags, spirals – let their imaginations run wild!
- Press the Paper: . . .
Stay tuned for the exciting next steps where we’ll teach you how to transform these vibrant swirls into magnificent marbled prints! We’re about to make some magical memories and fabulous art to treasure. Happy marbling!

5 Things Parents Should Know When Preparing for Paper Marbling with Shaving Cream
Delving into the world of paper marbling with your kids is a splendiferous affair! Here are five essential tips that can help ensure a smooth and joyful crafting experience:
1. Safety Comes First
Make sure to use child-friendly, non-toxic materials. Even though our primary medium is shaving cream, which is typically safe for skin contact, always opt for brands that are free of harmful chemicals—especially when young kids are involved. Additionally, supervise your little artists throughout the process to keep the activity both safe and fun.
2. Embrace the Mess
Let’s face it, creativity can be a bit chaotic sometimes, and paper marbling isn’t an exception. It’s okay to let children get their hands a little messy—it’s part of the fun! Have plenty of paper towels on hand and maybe a bowl of water for quick rinsing.
3. Manageable Materials
Pre-cut the paper to a size that fits well within the tray to make it easy for your child to handle. This step will ensure that the marbling process is straightforward and that the end result is neat and contained within the confines of the paper.
4. Color Choices
While you might be tempted to use every color in the rainbow, sometimes less is more. Start with two or three colors to avoid muddying the beautiful marbling patterns. As children become more familiar with the process, you can introduce more shades to their palette.
5. Patience is a Virtue
The actual crafting part may be quick, but kids might need a few tries to get their designs just right. Practice patience and encourage them to experiment with different techniques and patterns. Remember, the beauty of marbling is that each piece is a unique work of art!
Pressing on with Paper Marbling
The final steps in paper marbling are what reveal the true beauty of your child’s artistic endeavors:
- Press the Paper: Gently lay the paper onto the colorful shaving cream surface, allowing it to make contact all over. You don’t need to push down too hard – a gentle touch is perfect.
- Lift and Reveal: After a moment, carefully lift the paper out of the tray. You’ll see a thick layer of shaving cream on the paper, but don’t worry, it’s all part of the plan!
- Scrape Off Excess: Use your straight-edged scraper or ruler to remove the excess shaving cream from the paper. This action will leave the stunning marbled pattern on the paper.
- Let it Dry: Place the paper on a flat surface or hang it up to dry completely. The colors will become even more vibrant once the paper has dried.
- Display with Delight: Once the papers are dry, use them as personalized stationery, frame them as art, or incorporate them into other crafts. The possibilities are endless!
As you embark on this adventure of colors and curls, remember that every print will be as unique as your child’s imagination. There’s no end to the joyous discoveries that await with each swirly press of paper into the pillowy foam. Savvy parents know that the real fun is in the giggles, the wonder in your child’s eyes, and the playful mess of creation. Be there, present in the moment, capturing the heartfelt creativity and cheering on every splash of color.
Witness as your children learn, laugh, and express themselves through the timeless art of paper marbling. It’s a craft that tickles the fancy and captures the hearts of all age groups, making family memories last through dimensions of swirling color patterns.
The marvelous journey of paper marbling with shaving cream awaits your family. Gather your supplies, set up your space, and plunge into the frothy depths of your collective creativity. Here’s to patterns as unique as your child’s brilliant smile and masterpieces that reflect the joy of your time spent together. Happy marbling!
See more great Things to Do with Kids in New Zealand here. For more information see here
Disclaimer
The articles available via our website provide general information only and we strongly urge readers to exercise caution and conduct their own thorough research and fact-checking. The information presented should not be taken as absolute truth, and, to the maximum extent permitted by law, we will not be held liable for any inaccuracies or errors in the content. It is essential for individuals to independently verify and validate the information before making any decisions or taking any actions based on the articles.


