
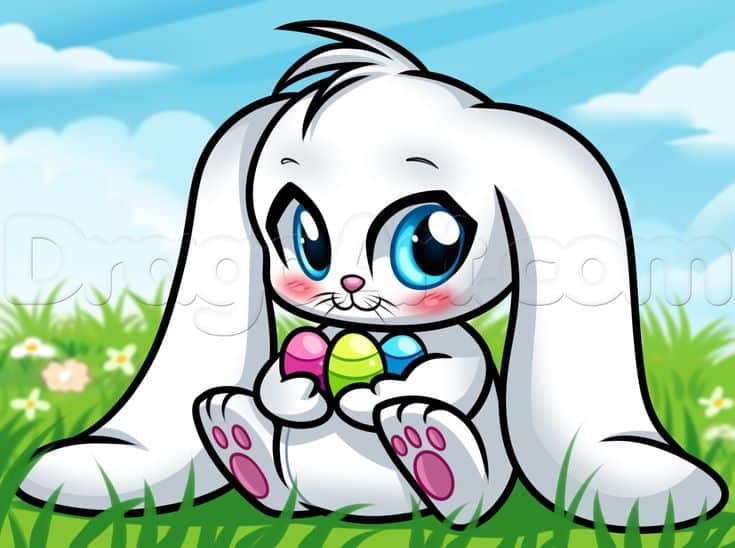
Draw a Cute Easter Bunny: A Step-by-Step Guide for Creative Family Fun!
Hey there, creative parents and bunny enthusiasts! ? Easter is right around the corner, and what’s more fitting for this festive season than drawing an adorable Easter bunny with your little ones? Not only is it a perfect way to bond with your kids, but it also helps them develop their fine motor skills and sparks their imagination. So grab your drawing supplies, and let’s hop into fun with a step-by-step guide to drawing a cute Easter bunny that’ll have everyone beaming with joy!
What You’ll Need:
- Pencil (HB or B2)
- An eraser (kisses goodbye to those little oopsies!)
- Drawing paper (size A4 is a good start)
- Colored pencils or crayons (for that splash of Easter color)
Step 1: Sketching the Basic Shapes
Before we start adding those charming details, we need to get our basic shapes down. Start by drawing a large oval for the bunny’s body and a smaller one for its head—sort of like a snowman, but with an extra dose of cuteness! Remember, it doesn’t have to be perfect; we’re going for warm and fuzzy, not geometry class crisp.
Step 2: Ears and Facial Features
Now it’s time for those iconic bunny ears! Draw two long, slightly curved lines coming from the top of the head for the ears. Then add a nice, big fluffy curve to each ear for that soft, realistic touch. For the face, let’s keep it simple with two dots for eyes, a small triangle for the nose, and a gentle curved line for the mouth. Let’s not forget those whiskers—just a few quick strokes, and voilà!
Step 3: Paws and Tails
Onto the paws! Draw two small ovals on the front and two larger ovals at the bottom for those lovely little bunny feet. Add in the details of the paws, like the toes, to give them some personality. The tail is just a quick, fluffy round shape at the back—like a tiny, soft cloud floating behind our bunny friend.
Step 4: Extra Touches for Personality
We want our Easter bunny to truly come to life! Add some inner ear details with a softer color or shade—this adds depth. Then give your bunny a cute outfit or a pattern on its fur! Maybe a bowtie or a cute Easter egg pattern? Let your and your child’s imagination run wild!
Step 5: It’s Coloring Time!
Grab those colored pencils or crayons, and let’s get to work! When coloring your bunny, think about where the light might hit—this helps to add dimension to your drawing. Don’t be afraid to mix colors for a truly unique bunny—they can be lilac, pink, or even have rainbow stripes. It’s all about the fun!
And there you have it, talented artist parents and kids! You now know the basic steps to draw a heartwarming Easter bunny. Remember, the most important part is to have fun and enjoy the quality time spent with your family. Stay tuned for more drawing tips and creative ideas to keep the festive spirit hopping all season long. Keep those pencils sharp and your imaginations ready for adventure!
Join us for the next part where we’ll dive into some additional tips and ideas for making your Easter bunny drawings extra-special. We’ll explore background ideas, how to draw a bunny holding an Easter egg, and fun ways to use your drawing for Easter decorations. Get ready to add personality and charm to your festive creations!
5 Things Parents Should Know in Preparing for Cute Easter Bunny Drawing
1. Set the Scene for Creativity
Find a comfortable and well-lit space for drawing. A kitchen table or a cleared floor area with cushions can be transformed into a creative studio. Ensure it’s a spot where spills of creativity (and maybe some crayon marks!) are welcome, and the focus is on enjoying the process together.
2. Get the Right Materials Ready
Aside from the essentials listed above, consider different types of paper like colored or textured paper for a unique background. Watercolor pencils can also add a unique flair to your drawing, and don’t forget a sharpener for those pencils!
3. Embrace the Messy Moments
Art isn’t about staying inside the lines; it’s about expression and fun. Encourage your child to explore and not to worry about making mistakes. The eraser is there, but often, the best character comes from the unplanned strokes!
4. Make It Educational
While drawing, you can sneak in some learning moments. Talk about shapes, colors, and even bunny facts. It’s a brilliant way to combine art with education and keep the conversation engaging and interactive.
5. Display Their Artwork
Plan in advance what you’ll do with the drawings. Will they be Easter cards for family, decorations for the home, or framed as a keepsake? Letting your child know their artwork will be displayed or shared can be a great motivation and a proud moment for them.
Remember, these moments are about making memories and letting your child’s creativity bloom. By following the steps provided and keeping these five tips in mind, you’re ready to create some egg-cellent artwork together. Let’s get those pencils and crayons dancing across the paper, and bring those fluffy bunnies to life!
See more great Things to Do with Kids in New Zealand here. For more information see here
Disclaimer
The articles available via our website provide general information only and we strongly urge readers to exercise caution and conduct their own thorough research and fact-checking. The information presented should not be taken as absolute truth, and, to the maximum extent permitted by law, we will not be held liable for any inaccuracies or errors in the content. It is essential for individuals to independently verify and validate the information before making any decisions or taking any actions based on the articles.


