
DIY Bunny Ears Craft: A Fun Activity for Parents and Kids Alike!
Are you looking for a delightful crafting project to share with your kids? Look no further, as DIY Bunny Ears are not only cute and perfect for Easter, but they’re also incredibly fun and easy to make! Whether you’re prepping for a springtime party, seeking a playful costume accessory, or just want to add a splash of whimsy to your family’s weekend, making homemade bunny ears is a fantastic way to bond and unleash everyone’s creativity. So, hop on in, and let’s get started on this joyful journey to making your very own bunny ears!
Materials You’ll Need for Bunny Ears DIY
- Construction paper or felt: Opt for pink, white, or any fun color your child adores.
- Headband: A plain headband will serve as the base for your bunny ears.
- Glue: A glue stick or hot glue gun (used with parental supervision) will secure your ears in place.
- Scissors: For cutting out the ear shapes. Safety scissors are perfect for little hands.
- Extras for decoration: Think pom-poms, glitter, stickers, or markers for extra flair.
Step-by-Step Guide to Making Your Bunny Ears
Step 1: Prepping Your Materials
Gather all your materials in your crafting area. If you’re using a hot glue gun, make sure it’s heating up while you’re getting everything else ready. If your kiddos are helping with cutting, ensure that they have the appropriate safety scissors for their age and skill level.
Step 2: Crafting the Ears
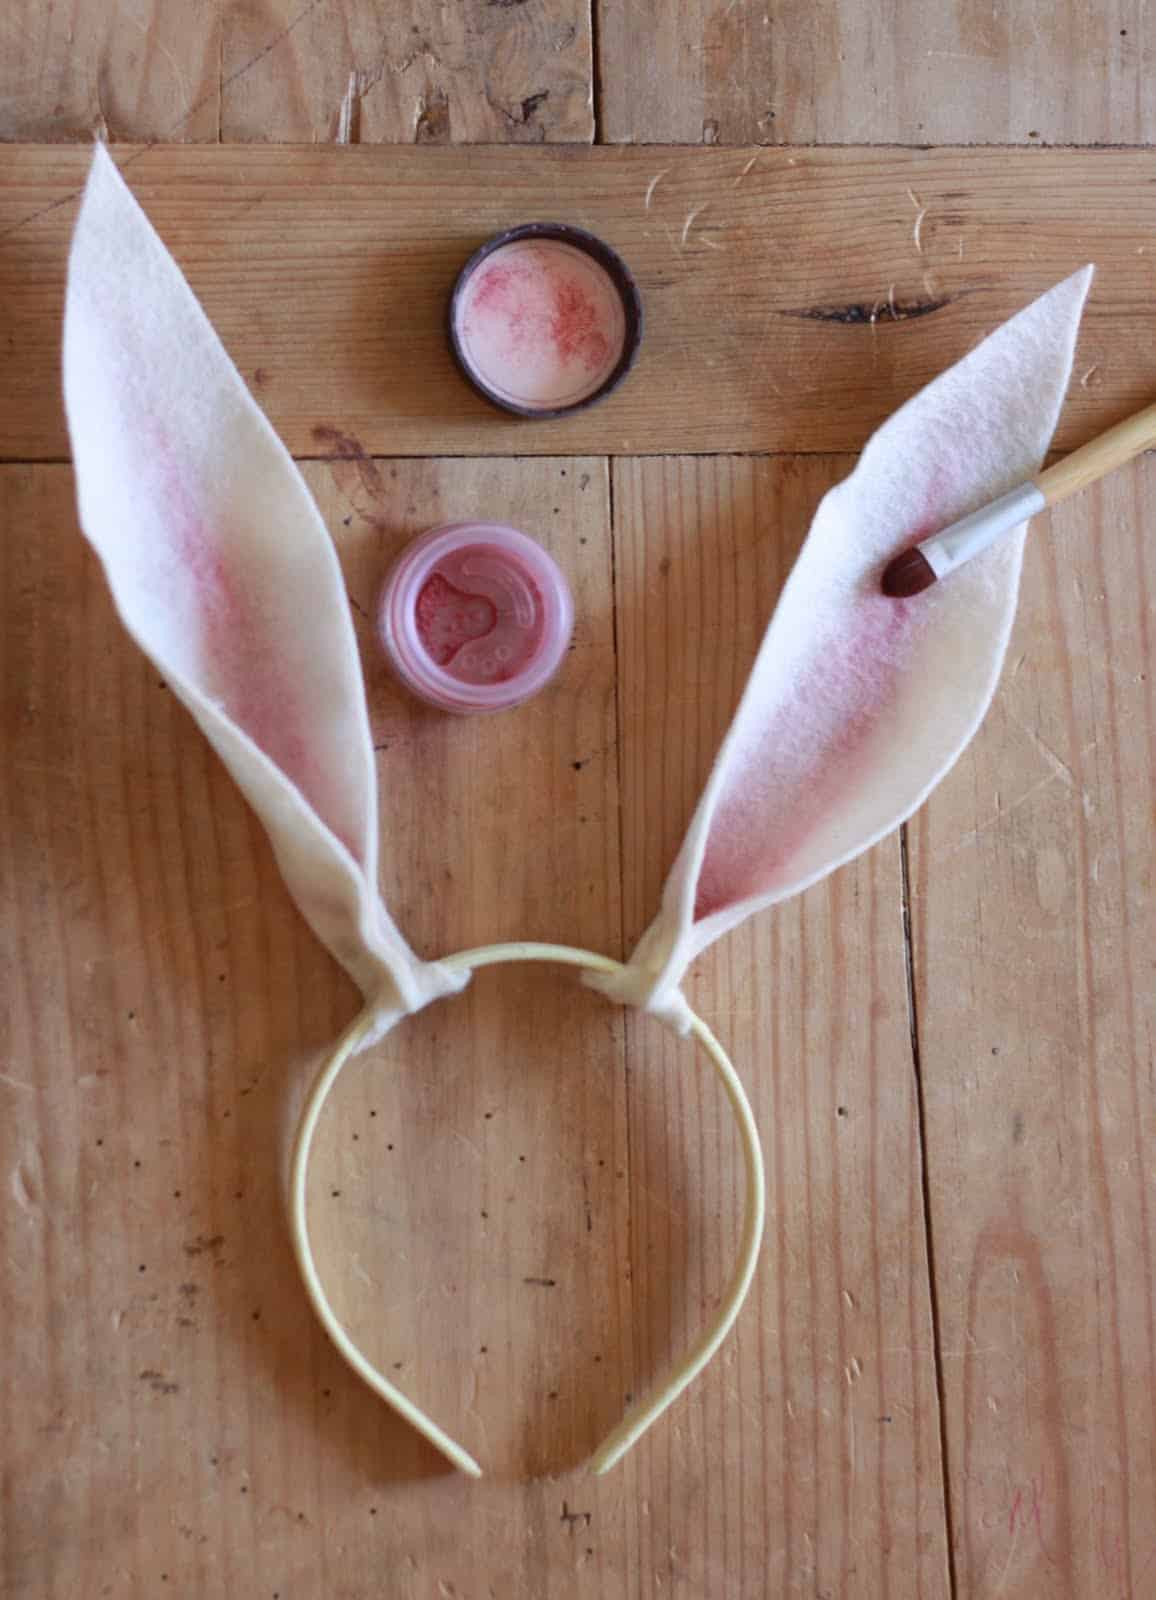
Trace the shape of the bunny ears onto your construction paper or felt. You’ll want to create two larger ear shapes in white and two smaller ones in pink to serve as the inner part of the ears.
Step 3: Assembling the Ears
Cut out the shapes you’ve drawn. Glue the smaller pink shapes onto the center of the white ear shapes to mimic the inner part of the bunny’s ears. Make sure to leave a little extra at the bottom of the white shapes to wrap around the headband.
There you have it—a brief introduction to making your very own bunny ears! But our journey doesn’t stop here. Whether you’re a seasoned crafter or a first-time DIYer, the next section will take you through the final steps to ensure your bunny ears are the talk of any Easter gathering or costume party. So grab your crafting supplies, and let’s hop to it!
Stay tuned for the continuation of our fluffy bunny ear crafting adventure!
5 Things Parents Should Know in Preparing for Bunny Ears DIY
1. Safety First
Before you get lost in the fun of crafting, safety should be your top priority. Ensure that the scissors are kid-friendly if your children will be participating in cutting the materials. Additionally, if you are using a hot glue gun, always supervise its use to prevent any accidents, or opt for child-safe adhesives like glue sticks or tape.
2. Customize to Fit Your Child
Headbands come in different sizes, and so do the little heads that will wear them. Prior to crafting, make sure the headbands you’ve chosen are comfortable for your child to wear. Nothing spoils fun like an ill-fitting accessory. Wrap the headband in soft fabric or ribbon if you need to add extra comfort.
3. Embrace Creativity and Individuality
Your kids will love personalizing their bunny ears, so have a variety of materials on hand. Gather stickers, glitter, and colored markers. You might be surprised at how creative your little ones can be! Plus, crafting is a great opportunity for children to express themselves and take pride in their creations.
4. Allow for Ample Crafting Time
Good craft doesn’t need to be rushed. Set aside enough time so that you won’t need to hurry through the fun. This is especially important if you’re crafting with younger children who may need more time for cutting and pasting. Remember, the journey is just as important as the finished product!
5. Preparation is Key
Before sitting down to start your crafting session, make sure you have all the materials listed out and ready to go. It’s a good idea to have extra supplies in case of mishaps or multiple attempts. Keep a clean workspace, and prepare a sample or prototype beforehand if possible to make the process smoother for the kids to follow.
Finishing Touches for Your DIY Bunny Ears
Step 4: Attaching the Ears to the Headband
Once your ears are assembled, it’s time to attach them to the headband. Position them where you’d like them to sit, then wrap the extra tab of paper or felt at the bottom of the ear around the headband and secure it with glue. Make sure they’re firmly attached and upright. Allow for drying time if using liquid glue.
Step 5: Adding the Finishing Touches
Now for the fun part! Decorate your bunny ears with all the additional materials you’ve gathered. Add pom-poms at the base of the ears to represent fluffy cheeks or cotton balls for a cute tail at the back of the headband. Use markers to draw patterns or whiskers, and sprinkle some glitter for a magical touch.
Step 6: Fit and Wear Your Bunny Ears
After the glue has dried and your decorations are set, it’s time to try on your new bunny ears! Adjust them if necessary to ensure they’re comfortable and secure. Now your child is ready to hop into any festive activity with their adorable homemade bunny ears!
Crafting DIY bunny ears with your kids is more than just creating a costume accessory; it’s about spending quality time together and making memories. Enjoy the laughter, photos, and maybe a little bit of mess, because those are the moments that you’ll cherish long after the crafting glue has dried.
Remember, DIY crafts like bunny ears are not just for Easter. They’re perfect for any bunny-themed event, imaginative play, or even as a fun weekend project to encourage creativity. Have a hopping good time!
See more great Things to Do with Kids in New Zealand here. For more information see here
Disclaimer
The articles available via our website provide general information only and we strongly urge readers to exercise caution and conduct their own thorough research and fact-checking. The information presented should not be taken as absolute truth, and, to the maximum extent permitted by law, we will not be held liable for any inaccuracies or errors in the content. It is essential for individuals to independently verify and validate the information before making any decisions or taking any actions based on the articles.

