
Dive Into DIY: Crafting Delightful Concrete Planters With Your Kids!
Hey there, crafty families! Are you searching for a rewarding project you can dig into with your little ones? Look no further! Today, I’ll be your guide in creating a DIY concrete planter that’s not only adorable but also super functional. You’ll be amazed how a simple mix of water, cement, and a dash of love can turn into a marvelous home for your leafy friends. ??
Why Concrete Planters? ?
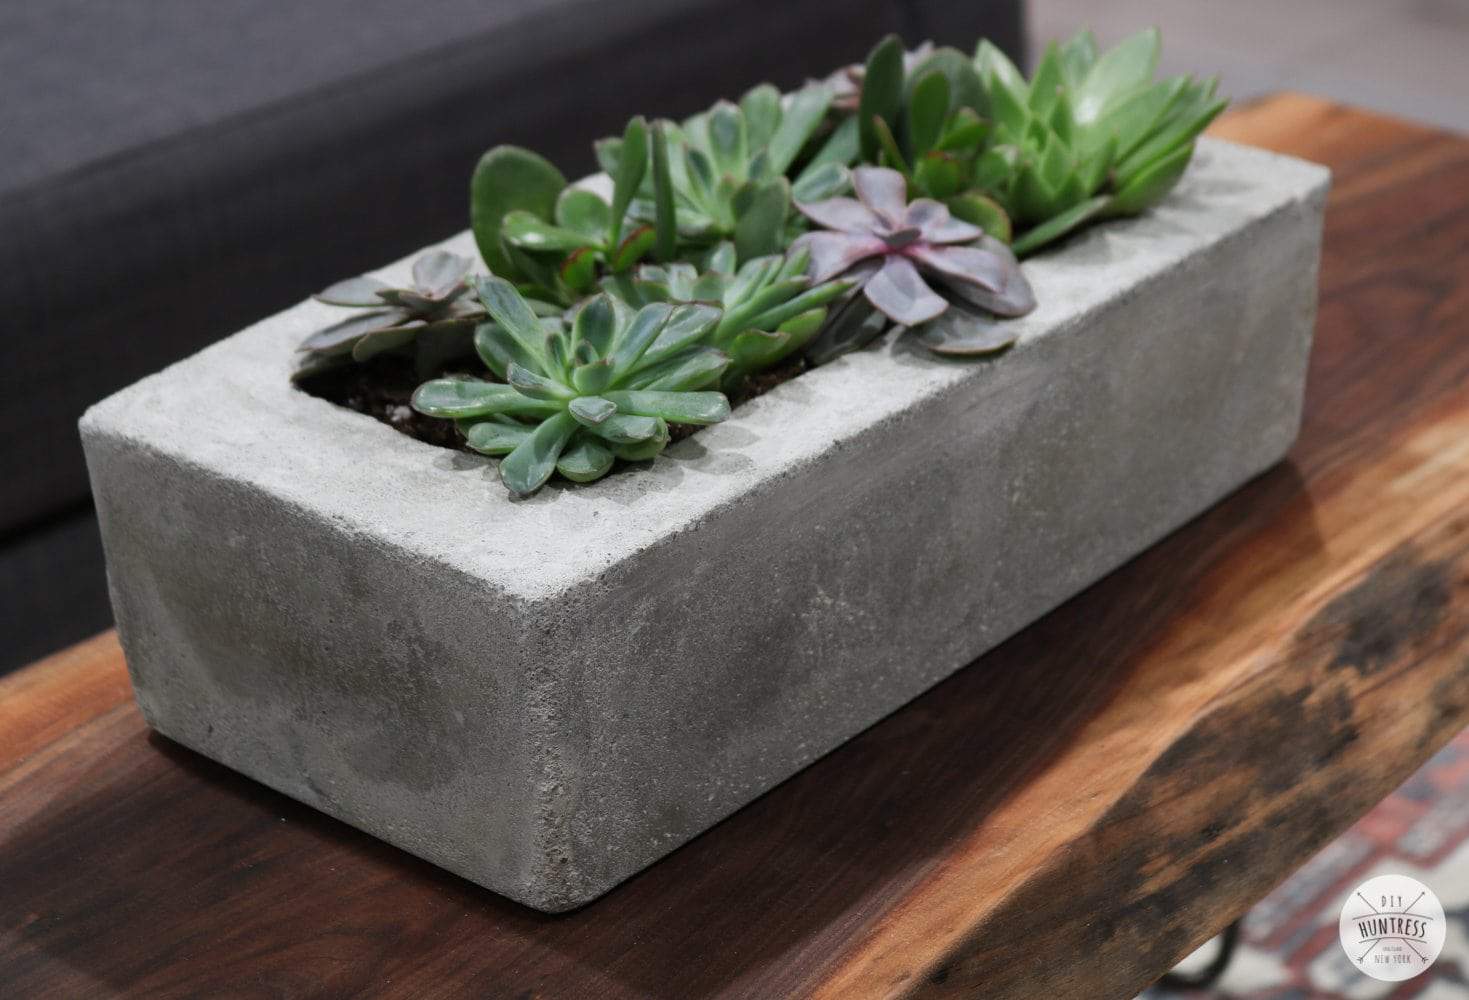
Concrete planters aren’t just sturdy and weather-resistant; they’re a stylish way to showcase your plants both indoors and outdoors. Plus, getting your hands a little dirty is a fantastic way to bond with your kiddos while nurturing their creativity.
Before You Start: Planning Your Project
Before you dive into the fun, it’s essential to gather all your materials and plan out your design. Will you go for a classic square shape, or perhaps a quirky geometric look? Whatever you decide, remember to involve the kiddos in the brainstorming – their imaginations are boundless!
What You’ll Need
- Portland cement
- Perlite or vermiculate (for lighter-weight planters)
- Peat moss (if you’re making a hypertufa planter)
- Water
- A large mixing bowl or wheelbarrow
- Non-stick cooking spray or vegetable oil
- Molds of your choice (Old containers, boxes, or purchased molds)
- Mixing tools (a trowel or stick)
- Sandpaper
- Decorative elements (optional, such as pebbles, tiles, -paint, or stamps)
- Protective gear (dust mask, gloves, and eye protection)
Now that we have our materials ready, let’s roll up our sleeves and dive into the nitty-gritty of planter-making!
Step-by-Step Guide to Your New Plant Abode
Step 1: Safety First!
Concrete can be dusty and quite alkaline, so gear up with gloves, dust masks, and eye protection before you start. This is a fantastic opportunity to teach your little ones about the importance of safety – they’ll get to dress up like a pro crafter!
Step 2: Mix It Up!
In your mixing bowl or wheelbarrow, combine the Portland cement, perlite (or vermiculite), and peat moss if you’re going for that trendy hypertufa look. You’ll want to aim for a mixture resembling coarse, crumbly dough – think cookie batter, but less yummy and not edible!
Step 3: Get Your Molds Ready
Your molds will shape your planter, so get creative here! You can use old containers cut to size, or even make your own molds out of cardboard. Just remember to coat your molds with a non-stick spray or oil to ensure an easy release once the concrete sets.
Step 4: Pour and Shape
Carefully pour your mixed concrete into the molds, pressing down gently to avoid air pockets. This is a terrific sensory experience for the little ones – they’ll marvel at the squishy, cool texture of the cement mix under their fingers (within the safe confines of their gloves, of course).
Step 5: The Waiting Game
Now comes the hard part – waiting! Concrete planters need to cure, so find a warm, dry spot for your creation and leave it undisturbed for at least 24 hours. Use this time to anticipate the beauty of your planter and the greenery it will soon house.
We’ve embarked on a crafting journey that is sure to sprout a lot of joy! Stick around for the next steps where we’ll be finishing our creations with smoothing, decorating, and planting. Crafting a DIY concrete planter with your kids is not just about having a nifty new pot; it’s about making memories that will last even longer than your sturdy new botanical buddy. So let’s keep the momentum growing!
5 Essential Tips for Parents Preparing for DIY Concrete Planter Projects
Tip 1: Schedule Wisely & Spread Out the Fun
As eager as you might be to jump right in, remember that a DIY concrete planter project is not a one-day affair. Crafting time needs to be balanced with drying and curing times, which can span over multiple days. Plan this as a weekend project or over a school break to ensure that the process is enjoyable and not rushed. Tackling the project in stages also enhances the anticipation and teaches kids about patience and the value of a job well done.
Tip 2: Dress for the Mess
No matter how tidy your little ones are, concrete crafting is a messy business. Have everyone don old clothes and shoes that you won’t mind getting a splatter or two of cement. Setting up your workspace outdoors or in a well-ventilated area can limit the aftermath inside your home, and prepping the site with a tarp or plastic sheet helps with easy cleanup.
Tip 3: Get Creative with Molds
The great thing about concrete is that it can take virtually any form. Encourage your kids to look for interesting shapes around the house that could be used as molds. Think outside the box – literally! From buckets to bowls, to packaging from recent purchases, explore various shapes and sizes. Just be sure they can withstand the concrete’s weight without warping.
Tip 4: Practice Safe Crafting
It’s not just about donning the gloves and goggles – being safe also means knowing what to do if concrete mix gets on the skin or in the eyes. Have a clean-up station ready with plenty of water and towels, and ensure everyone knows the importance of not touching their faces during the process. Additionally, keep your DIY area kiddo-friendly by ensuring all tools are kid-safe.
Tip 5: Embrace Imperfections
Especially when crafting with children, the final result may be a little less than what you’d see in a store – and that’s perfectly fine! Concrete planters have an inherently rustic charm when they’re handmade. They’re all about the joy and pride of making something from scratch. So, when a bubble leaves a hole or a corner isn’t as sharp, remember it adds character and tells a story of a family craft day well spent.
With these five tips in hand, you’re well on your way to creating wonderful memories and gorgeous, personalized concrete planters. Remember, crafting with concrete isn’t just a creative outlet; it’s a great learning experience where every step from mixing to molding involves a tactile, enriching education. Ready, set, concrete! Let’s bring some excitement to gardening and give your plants a home they – and your family – will adore.
Remember to take plenty of pictures during this process! Not only will you capture the fun and the messy hands, but you’ll also document the learning, the laughter, and the excellent planters you’ve created together. These snapshots will be as treasured as the planters themselves, serving as timeless reminders of when you turned everyday materials into masterpieces of home decor.
Crafting a DIY concrete planter can be the seed for a deep-rooted passion for DIY projects in your little ones. It teaches them to create, to wait, and to appreciate the fruits of their labor. The sense of accomplishment when they see their plants grow in the very pot they’ve made will be unparalleled. So, get ready for some mix-and-mold fun – it’s time to craft, plant, and grow together!
See more great Things to Do with Kids in New Zealand here. For more information see here
Disclaimer
The articles available via our website provide general information only and we strongly urge readers to exercise caution and conduct their own thorough research and fact-checking. The information presented should not be taken as absolute truth, and, to the maximum extent permitted by law, we will not be held liable for any inaccuracies or errors in the content. It is essential for individuals to independently verify and validate the information before making any decisions or taking any actions based on the articles.


