
DIY Insect Hotel: A Wholesome Project for Eco-Friendly Families
Hey there, wonderful parents and guardians! Are you on the lookout for a delightful project that combines crafting, education, and nature? Well, buzz with excitement, because building a DIY insect hotel with your kids is the perfect activity to foster their interest in the natural world while contributing to your garden’s ecosystem. Get ready to roll up your sleeves and create a cozy little abode for our six-legged friends!
Why Build an Insect Hotel?
An insect hotel is not just an adorable feature for your garden; it plays a crucial role in supporting our pollinators and beneficial insects. These wonderful structures offer shelter and nesting sites for bees, ladybugs, butterflies, and other beneficial bugs that help control pests and pollinate plants. Plus, it’s a fantastic hands-on educational tool that teaches kids about the importance of biodiversity and conservation. So let’s get started!
Materials You’ll Need
- Untreated wooden planks or pallets
- Bamboo canes or hollow stems
- Straws or reeds
- Drilled wood blocks or logs
- Pinecones, bark, and other natural materials
- Twine or wire for binding
- Screws or nails
- Hammer or screwdriver
- Optional: Non-toxic wood paint or varnish
Remember, the goal is to use natural and recycled materials as much as possible. This is not only eco-friendly but also teaches kids about sustainability and creativity with resources!
Choosing the Perfect Location
Before you start assembling, it’s essential to find the ideal spot for your insect hotel. Here’s what to consider:
- Sunlight: Choose a location that gets morning sun but is shaded from the intense afternoon heat.
- Protection: Ensure the spot is sheltered from wind and heavy rain to keep your little residents safe.
- Natural Surroundings: Place your hotel near flowering plants, shrubs, or a water source to provide easy access to food and water.
Your insect hotel should be a peaceful, welcoming haven for its tiny guests, offering everything they need to thrive just a short flight away!
Step-by-Step Guide to Building Your Insect Hotel
Step 1: Construct the Frame
First, decide the size of your insect hotel. It can be as large or as small as you like, depending on the space available. Use the untreated wooden planks or pallets to create a box frame. If using a pallet, ensure it’s clean and remove any hazardous materials like nails or splinters. Secure the corners with screws or nails, creating sturdy shelves or compartments within your frame.
Five Things Parents Should Know in Preparing for Insect Hotel DIY
Embarking on the DIY insect hotel journey is more than creating a sanctuary for bugs; it’s about imparting valuable environmental lessons to our children. Here are five key points to keep in mind to ensure a smooth experience:
- Safety First: While we’re using natural and potentially upcycled materials, it’s paramount to ensure there are no sharp edges or risky components. If you’re involving smaller kids, consider pre-cutting materials or using child-friendly tools. Always supervise the use of hammers, screwdrivers, or any other tool during the project.
- Involve Your Kids in Planning: Utilize this project as an opportunity for your children to learn about planning and design. Discuss which insects you aim to attract and research their needs together. This planning stage can also be a mini-science lesson about each bug’s role in the ecosystem.
- Responsibility in Material Selection: Teach kids the significance of being eco-conscious by selecting materials mindfully. Opt for untreated wood to steer clear of chemicals that might harm the insects. Use this moment to discuss how repurposing materials can reduce waste and help the planet.
- Learning Through Observation: An insect hotel is an ongoing, live attraction, rather than a one-off craft project. Encourage children to observe which insects visit and residence patterns, perhaps even keeping a nature diary. This not only reinforces lessons learned but also instills patience and appreciation for biodiversity.
- Community Engagement: Why not make this an extended community project? Share your experience online, or, if safe to do so, invite neighbors to contribute materials or make their own. This can be a great way to connect with others while spreading the importance of supporting local wildlife.
Equipped with these insights, you’ll be on your way to creating a bug-friendly habitat that provides endless opportunities for learning and fun!
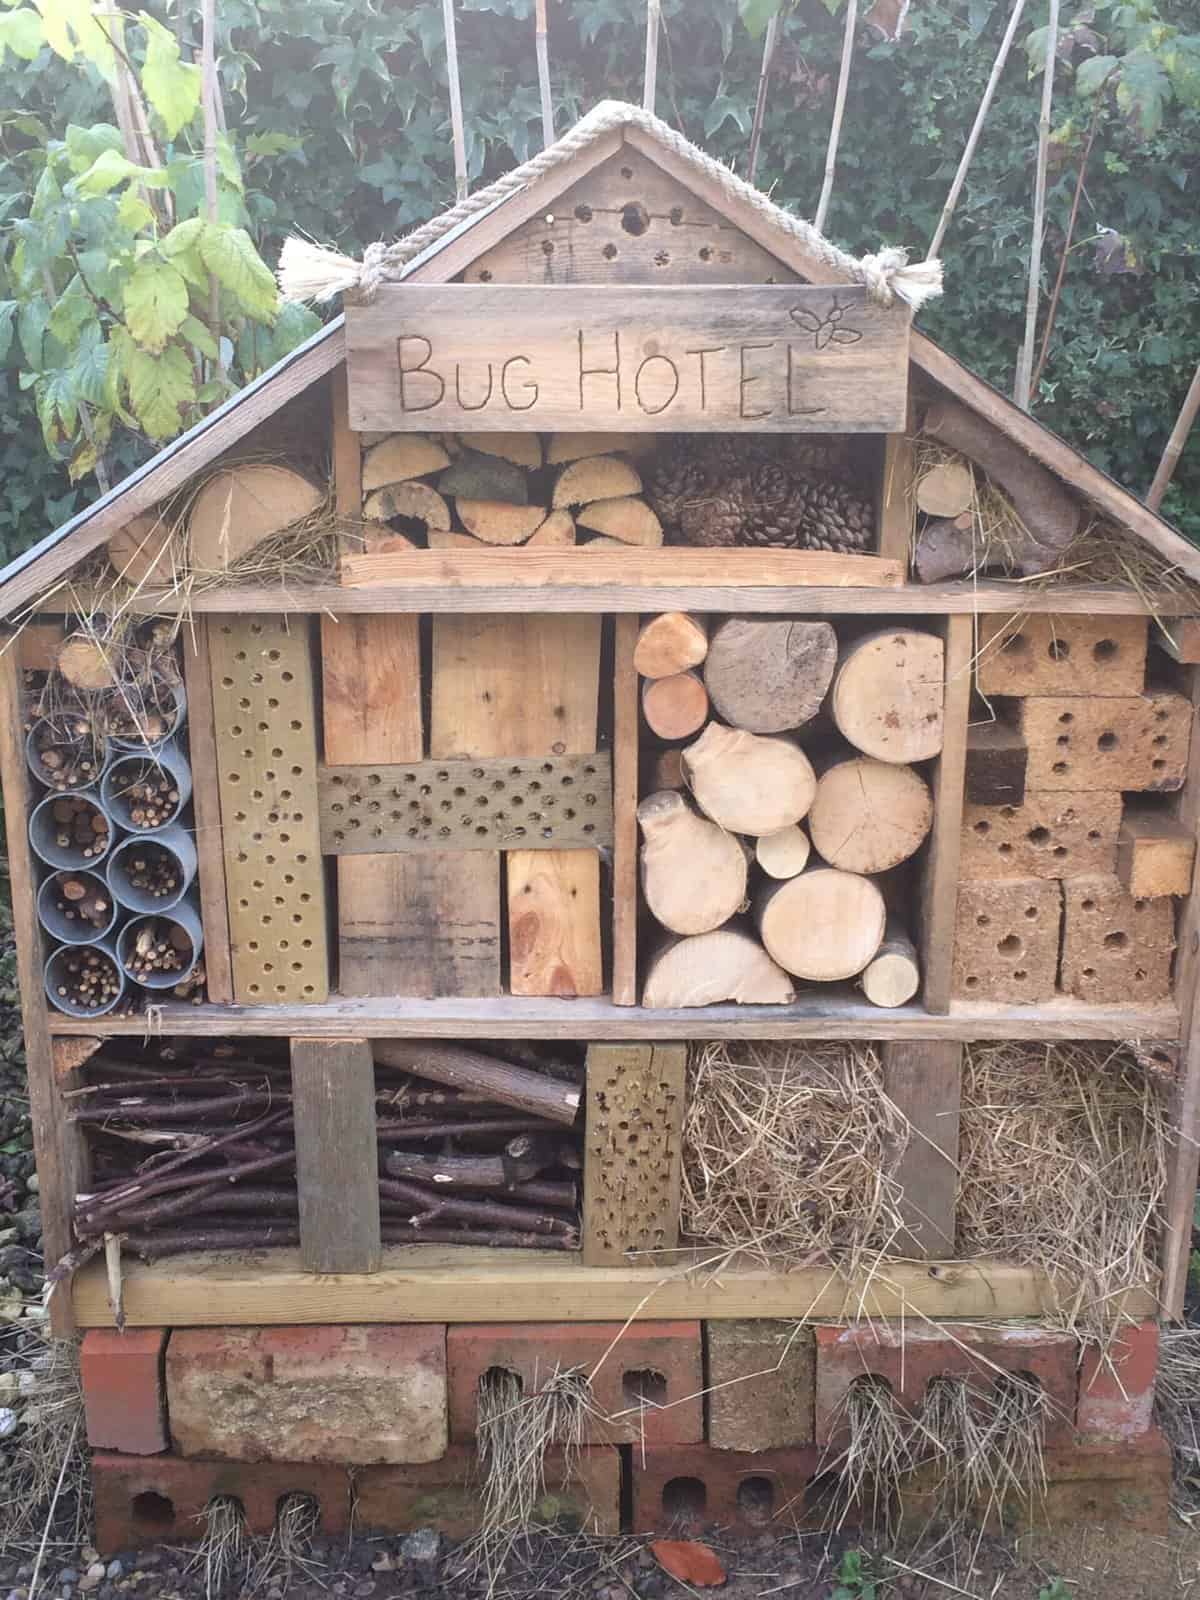
Step 2: Fill the Compartments with Natural Materials
The real allure of an insect hotel lies in its diverse and cozy compartments. Here’s a delightful way to fill up the space:
- Bamboo canes and hollow stems are perfect for solitary bees. Cut them to the frame’s depth and pack them tightly.
- Wood blocks with drilled holes mimic natural burrows for other insects. Ensure varying hole sizes to welcome different species.
- Pinecones, straw, and loose bark can fill up larger gaps and provide welcome texture and hiding spots for a variety of other beneficial bugs.
Remember to have fun with this part! Encourage your kids to get creative, arranging the materials in patterns or themes, all while teaching them about each material’s purpose and which insect it attracts.
See more great Things to Do with Kids in New Zealand here. For more information see here
Disclaimer
The articles available via our website provide general information only and we strongly urge readers to exercise caution and conduct their own thorough research and fact-checking. The information presented should not be taken as absolute truth, and, to the maximum extent permitted by law, we will not be held liable for any inaccuracies or errors in the content. It is essential for individuals to independently verify and validate the information before making any decisions or taking any actions based on the articles.


