
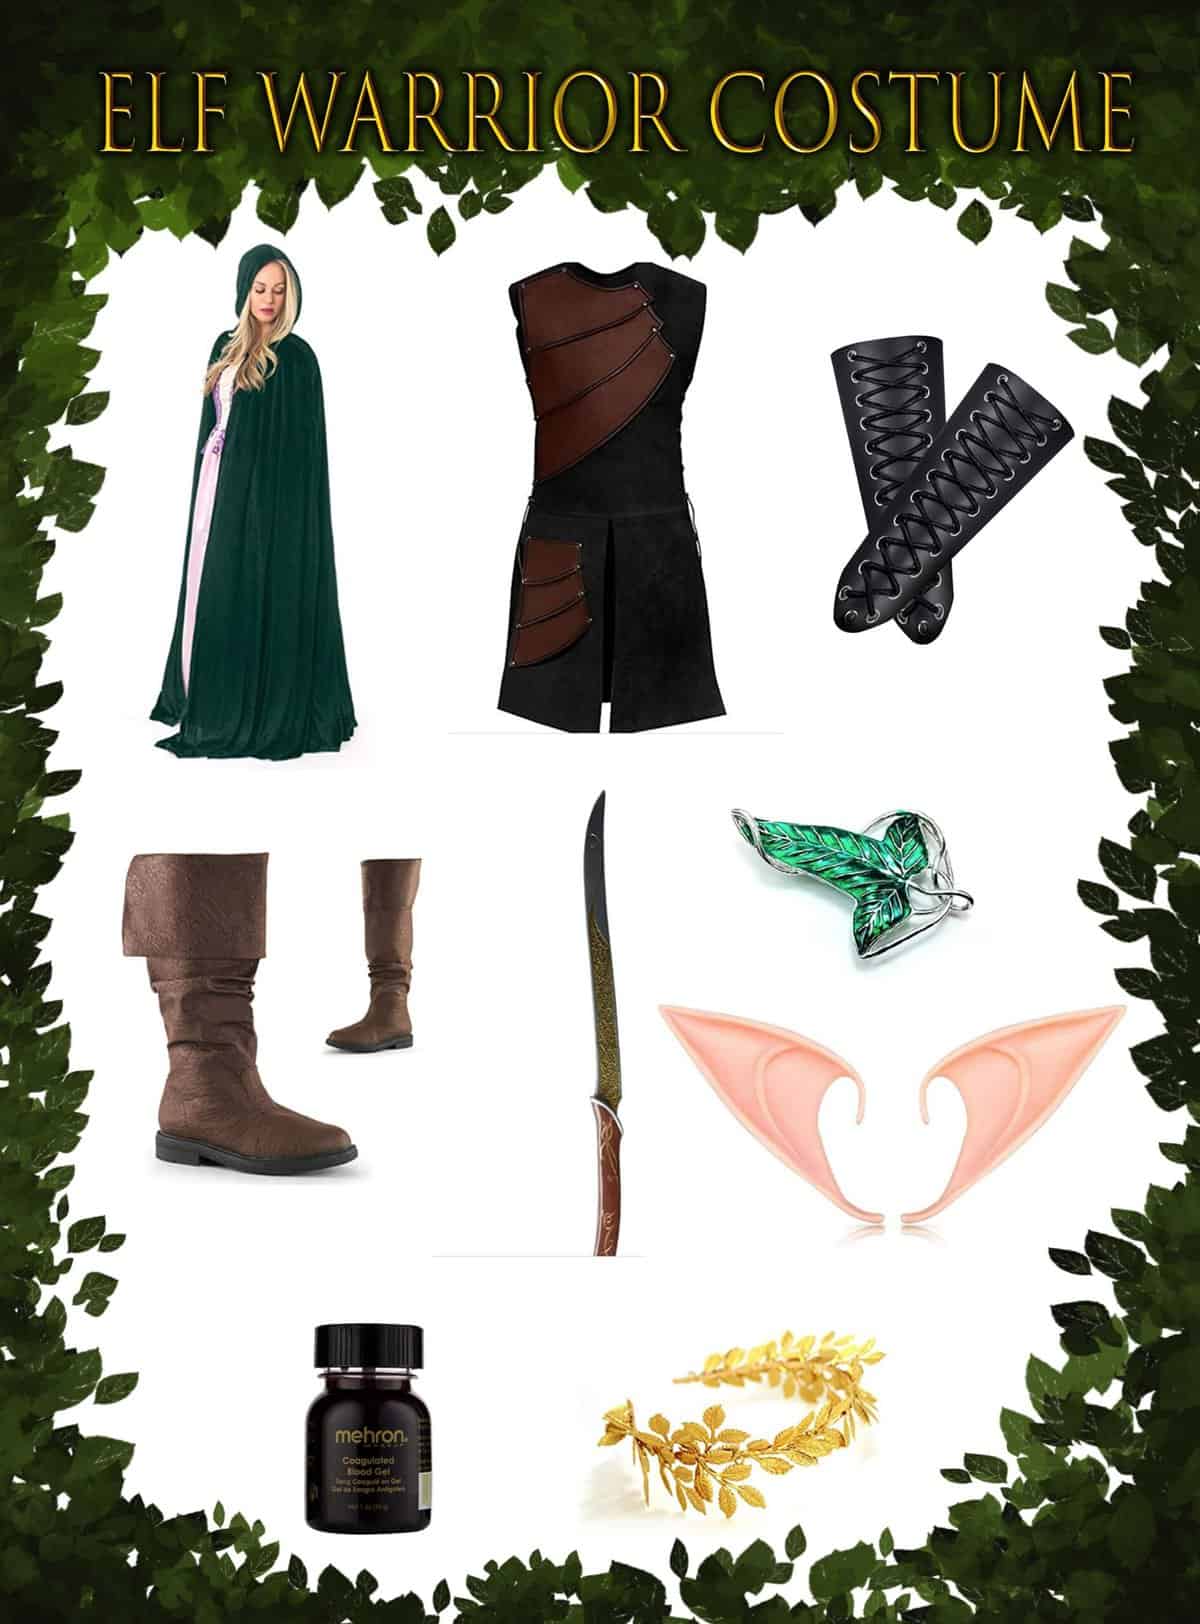
Embark on a Magical Journey with a DIY Elven Costume
Hey there, magical beings! ? Are you ready to sprinkle some enchantment into your child’s wardrobe? If the answer is a resounding “Yes!” then you’re in the right place. Whether it’s for a themed party, a school play, or just for fun, creating a DIY Elven Costume can be an exciting adventure for both you and your little one. In this guide, we’ll walk through the mystical forest of costume creation and ensure that you have everything you need to craft a costume that is as unique and special as your child!
Why Choose DIY?
Choosing to make a costume yourself comes with a plethora of perks! Not only does it allow for customizable features and a perfect fit, but it also adds a personal touch that store-bought costumes simply can’t match. Engaging in a DIY project with your child can spark creativity, encourage bonding, and provide a wonderful sense of accomplishment for you both. Let’s get started!
Gathering Your Materials
Before we dive into the mystical realm of elves, you’ll need to gather some enchanted (or at least crafty) materials:
- Fabric: Think lightweight and flowy. Fabrics like chiffon, tulle, or velveteen are perfect for capes and tunics, while felt can be used for belts and boots.
- Thread: Matching or invisible thread to seamlessly bring your pieces together.
- Needle or Sewing Machine: Depending on your comfort level with sewing, both are perfect for the task.
- Measuring Tape: Essential for ensuring your costume fits like a dream.
- Scissors: For cutting fabric and trimming any wayward threads.
- Glue Gun and Sticks: A quick fix for attaching accessories or for those who aren’t sew-savvy.
- Ribbon: Great for cinching in waists and adding decorative touches.
- Wire: To give structure to elfish ears or headpieces.
- Paints and Brushes: For those who want to add intricate designs or customize their fabrics.
- Accessories: Think about adding leaves, flowers, or sparkling gems to give a more natural, forest-inspired look.
Crafting the Core of Your Elven Attire
With the materials in hand, let’s embark on the first few steps of costume creation:
- Elven Tunic: Start by measuring your child from shoulder to desired tunic length. Add on a few centimeters for seam allowance. Cut two pieces of fabric using these measurements. Sew the sides together, leaving space for the arms. Don’t forget to hem the sleeves and bottom for a polished look!
- Belt: A belt not only adds detail but also secures the tunic. Cut a strip of felt longer than the child’s waist and add Velcro at the ends for easy fastening. Feel free to adorn it with leaf-shaped cutouts or decorative stitching.
- Trousers or Leggings: Pair the tunic with comfortable leggings or trousers in a matching or complementary color. You can add patches or fabric paint to personalize them further.
So far, so good! By now, you should have a basic tunic and trousers that are already starting to resemble an Elven outfit fit for an adventure in Middle Earth. But wait, there’s more! Accessories are next, and they’re the secret to a truly magical Elven costume.
Stay tuned as we will weave through the world of crafting the perfect pointed ears, an ethereal cape, and an elven tiara that would make even the Queen of Elves tip her crown. As fun as it is to DIY, remember the most important element of all—enjoying the process with your little elf! ?
To be continued, with our imagination as vivid as the forest, we will create something truly stunning!
5 Things Parents Should Know When Preparing for an Elven Costume DIY
Before we continue with our crafting quest, let’s cover five essential tips that every parent should keep in mind when embarking on the Elven costume journey:
1. Comfort is Key
While you want your child’s Elven costume to look magical, it’s important that they feel comfortable. If they’re going to be wearing the costume for an extended period, ensure that the fabric is breathable and the fit allows for easy movement. Avoid itchy materials, tight elastic bands, and ensure the costume is age-appropriate for your elf-in-training.
2. Planning is Magical
A little foresight goes a long way! Sketch your design ideas beforehand and involve your child in the process. This will save you time and help prevent any last-minute problems. Plus, involving your child can make them even more excited to wear the costume they helped create.
3. Time Management
Starting early is always better when it comes to DIY costumes. This gives you plenty of time to find materials, create without rushing, and make any necessary adjustments. Planning ahead also reduces stress, which means more fun for everyone!
4. Trial and Error
Accept that the first attempt may not be perfect—and that’s totally okay! Part of the fun of DIY is learning and experimenting. Use the time to teach your child about patience and perseverance. The experience is just as valuable as the final product.
5. Safety First
Prioritize safety when using tools like scissors, needles, or hot glue guns. Make sure that all crafting is age-appropriate and that younger children are supervised. It’s also wise to ensure that the costume doesn’t include small parts that could be a choking hazard.
Adding Enchantment: Accessorizing Your Elven Costume
Now, let’s turn our attention back to the costume and the elements that will elevate it to legendary status:
- Elven Ears: Using wire and flesh-colored felt, create the iconic pointed ears. Cut the felt in the shape of an elongated ear, wrap the wire around the edges to maintain the shape, and then sew it onto a thin headband that can be hidden under the child’s hair.
- Ethereal Cape: Capes add a layer of mystique and elegance. Use tulle or chiffon for a lightweight cape that flows like magic. To secure it, attach ribbons at the collar so it can be easily tied around the neck.
- Elven Tiara: Craft a tiara from wire, shaping it to fit comfortably on the head. Add leaves, gems, or flowers using a glue gun for that regal elven touch.
- Arm and Leg Wraps: Use leftover fabric or ribbon to create wraps for the arms and legs, enhancing the otherworldly look.
- Lembas Bag: No elf would roam without their trusty lembas bread. Sew a small satchel out of felt to carry treats or treasures.
Now that you’ve fashioned the perfect Elven attire, remember that the most magical part about DIY costumes lies in the shared experiences and memories you create with your child. From gathering materials to the final fitting, each step is an integral part of the enchanting adventure. With your handmade Elven costume complete, get ready to transport your little one to a land of imagination and wonder.
Embrace the journey, dear crafty parents, and let the magic of creativity lead the way! ???
See more great Things to Do with Kids in New Zealand here. For more information see here
Disclaimer
The articles available via our website provide general information only and we strongly urge readers to exercise caution and conduct their own thorough research and fact-checking. The information presented should not be taken as absolute truth, and, to the maximum extent permitted by law, we will not be held liable for any inaccuracies or errors in the content. It is essential for individuals to independently verify and validate the information before making any decisions or taking any actions based on the articles.


