
Delightful Choco Balls Recipe: A Kid-Friendly Treat for Every Occasion
Hello there, sweet-toothed families! Are you on the hunt for a scrumptious treat that’s fun to make with the kids and perfect for any occasion? Look no further than our delightful choco balls recipe! These bite-sized confections are not only delectable but also a joy to create, offering a special bonding experience with your little ones. So, let’s don your aprons, gather the ingredients, and embark on a chocolate-coated adventure!
Why Choco Balls Are the Perfect Family Project
Making choco balls with your children isn’t just about the delicious outcome— it’s about spending quality time together, learning, and creating memories that last a lifetime. This mess-friendly recipe is perfect for little hands to help with, and it can be customized to suit even the pickiest of eaters. Plus, these treats are ideal for parties, school events, or as a special dessert after a family dinner. Time to roll up your sleeves!
Ingredients to Gather
- Digestive biscuits or graham crackers – 250g (about 9 ounces)
- Unsweetened cocoa powder – 3 tablespoons
- Condensed milk – 1 can (approximately 14 ounces)
- Unsalted butter (melted) – 50g (about 3.5 tablespoons)
- Desiccated coconut or sprinkles for coating
- Optional: nuts, chocolate chips, or dried fruit for added texture and flavor
Essential Tools You’ll Need
- Large mixing bowl
- Wooden spoon or spatula
- Baking sheet or tray lined with parchment paper
- Airtight container for storage
Step-by-Step Instructions: Crafting Your Choco Balls
Get ready for some fun! Here’s how to make your very own choco balls:
- Crush the Biscuits: Begin by placing your digestive biscuits or graham crackers in a large zip-lock bag and crush them into fine crumbs using a rolling pin (perfect for letting the kids burn off some energy!). Alternatively, pulse them in a food processor for a quick and easy crumb.
- Mix the Ingredients: In your large mixing bowl, combine the biscuit crumbs with the unsweetened cocoa powder. Stir in the melted butter and condensed milk until you have a sticky, cohesive mixture. If you’re feeling adventurous, this is the perfect time to add in any optional extras like nuts or chocolate chips!
- Shape the Balls: Once the mixture is well combined, it’s time to get rolling! Using clean hands, scoop out small portions of the mixture and roll them between your palms to form balls. Aim for sizes that are just right for a one-bite treat.
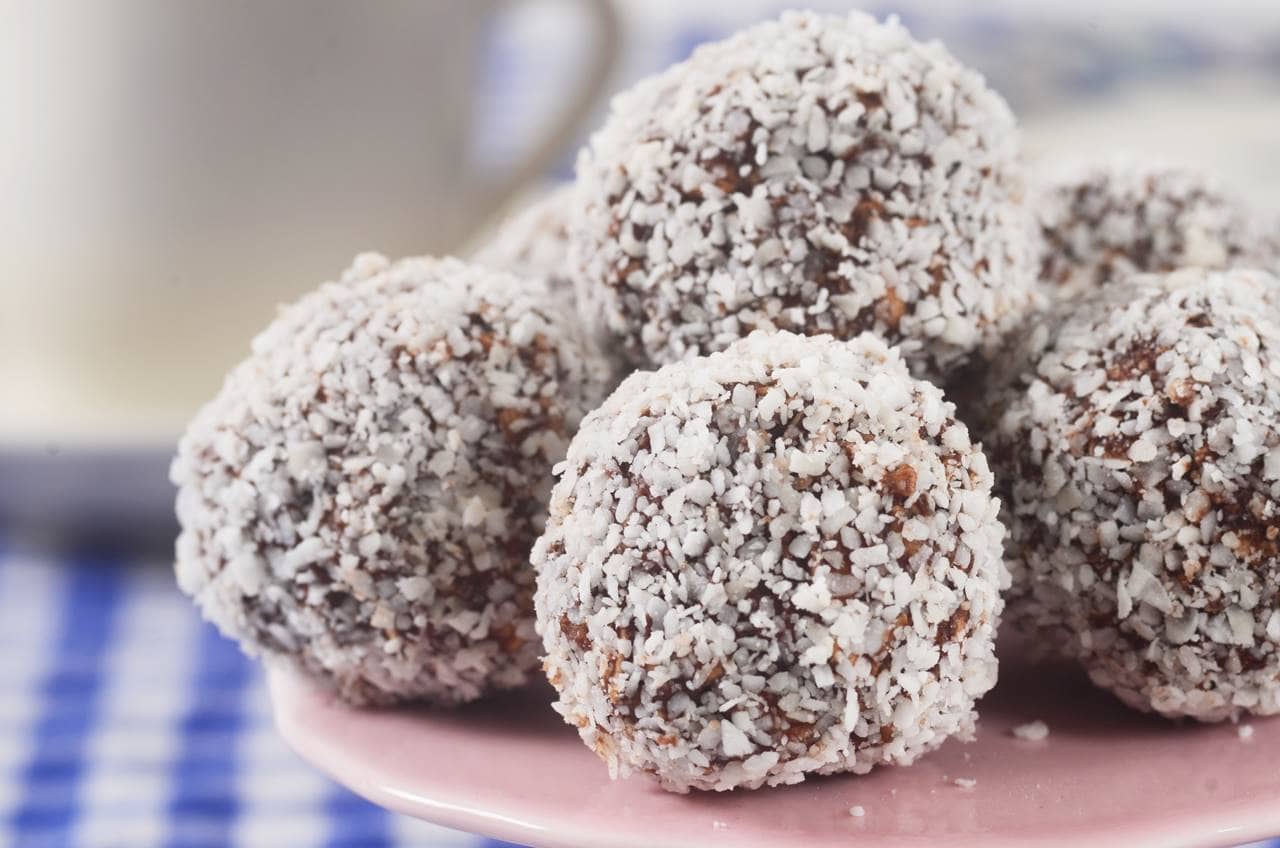
- Coat Your Creations: Roll each ball in desiccated coconut or sprinkles until fully covered. This not only adds flavor and texture but also makes for a fun, interactive step for the kiddos. Plus, they’ll look as good as they taste!
- Chill Out: Place the coated choco balls on your lined baking sheet and let them chill in the refrigerator for at least an hour. This helps them firm up and develop their flavors.
And voilà! You’ve now made your own choco balls—congratulations! Remember to store your treats in an airtight container in the fridge, ready to be enjoyed for up to a week. They make fantastic edible gifts or a handy snack for when you’re on the go.
But wait, there’s more to these delightful goodies than just the basic recipe. In the next part of our guide, we’ll explore fun variations, tips for decorating, and how to involve your kids in each step of the process for a truly entertaining kitchen experience. So, stay tuned and get ready for even more chocolatey fun!
Creating choco balls with your family isn’t just about making a snack; it’s about building lasting memories together. Whether it’s a weekend activity, a holiday treat, or simply a way to make an ordinary day a bit more special, these little bites of heaven are sure to brighten everyone’s day. Let’s continue to mix, roll, and dip our way to happiness with these irresistibly tasty choco balls!
5 Things Parents Should Know in Preparing for Choco Balls Recipe
1. Prep Work is Key
Before you start, ensure all ingredients are measured and ready to go. Engage the kids in organizing the ingredients which can be a great lesson in preparation and following directions. Always remember to start with clean hands and surfaces – health and hygiene first!
2. Safe and Inclusive
For younger children, make sure their tasks are age-appropriate. They can help with things like pouring and mixing ingredients, or rolling the choco balls in coatings. Also, consider potential allergies when choosing ingredients – you can always substitute out nuts and use allergen-free options to ensure everyone can enjoy the treats.
3. Patience with the Process
Working with children can be unpredictable, so embrace a little mess and a slower pace. Remember that the goal is creating a fun experience rather than perfection. Your choco balls might not all be the exact same size, and that’s perfectly okay!
4. Chill Out with Choco Balls
Chilling the balls properly is crucial for getting the right texture. Don’t skip this step no matter how eager your little helpers are to taste their creations. Patience is a virtue, as they say, and a chilled treat is the reward!
5. Storage and Serving
Choco balls are a great make-ahead treat. Store them in an airtight container in the refrigerator to maintain freshness. They’re not only a neat treat to have on hand for kids but also a charming addition to any party or gathering. Plus, they can double as a neat, no-fuss dessert when unexpected guests drop by!
Fun Variations to Try
Now that you’ve mastered the basic choco balls recipe, why not get creative? Try different coatings like crushed nuts, mini marshmallows, or even a dusting of powdered sugar for a snowball effect. Mix-ins can also vary – think pieces of candy cane for a peppermint twist, or swirls of caramel for extra decadence. The possibilities are virtually endless and entirely delicious! Exploring these options can be a fantastic taste test activity with the family – jot down your favorites for next time!
Tips for Decorating Choco Balls
Let your imagination run wild with decorating! Use piping bags filled with melted chocolate to drizzle artistic designs over the choco balls, or create characters with icing and candy pieces. This is an excellent avenue for kids to express their creativity and develop fine motor skills. Plus, it’s just plain fun to see what adorable creations they come up with. Just remember, melted chocolate can be warm, so oversee this step for safety.
With these tips and tricks, your journey to making the perfect choco balls should be a breeze. Kids will love the hands-on experience, and parents will appreciate the simplicity and versatility of the recipe. Whether you’re making choco balls for a special occasion or just for a cozy day in, this guide is designed to ensure the process is as sweet and enjoyable as the treat itself. So, have a blast mixing, rolling, and dipping your way to chocolate bliss!
For more great articles please see here. For more information see here
Disclaimer
The articles available via our website provide general information only and we strongly urge readers to exercise caution and conduct their own thorough research and fact-checking. The information presented should not be taken as absolute truth, and, to the maximum extent permitted by law, we will not be held liable for any inaccuracies or errors in the content. It is essential for individuals to independently verify and validate the information before making any decisions or taking any actions based on the articles.


