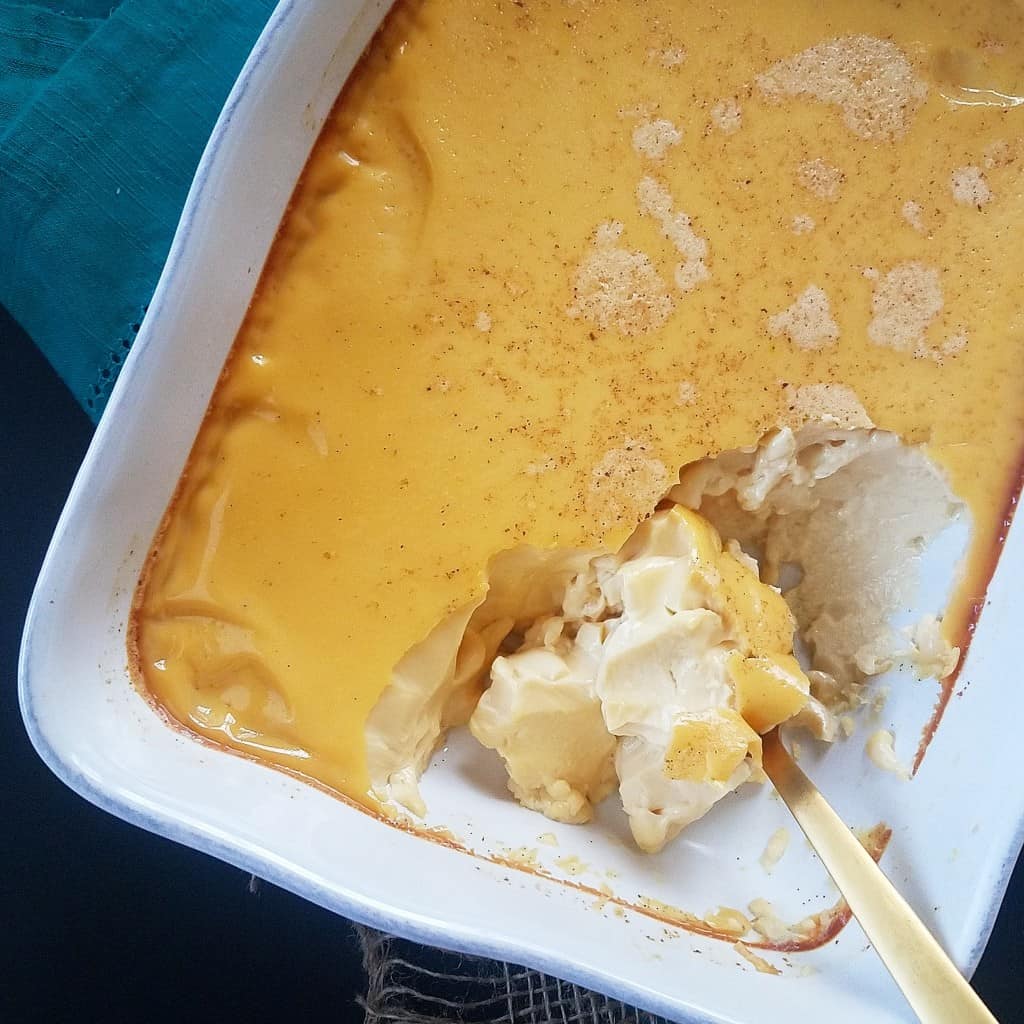
Wholesome & Creamy Baked Custard: A Family Favorite Dessert
Welcome to your go-to guide for creating the smoothest, creamiest baked custard that’s bound to become a staple in your family’s dessert repertoire. Not only is baked custard a heartwarming treat that evokes nostalgia, but it’s also incredibly versatile, serving as the perfect ending to any meal. Before we dive into the step-by-step instructions, let’s talk about why baked custard deserves a spot on your dessert menu!
Why Choose Baked Custard for Your Family?
Baked custard is not just a dessert; it’s a warm hug served in a ramekin. With a handful of simple ingredients and minimal prep time, you can whip up a dessert that feels both sophisticated and homey. Here’s why it’s perfect for families:
- Minimal Ingredients: You likely have everything you need right in your pantry and fridge.
- Dietary Accommodating: It’s easily adaptable for lactose intolerance and different kinds of diets.
- Kid-Friendly: Its smooth texture and sweet flavor are a hit with the younger crowd.
- Learning Opportunity: Baking custard is a perfect way to teach kids basic kitchen skills.
Gathering Your Ingredients
Here’s what you’ll need for your custard base:
- Milk – Whole milk is traditionally used for that creamy texture, but you can use lower fat or non-dairy alternatives if preferred.
- Eggs – The key ingredient for setting your custard. Fresh, room-temperature eggs are ideal.
- Sugar – Just the right amount to sweeten your custard without overpowering its delicate flavor.
- Vanilla Extract – For that classic custard aroma and depth of flavor.
- Salt – A pinch to balance the sweetness and enhance the other flavors.
- Nutmeg (optional) – A light sprinkling on top adds warmth and a hint of spice.
Note: Be sure to check for potential allergies and dietary restrictions before choosing your ingredients. The versatility of this custard recipe means it’s simple to substitute where necessary without compromising on taste!
Ready, Set, Bake!
Now that you have your ingredients, let’s get started on making that delightful baked custard. But first, preheat your oven to 350°F (175°C) and set a kettle of water to boil. This is for the water bath, which ensures your custard bakes gently and evenly. Here’s a sneak peek of the process:
- Prep Your Ramekins: Lightly grease the ramekins and place them in a deep baking dish.
- Mix it Up: Combine your milk, sugar, eggs, vanilla extract, and salt in a large bowl until well blended but not too frothy.
- Strain for Smoothness: To achieve a supremely silky texture, it’s advisable to strain the mixture.
- Pour and Sprinkle: Fill the ramekins with the custard mixture and sprinkle with nutmeg if using.
Stay tuned as we walk you through these steps in more detail, ensuring your custard-making adventure is a stress-free and enjoyable experience. We’ll also provide some pro tips and answer common questions to ensure your success. Let’s make a dessert that will have your family asking for seconds – read on to create the ultimate baked custard at home!

5 Essential Tips for Parents Preparing Baked Custard
As you embark on this sweet journey with your little ones, here are five golden nuggets of wisdom to keep in mind:
1. Safety First: Supervise the Little Chefs
While cooking with your children is a wonderful bonding experience, safety is paramount. Always supervise them, especially when handling hot ingredients or when using the oven and stovetop. Equip them with age-appropriate tasks and use this time to educate them on kitchen safety.
2. Customize to Your Liking
Baked custard is forgiving and can be personalized. Whether it’s swapping dairy milk for almond milk or adding a dash of cinnamon, encourage your kids to get creative. This doesn’t just make the dessert special; it makes it uniquely theirs.
3. Temperature Matters
For a custard that’s the epitome of perfection, pay attention to the temperature of your ingredients. Room-temperature eggs blend more smoothly with the milk and sugar, preventing any lumps. And don’t forget, a warm (not boiling) milk mixture will mix better with the eggs without cooking them prematurely.
4. The Art of Baking: The Water Bath Technique
The water bath is a step you shouldn’t skip. It moderates the baking temperature, ensuring that the custard bakes evenly and stays silky. Explain the science behind this technique to pique your children’s interest and make them mini-experts on custard!
5. Patience Pays Off: The Chill Factor
A custard rushed is a custard ruined. Once baked, let it cool slowly, and then chill it in the refrigerator. This not only makes for a better texture but also enhances the flavors. Use this waiting period to discuss the importance of patience—good things, indeed, come to those who wait!
With these tips under your belt, you are well on your way to not just making a dessert, but creating lasting memories in the kitchen with your family. As a helpful SEO content writer, here’s to your delicious success with this creamy, dreamy custard!
Time to Dive Into the Detailed Baking Process
Are you ready to embrace the art of custard making? There’s no need to be intimidated! We’re going to make this as smooth as your soon-to-be custard. All these steps are designed to guide you through a foolproof process that guarantees joy in both making and tasting.
Step 1: Preparing Your Equipment
It all starts with prepping your ramekins and heating the oven and water for your bath. This step teaches your kids the importance of preparation.
Step 2: Mix the Ingredients
Mix with a whisk or fork – no electric mixers necessary here! Doing it by hand helps prevent overmixing, which can introduce too much air and affect the density of your custard.
Step 3: Strain for Perfection
Straining might seem like an extra step, but it’s the secret to that restaurant-quality texture. Plus, it’s a fun little task the kids can take pride in.
Step 4: Baking with Science
Once your ramekins are filled, it’s time to place them in the baking dish and gently pour the hot water around them. Explain to the young ones how steam helps cook the custard gently, preventing any cracks or curdling!
Frequently Asked Questions
Before moving on to the pleasures of tasting your creation, let’s address a couple of the most common questions that may arise:
Can I Make Baked Custard in Advance?
Absolutely! Baked custard can be made a day ahead, making it a convenient option for busy parents. Plus, chilling it overnight can result in even better flavor and texture.
How Do I Know When the Custard is Ready?
This is where teaching kids to bake becomes a little lesson in patience and observation. The custard is done when it’s mostly set but still slightly wobbly in the center. It will continue to firm up as it cools.
For more great articles please see here. For more information see here
Disclaimer
The articles available via our website provide general information only and we strongly urge readers to exercise caution and conduct their own thorough research and fact-checking. The information presented should not be taken as absolute truth, and, to the maximum extent permitted by law, we will not be held liable for any inaccuracies or errors in the content. It is essential for individuals to independently verify and validate the information before making any decisions or taking any actions based on the articles.


