
Cheese Scone Heaven: A Kiwi Treat the Whole Family Can Bake!
Welcome to a cheesy adventure, dear parents and kiddos! Our guide is sprinkled with tips and fun to help you craft the most scrumptious Cheese Scones, straight out of a New Zealand kitchen! ??
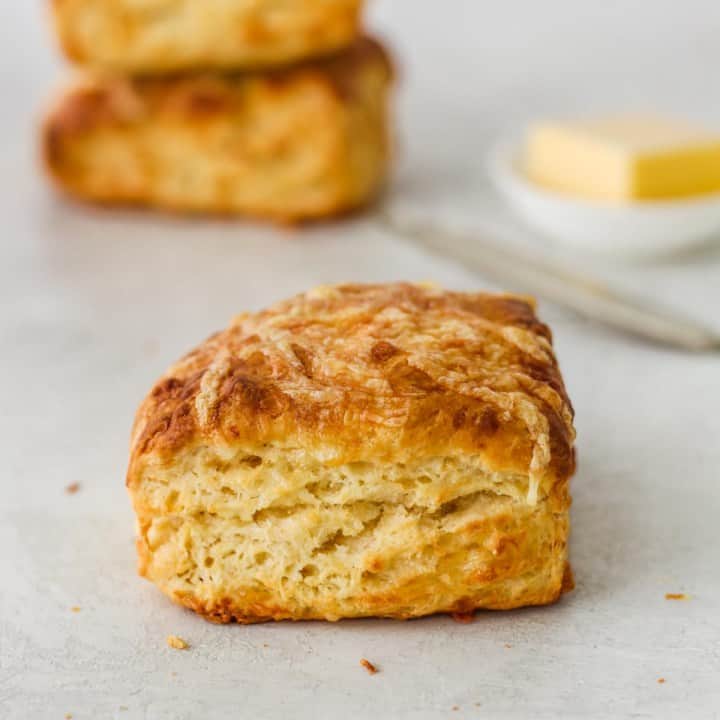
What Makes New Zealand Cheese Scones So Special?
Oh, the humble cheese scone – it’s a staple in New Zealand cafes and homes, known for its rich, buttery flavour and delightfully crumbly texture. What’s their secret? The simple, yet hearty ingredients that come together to create a comfort food that’s perfect for any occasion – be it a cozy family breakfast or an addition to the little one’s lunchbox. Let’s dive into the cheesy goodness that is the Kiwi cheese scone!
The Ingredients You’ll Need
Gather your little helpers and let’s go through what you’ll need from your pantry to whip up these delightful bites:
- Self-raising flour – The base for the airy texture
- Salt – Just a pinch to balance the flavours
- Cold butter – For that irresistible flaky crumb
- Shredded strong cheese – The star of the show!
- Milk or buttermilk – To bind it all together
- A sprinkle of joy – The most important ingredient!
We’ll share our special family recipe with exact measurements and step-by-step instructions further down, so keep reading!
Why Cheese Scones Are a Family Baking Winner
Cheese scones are not just tasty, they’re also fabulously fun for baking with the family. From rubbing the butter into the flour (perfect for little fingers to get messy) to sprinkling cheese like fairy dust, each step is an opportunity to teach your children about measuring, mixing, and the joy of creating something from scratch. It’s a warm, bonding experience that ends with a delicious treat – what more could you want?
Get the Kids Involved
Every child is a budding chef with their own sprinkle of imagination. Why not let them pick their favourite type of cheese or add some herbs for a touch of green? Maybe they’d like to shape the scones into funny faces or animals? The possibilities for creativity are endless!
5 Things Parents Should Know When Preparing Cheese Scones
Before you embark on this yummy journey, there are a few tips you should keep in mind:
- Choose the Right Cheese: When it comes to the type of cheese for your scones, not all are created equal. A strong cheddar, aged gouda or a tasty Colby can make a world of difference. These types of cheese not only melt well but also impart a rich flavour to the scones. Encourage the kids to taste different cheeses and pick their favourites – you might end up with a new family specialty!
- Cold Butter is Key: To achieve those flaky layers and tender crumb, the butter needs to be cold. Consider freezing it for a bit before grating it into the flour. This makes it easier to incorporate, and the little shards of butter will melt as they bake, creating pockets of air that are critical for that classic texture.
- Mess is Part of the Fun: Baking with children can (and will!) get messy. Flour might flutter onto the floor, and cheese will scatter, but that’s all part of the experience. Wear aprons, set up your space with easy-to-clean surfaces, and enjoy the process. Baking should be fun, not fretful!
- Don’t Overwork the Dough: It’s tempting to knead the dough until it’s completely smooth, but with scones, less is more. Teach your kids to mix the dough just until it comes together to keep the scones from getting tough. Press the dough out gently and use fun cookie cutter shapes to entice them into the magic of baking!
- Bake Immediately: Once your scones are shaped and ready, get them into the oven straight away. Letting the dough sit can affect their ability to rise. This is a great opportunity to discuss with the kids how baking powder works and the science behind these delicious treats!
A Taste of Home: The Ultimate Cheese Scone Recipe
And now, the moment you’ve been waiting for: our treasured family recipe. Follow these steps for cheese scone perfection:
Ingredients:
- 2 cups self-raising flour
- 1/2 teaspoon salt
- 50g cold butter, cubed or grated
- 1 cup shredded strong cheese, plus extra for topping
- 3/4 cup milk or buttermilk
Instructions:
- Preheat your oven to 220°C (428°F) and line a baking sheet with parchment paper.
- In a large mixing bowl, sift together the self-raising flour and salt. Add the cold butter and use your fingertips to rub it into the flour until the mixture resembles fine breadcrumbs.
- Stir in the shredded cheese, saving a small amount for topping the scones later.
- Make a well in the center of the flour mixture and pour in the milk or buttermilk. Using a butter knife, mix everything together with a cutting motion until a dough forms.
- Turn the dough out onto a lightly floured surface and gently press it out to about 2cm thickness.
- Use a round cookie cutter to cut out scones. Place them on your prepared baking sheet, barely touching each other.
- Brush the tops with a little milk and sprinkle with the reserved cheese.
- Bake for 12-15 minutes, or until the scones are golden brown and sound hollow when tapped.
- Let them cool slightly on a wire rack before serving warm, with a side of butter, jam, or even more cheese!
There you have it, folks! A classic Kiwi cheese scone that’s bound to become a household favourite. Now, roll up those sleeves, get the family together, and bake your hearts out. We promise, these scones are worth every crumbly, cheesy bite!
After the Bake: Storing and Enjoying Your Scones
While cheese scones are best eaten fresh, here are a few tips for keeping them scrumptious for days to come:
- Once completely cooled, store your scones in an airtight container at room temperature. They’ll stay fresh for up to two days.
- If you’ve made a larger batch, you can freeze the scones. Just wrap them individually in cling film and pop them into a freezer bag. They’ll keep for up to a month.
- To reheat, thaw (if frozen) and place them in a preheated oven at 150°C (302°F) for a few minutes to warm through.
See more great Things to Do with Kids in New Zealand here. For more information see here
Disclaimer
The articles available via our website provide general information only and we strongly urge readers to exercise caution and conduct their own thorough research and fact-checking. The information presented should not be taken as absolute truth, and, to the maximum extent permitted by law, we will not be held liable for any inaccuracies or errors in the content. It is essential for individuals to independently verify and validate the information before making any decisions or taking any actions based on the articles.


