
Whip Up the Perfect Apricot Jam with this Family-Friendly Guide!
Unveiling the Joy of Homemade Apricot Jam
Hello, dear parents and jam enthusiasts! Are you ready to fill your home with the sweet, tangy aroma of fresh apricot jam? Today, we’ve got a delightful treat for you — a guide so simple and comprehensive, even the busiest bees in the parenting hive can buzz their way to jam perfection. Let’s embark on this delicious journey together, shall we?
Why Choose Apricots for Your Homemade Jam?
Apricots shine like little golden orbs packed with a bounty of health benefits and flavors. They are not only rich in vitamins and minerals, but their naturally sweet taste and velvet-like texture make them the ideal candidate for an unforgettable jam experience. Here’s why apricot jam will become your family’s new favorite spread:
- Natural Sweetness: Apricots have a delectable sweetness that minimizes the need for additional sugars.
- Health Benefits: Bursting with nutrients, apricots are wonderful for boosting eye health and providing plenty of dietary fiber.
- Texture: When cooked down, apricots offer a smooth, spreadable texture perfect for toast, pastries, and more.
Choosing the Right Apricots for Jam-Making
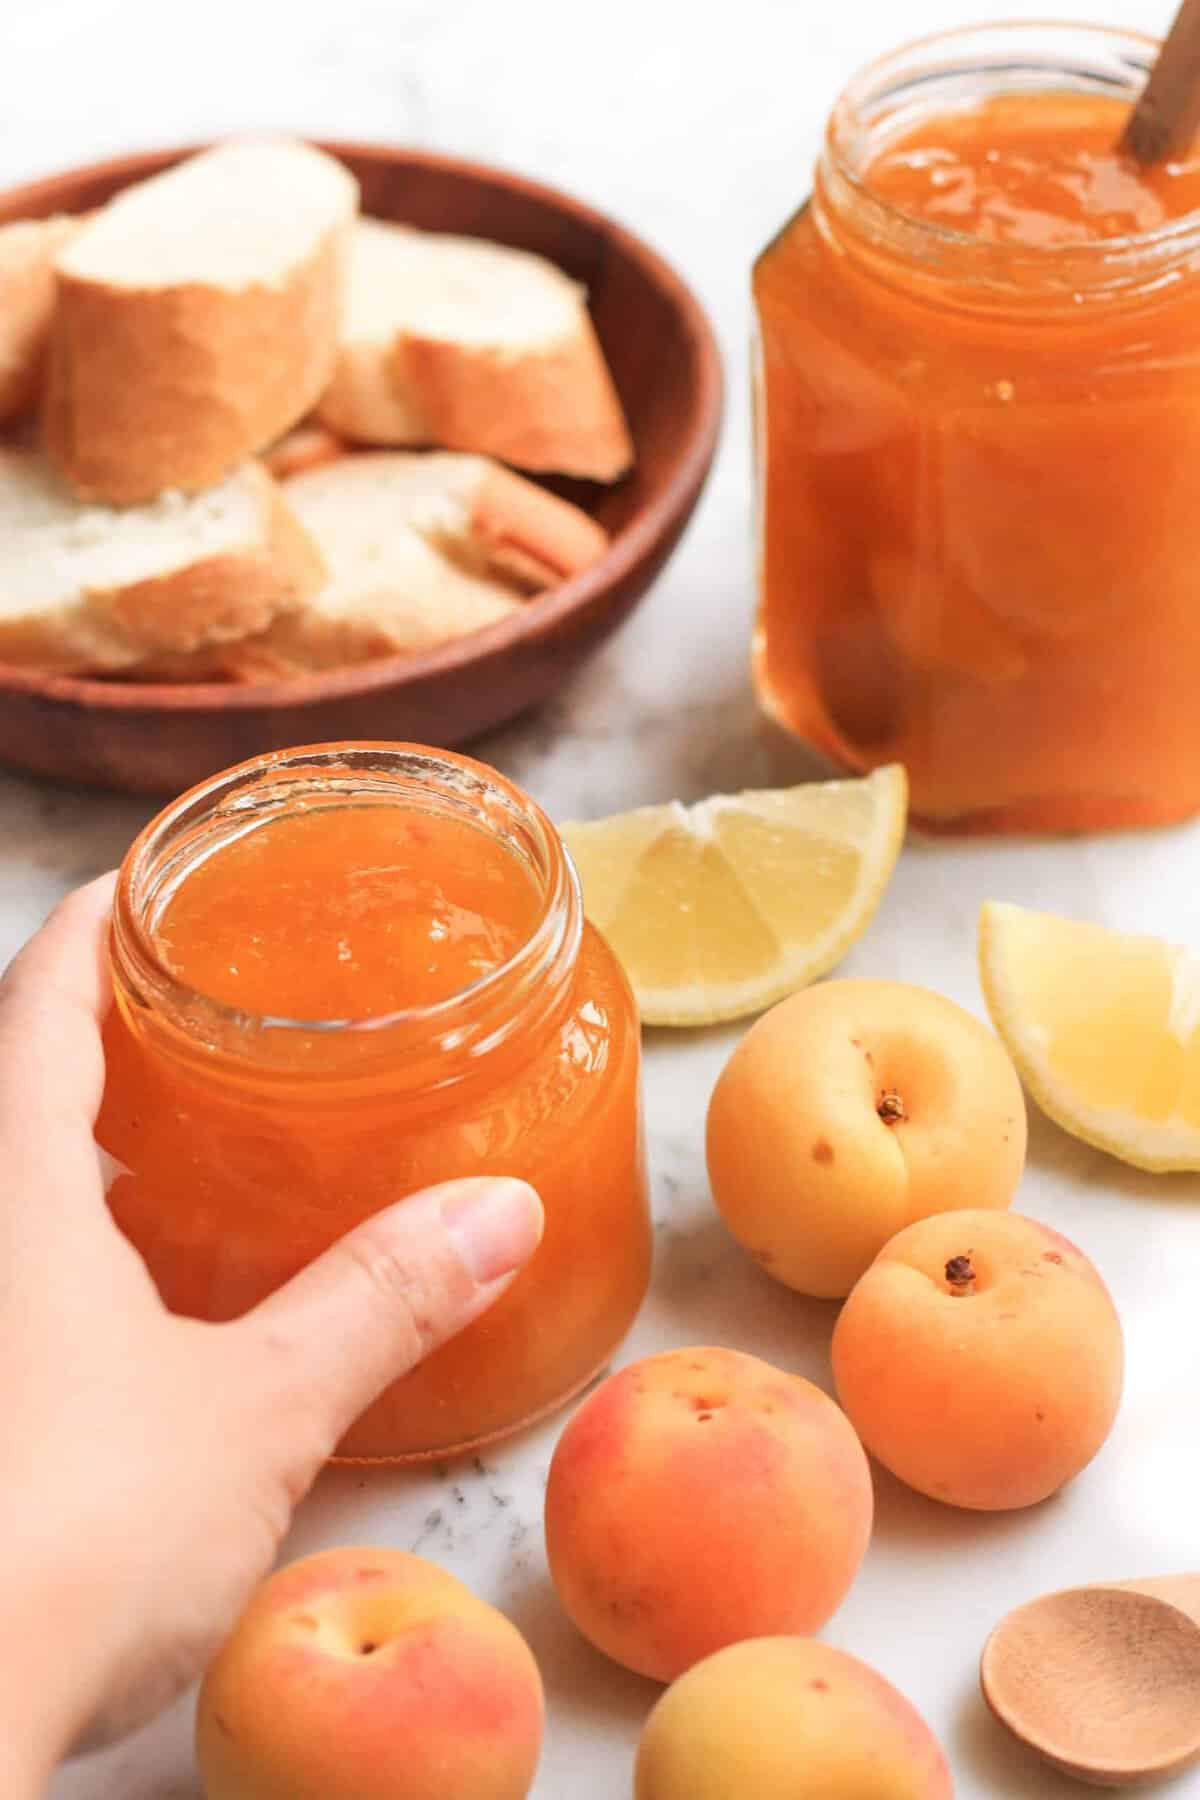
For the most luscious jam, selecting the right apricots is crucial. You’ll want to look for ripe, but not overly soft, apricots that give just slightly under pressure. The aroma should be sweet and the color, a bright, sunny orange. Remember, the better the fruit, the tastier your jam!
The Quintessential Family Apricot Jam Recipe
Now, let’s dive into the heart of our guide — crafting your very own apricot jam. Gather the kids around and turn this into a fun family activity. Here’s what you’ll need:
Ingredients:
- 1kg fresh apricots, halved and pitted
- 750g granulated sugar
- Juice of 1 large lemon
- 1/2 cup water (optional, depending on the juiciness of your fruit)
Equipment:
- Large, heavy-bottomed pot
- Wooden spoon
- Ladle
- Jam jars with lids
- Canning funnel (optional)
Step-by-Step Journey to Apricot Jam Bliss
Feeling excited? Your jam-making adventure is about to begin! Follow these simple steps and soon you’ll have jars of golden goodness to enjoy and share:
- Prep Your Jars: Make sure your jam jars and lids are thoroughly cleaned and sterilized. Boil them in water for 10 minutes or use your dishwasher’s sterilize setting if available.
- Combine Ingredients: In your large pot, toss in the halved apricots, sugar, and lemon juice. Gently stir to combine and let the mixture sit for about 20 minutes to let the apricots release their natural pectins and juices.
- Cook the Jam: Bring the mixture to a boil over medium heat. As it starts to bubble, reduce the heat to a simmer. Stir occasionally to prevent sticking.
- Monitor the Cooking Process: As the jam thickens, regularly check on it, stirring more frequently to ensure even cooking and to retain the perfect consistency.
- Test for Doneness: To check if your jam is ready, place a small amount on a cold plate. If it wrinkles when you push it with your finger, it’s set.
- Bottle Up: Carefully ladle the hot jam into your prepared jars, using a canning funnel if you have one to prevent messy spills. Leave a small space at the top, then seal the jars while still hot.
Common Questions Answered for Apricot Jam Rookies
Got questions? We’ve got answers! Here’s a quick FAQ to help ensure your jam-making process is as smooth as apricot puree:
- Do I need to add pectin to my apricot jam?
- Apricots naturally contain pectin, especially in their skins, so additional pectin is not strictly necessary for your jam to set. However, if you’re after a firmer set, feel free to add a little pectin according to package instructions.
- How long does homemade apricot jam last?
- Properly sealed and stored in a cool, dark place, homemade apricot jam can last for up to a year. Once opened, keep it refrigerated and enjoy it within a month for maximum freshness and flavor.
- Can I reduce the sugar in this recipe?
- While sugar helps preserve the jam and aids in the setting process, you can experiment with reducing the quantity if desired. Just be mindful that this may alter the texture and shelf-life of your jam.
Whip Up the Perfect Apricot Jam with this Family-Friendly Guide!
Welcome to the World of Homemade Apricot Delights
Gather around, kitchen adventurers! Today’s mission is deliciously sweet: we’re making homemade apricot jam. This family-oriented activity isn’t just about creating a yummy spread—it’s a chance to make memories with every stir, sniff, and taste! So, pull up your sleeves, because we’re about to get jammin’!
5 Things Parents Should Know Before Preparing Apricot Jam
Before diving into the jam-making process, let’s skim through a few ‘sweet’ tips that will have you prepped and ready for apricot action!
- Preparing Your Apricots is Key: Wash and dry the apricots thoroughly. A little sunshine on their skins adds natural pectin, which helps your jam set without the need for extra additives.
- Safety First: Always supervise the kids, especially during the cooking and bottling stages. Handling hot pots and jars requires a grown-up’s touch.
- Quality Ingredients Make a Difference: Choosing organic apricots and sugar can amplify the flavor of your jam while keeping it healthier for the family.
- Keep It Fun and Educational: Engage the little ones by explaining what pectin is or how sugar preserves the fruit. It’s a jam session and science class rolled into one!
- Patiently Perfecting the Texture: Don’t rush the cooking process. A well-set jam is a matter of patience and precision. Besides, the anticipation makes the first taste even more heavenly!
Prepping the Perfect Batch
Being well-prepared is half the battle won. So, what should you gather around the kitchen island before you start?
What You’ll Need:
- Fresh apricots – As ripe as a sunny afternoon, but not too mushy.
- Granulated sugar – The sweet companion to your succulent apricots.
- Lemon juice – A splash of citrus to compliment the apricot’s flavor and assist with setting.
- Water – Just a bit, to get things going in the pot if your apricots are on the drier side.
Tools of the Trade:
- A sturdy pot – No scorching allowed! A thick base is your friend here.
- Something to stir – A wooden spoon being the classic choice.
- The ladle – For transferring your jam into jars with heroic grace.
- Trusty jars – Sterilized and prepped for their sweet contents.
- A funnel – Because neatness counts (and it’s so much easier!)
Let’s Make Jam: A Flavorful Journey
And we’re off! The apricots are prepped, the sugar is measured, the excitement palpable. Follow these steps and you’ll soon be the proud creator of apricot jam so good, you’ll have neighbors knocking for a taste!
Step by Jovial Step:
- The Prep: Sterilize those jars. A good, scalding bath or a trip through the dishwasher should do the trick.
- The Mix: Fruit, sugar, lemon — in the pot, they go. Let them get cozy for a bit, releasing the pectin and melding the flavors.
- The Cook-Off: Heat things up with a boil, then dial it down to a simmer. Your patience is tested, but oh, it will be rewarded.
- Keep an Eye Out: Frequent stirring is your jam’s best friend as it thickens into that glistening spread.
- The Test: The wrinkle test never lies. If your dollop on the cold plate behaves, it’s ready to jar.
- Bottling the Magic: Into the jars, the jam goes, hot and tempting. Seal them up and bathe in the glory of your creation.
Apricot Jam FAQs for First-Timers
Never fear! Every question has its answer, and we’ve gathered the most common wonderings right here:
- Do I need to add pectin to my apricot jam?
- No need if your apricots are properly prepped with a bit of skin for that naturally occurring pectin.
- How long does homemade apricot jam last?
- In the dark and cool confines of your pantry, up to a year; once opened and refrigerated, keep it tasty for about a month.
- Can I reduce the sugar in this recipe?
- Sure, you can trim the sweet stuff, but it might make your jam a little looser and its shelf life a tad shorter.
For more great articles please see here. For more information see here
Disclaimer
The articles available via our website provide general information only and we strongly urge readers to exercise caution and conduct their own thorough research and fact-checking. The information presented should not be taken as absolute truth, and, to the maximum extent permitted by law, we will not be held liable for any inaccuracies or errors in the content. It is essential for individuals to independently verify and validate the information before making any decisions or taking any actions based on the articles.


