
Kid-Friendly Rum Balls Recipe: A Sweet Delight for the Whole Family!
Hey there, awesome parents! Get ready to don your aprons because we’re going on a delightful kitchen journey to craft some scrumptious Rum Balls that are totally kid-friendly. That’s right – we’ve tweaked the traditional rum balls recipe to make it perfect for the little ones to enjoy too! So, gather around your tiny sous chefs, it’s time to mix, roll, and create some sweet, chocolatey magic!
Introduction to Rum Balls
Historically, rum balls are a festive treat, often enjoyed during holiday seasons and special occasions. But why wait for an invitation when we can bring the celebration home any day? Now, before we dive into our kid-safe recipe, let’s address a common question: What exactly are rum balls? Rum Balls are typically no-bake confections that combine crushed cookies or cake with chocolate and rum (which we’ll be substituting, stay tuned!). Then, these delightful morsels are rolled into balls and coated with various toppings. Our version is equally tantalizing – without the liquor!
What Makes This Rum Balls Recipe Special?
- Fuss-Free Fun: No oven required! These treats are as fun to make as they are to eat, and the little ones can join in the process.
- Alcohol-Free Twist: We’ve skipped the traditional rum and opted for a non-alcoholic alternative that still packs plenty of flavors.
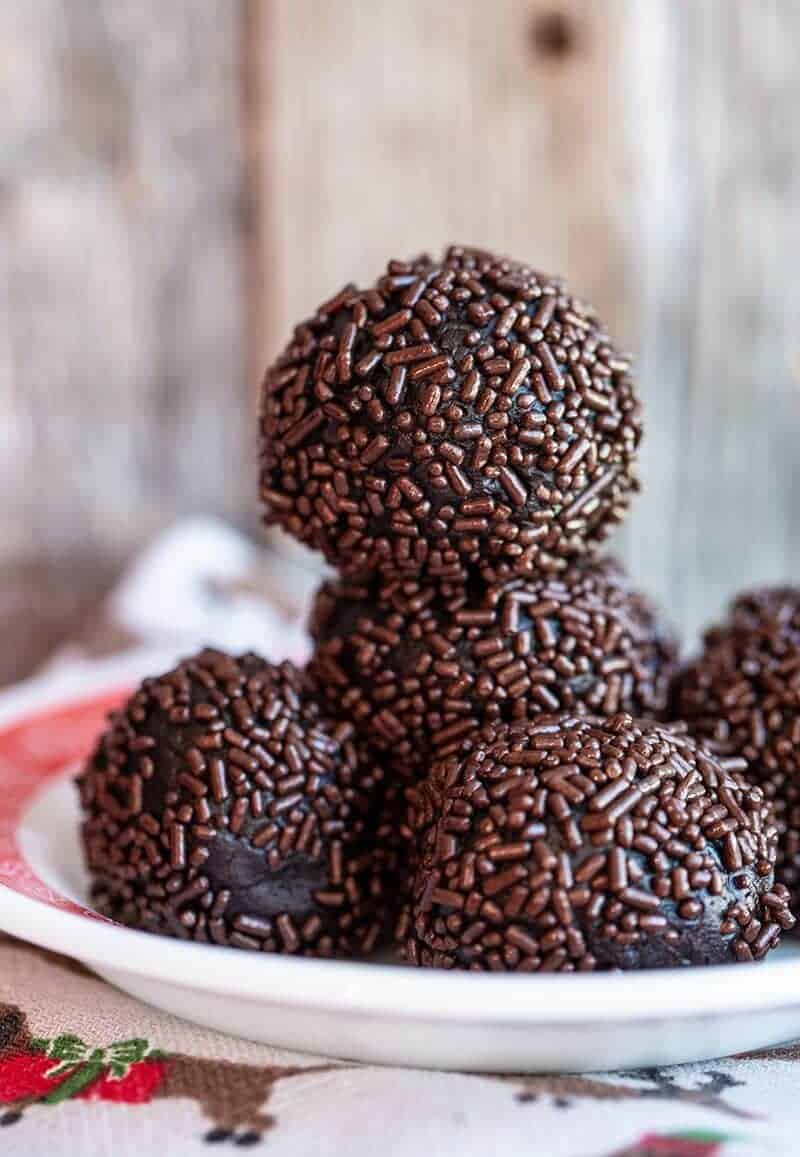
- Customizable: Encourage your kids’ creativity by letting them choose their favorite coatings and mix-ins.
Ingredients for Kid-Friendly Rum Balls
Before we start, let’s make sure we have all our ingredients ready:
- Digestive biscuits or Graham crackers: These form the base of our rum balls, offering a rich, crumbly texture.
- Unsweetened cocoa powder: For that irresistible chocolatey goodness that everyone loves.
- Sweetened condensed milk: This will be our binding agent and add a lovely sweetness to the recipe.
- Rum extract: This gives our rum balls that distinct flavor minus the alcohol content.
- Coatings of your choice: Think sprinkles, coconut flakes, chocolate chips, or even finely chopped nuts!
We’re just about ready to start, but first thing’s first, let’s make sure our junior chefs are suited up in their aprons because it might get a tad messy (that’s part of the fun, though!). Make sure you have a spacious work area, a big bowl for mixing, and a tray lined with parchment paper to place your rum balls on once they’re formed.
Ready, Set, Create! Crafting Your Rum Balls
Sweet treats are around the corner! Put on your favorite tunes, and let’s get the ball rolling.
Begin by crushing the digestive biscuits or Graham crackers into fine crumbs. A food processor does this job in a snap. If you don’t have one, no worries! A rolling pin and a sealable plastic bag will work wonders as well. It’s also a great way to let kids be a part of the action and burn off some energy. Aim for a fine consistency, as this will help your balls hold shape better.
Next up, mix those crumbs with the unsweetened cocoa powder in your mixing bowl. Ensure they’re well combined to guarantee an even chocolatey flavor throughout the batch. Now, it’s time to pour in that sweetened condensed milk and add a couple of teaspoons of rum extract – that’s where we mimic the lovely rum essence in our child-friendly recipe. Mix it all together until you achieve a consistent dough-like texture. If the mixture’s too dry, add a splash more condensed milk; too wet, sprinkle in some extra cookie crumbs.
This step is bound to be a hit – forming the rum balls! Scoop a small amount of mixture into your palms and roll it into a ball. If you’re working with kiddos, have a small ice cream scoop handy to keep the sizes uniform (plus, it’s way more fun!). Once you have a perfect little ball, roll it into your chosen coating and place it on the parchment-lined tray.
After you’ve rolled all your rum balls, it’s time for a little chill. Pop them into the fridge for at least an hour to set. This waiting part might just be the hardest – the anticipation is real!
And there you have it, parents and kids alike – the stage is set for a delightful rum ball bonanza. Everyone can enjoy rolling, coating, and, most importantly, savoring these sweet, alcohol-free treats. Rumor has it, they taste even better when made with love and giggles!
Stay tuned for more tips on how to get creative with your rum balls, storage advice, and how to turn this recipe into a teachable moment about different cultures’ cuisines. Let’s create yummy memories, one rum ball at a time!

5 Things Parents Should Know in Preparing Kid-Friendly Rum Balls
1. Preparatory Steps To Take Before Starting
Before you get your little ones excited about making rum balls, take a few moments to organize your workspace. Ensure all your ingredients are measured out, tools are within reach, and the kitchen is safe for your kiddos. A clear and clean working area allows for a smoother experience and ensures that the process remains enjoyable for everyone involved. Also, consider placing stools or chairs near the workspace for smaller children so they can easily reach the countertop and participate in the fun.
2. Ingredient Substitutions and Allergies
With this kid-friendly recipe, we’re already substituting rum for rum extract. But what if you encounter other ingredients your child is allergic to or dislikes? Fear not! You can swap out nuts for seeds or use gluten-free cookies if needed. Be sure to read all packaging for allergy information, and get creative with substitutions to make sure everyone can indulge safely and happily.
3. The Importance of Supervision and Inclusion
While making rum balls with your children is a great family activity, it’s essential to supervise them, especially with younger kids. Help them with the harder steps, like crushing the biscuits or handling the mixture if it’s too sticky. Make sure each child has a task so no one feels left out – even the littlest ones can sprinkle on the coatings. This not only keeps the process safe but also boosts their confidence and ensures everyone has a splendid time.
4. The Educational Angle
Who says you can’t learn while having fun? This rum balls activity is a great opportunity to incorporate basic math through measuring ingredients and teach about different ingredients and where they come from. It’s also a moment to encourage teamwork, following instructions, and even exploring cultural traditions associated with rum balls in different countries.
5. Clean-Up Can Be Fun Too
After enjoying the crafting of rum balls, don’t forget the clean-up. Make this part of the process enjoyable by involving the children. Assign simple tasks like putting ingredients away or wiping surfaces. It’s another educational moment where you teach responsibility and the importance of tidiness even after fun activities.
Armed with this comprehensive guide, you’re all set to create not just delicious kid-friendly rum balls, but also memories that will last a lifetime. So, what are you waiting for? Let’s get rolling!
For more great articles please see here. For more information see here
Disclaimer
The articles available via our website provide general information only and we strongly urge readers to exercise caution and conduct their own thorough research and fact-checking. The information presented should not be taken as absolute truth, and, to the maximum extent permitted by law, we will not be held liable for any inaccuracies or errors in the content. It is essential for individuals to independently verify and validate the information before making any decisions or taking any actions based on the articles.


