
Delightful Rum Balls Recipes for Family Fun
Welcome, awesome parents and baking enthusiasts! Looking for a fantastic treat to make with your kids or to whip up for your next family gathering? Look no further because delightful rum balls are here to save the day (and your sweet tooth)! Whether you’re a seasoned baker or just looking for a fun and easy kitchen project, these no-bake rum balls are a delicious way to add some joy and yumminess into your family’s life. So, let’s roll up our sleeves and dive into making these scrumptious morsels together!
Understanding Rum Balls: A Sweet History
Before we get our hands chocolatey, let’s take a wee trip down history lane. Rum balls are a sweet concoction believed to have originated in Europe, and they’ve been stealing the show at dessert tables for generations. These treats are a sensational mix of cookie crumbs, nuts, powdered sugar, and, of course, rum. Now, while traditional recipes include a kick of alcohol, many family-friendly versions substitute rum essence or syrup, ensuring everyone can enjoy this delectable dessert.
Getting Ready for Rum Ball Magic
First things first, when creating your rum balls, quality ingredients are key. Go for a nice dark rum or a non-alcoholic rum flavoring, depending on your preference. Using real chocolate, good quality vanilla wafers, and fresh nuts will all elevate your rum balls to a whole new level of deliciousness. Don’t forget to have fun with variations as well – there’s plenty of room for creativity with this recipe!
Ingredients:
- Fine vanilla wafer crumbs
- Powdered sugar (plus some extra for dusting)
- Unsweetened cocoa powder
- Finely chopped nuts (hazelnuts, walnuts, or almonds work great)
- Honey or corn syrup
- Rum or rum extract
Tools You’ll Need:
- Large mixing bowl
- Measuring cups and spoons
- Airtight container for storage
- A small scoop or spoon
- Parchment paper or non-stick baking mat
Let the Fun Begin: Making Your Rum Balls
Now, the real fun starts! Clear a little space in your kitchen, and let’s begin. The beauty of these rum balls is in their simplicity – it’s a fantastic way to involve the kids and make memories together. Mix your dry ingredients in a large bowl, stir in the liquid components, and you’re ready to start rolling. If the kids are helping, get them excited by letting them do the messy part – they’ll love it!
Still with me? Wonderful! We’re going to need a bit more room for the nitty-gritty recipe details, so keep reading, and let’s make some rum ball magic happen. Trust me, the gleeful giggles and smiles that come with every bite will be totally worth it.
Coming up next, we’ll talk about the step-by-step process, more tips and tricks, and storage advice to keep your rum balls as fresh as possible. Before you know it, you’ll be the reigning champion of rum balls, all thanks to this guide. So stay tuned, the sweet journey is just getting started!

5 Things Parents Should Know When Preparing Rum Balls
Here are five essential tips for any parent venturing into the delightful world of rum ball making:
1. Non-Alcoholic Options for Family-Friendly Fun
If you’re preparing rum balls with kids or for a family event, consider non-alcoholic substitutes for rum like rum extract or rum flavoring. This way, everyone, regardless of age, can enjoy them without worry. You can experiment to find the perfect mix that captures the essence of rum balls while keeping it kid-friendly.
2. Texture Matters
The texture of your rum balls is crucial. Your vanilla wafer crumbs should be fine enough to hold together but not so fine they turn to powder. Encourage the kids to join in by placing the wafers in a sealed bag and gently rolling over them with a rolling pin – it’s a fun activity and helps achieve the ideal consistency!
3. Spice It Up
Don’t be afraid to get creative with your rum balls. Mix in spices like cinnamon, nutmeg, or even a bit of chili for a surprising kick. This is an excellent opportunity to teach kids about flavors and how they combine. Let them smell and taste a little of the spices before adding them. It’s a delicious learning experience!
4. The Perfect Roll
Rolling your rum balls into the desired shape can be sticky business, but here’s a pro tip: lightly oil your hands or use a bit of powdered sugar to prevent the mixture from sticking to your skin. Make sure each ball is rolled firmly to ensure they hold their shape. This is another excellent task for little hands, so get the kids involved and roll away!
5. Storage Savvy
Rum balls need to firm up and develop their flavors, so store them in an airtight container before serving. You can even make them a day or two in advance, as they often taste better after sitting for a while. Teach the kids about patience as they wait for their tasty treats to be ready – it’s a hard lesson, but a good one. Plus, they’ll be learning how some desserts can improve with a little time, making the final treat even more gratifying.
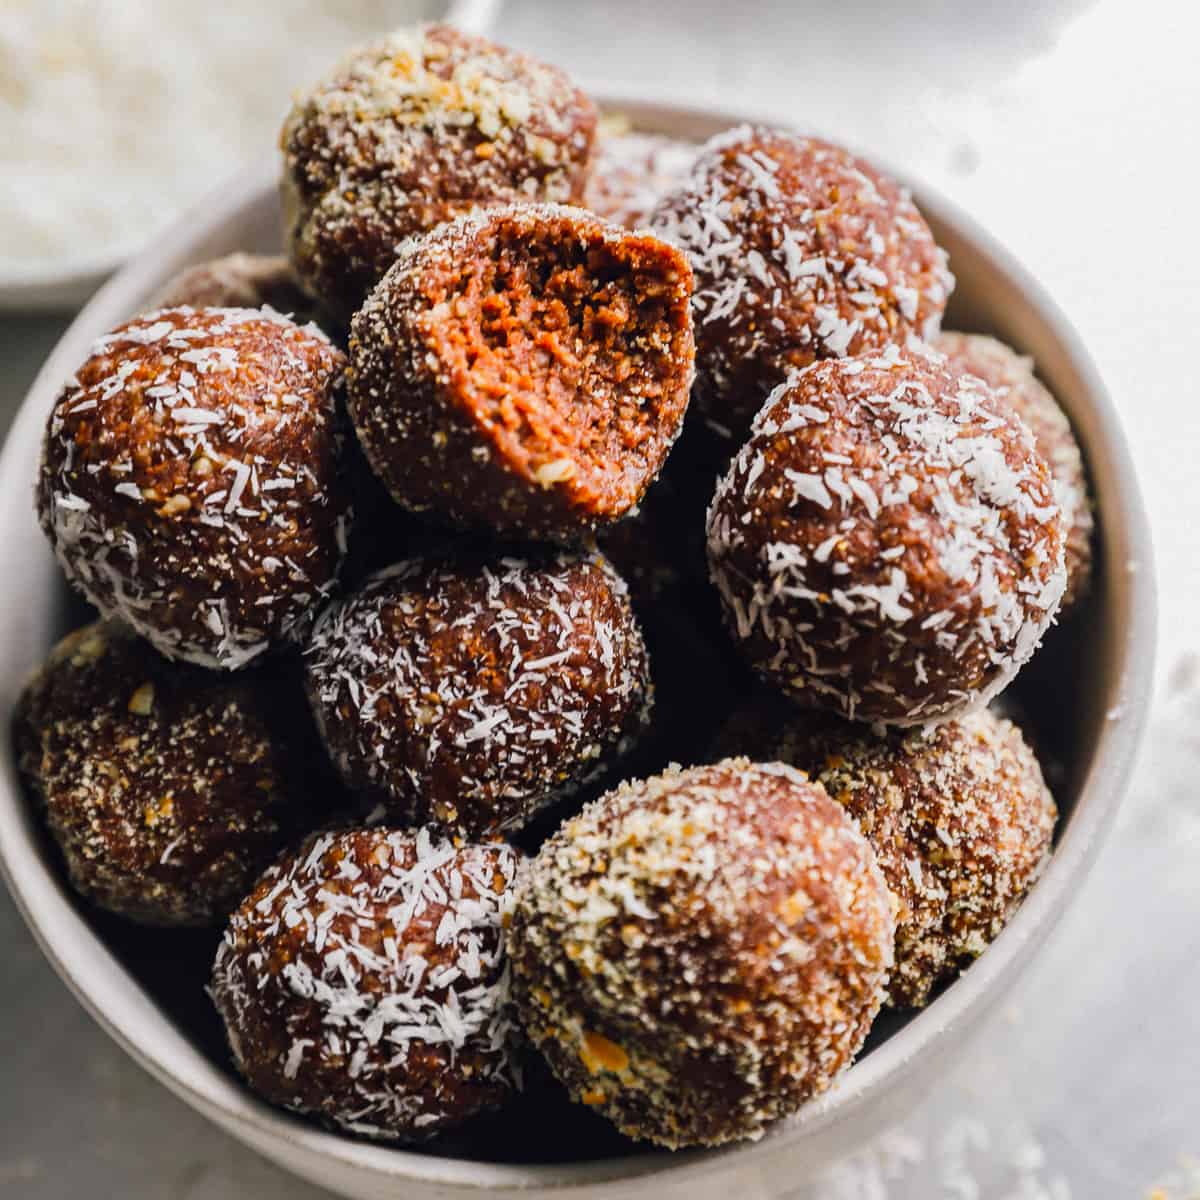
Step-by-Step Rum Balls Recipe
Let’s walk through the process of making these enticing sweets. Here’s a simple, step-by-step recipe for homemade rum balls that you and your family will adore:
Ingredients:
- 2 cups fine vanilla wafer crumbs
- 1 cup powdered sugar, and some extra for dusting
- 2 tablespoons unsweetened cocoa powder
- 1 cup finely chopped nuts (almonds, walnuts, or pecans)
- 2 tablespoons honey or corn syrup
- 1/4 cup rum, rum extract, or a rum flavoring for a non-alcoholic version
Directions:
- Mix the vanilla wafer crumbs, powdered sugar, cocoa powder, and chopped nuts in a large mixing bowl.
- Add the honey or corn syrup and your chosen rum or flavoring. Stir until well mixed.
- Shape the mixture into 1-inch balls using your hands or a small scoop.
- Roll each ball in powdered sugar, cocoa powder, or crushed nuts for an extra decorative touch.
- Place the rolled balls on parchment paper or a non-stick baking mat to set.
- Transfer the rum balls into an airtight container and let them sit in the fridge for at least a few hours, ideally overnight, to firm up and develop their flavors.
Remember, life’s too short for just one batch! Feel free to double or triple the recipe to make enough for all your friends and family. And don’t hesitate to let the kids add their special touch with decorations or by helping with the measurements. Happy rum ball making!
For more great articles please see here. For more information see here
Disclaimer
The articles available via our website provide general information only and we strongly urge readers to exercise caution and conduct their own thorough research and fact-checking. The information presented should not be taken as absolute truth, and, to the maximum extent permitted by law, we will not be held liable for any inaccuracies or errors in the content. It is essential for individuals to independently verify and validate the information before making any decisions or taking any actions based on the articles.


