
Delightful Easy Pikelets for Busy Parents: A Step-by-Step Guide
Welcome, busy bees! ? Are you looking for a scrumptious snack that’s easy to make and sure to bring smiles to your little ones’ faces? You’ve buzzed into the right place because today, we’re talking about pikelets! ?
As a parent, it’s always a juggle between keeping up with life’s daily demands and finding ways to create joyful moments with your children. Cooking together can be a fantastic way to bond, and what better way to do just that than by flipping some fluffy pikelets together? ?
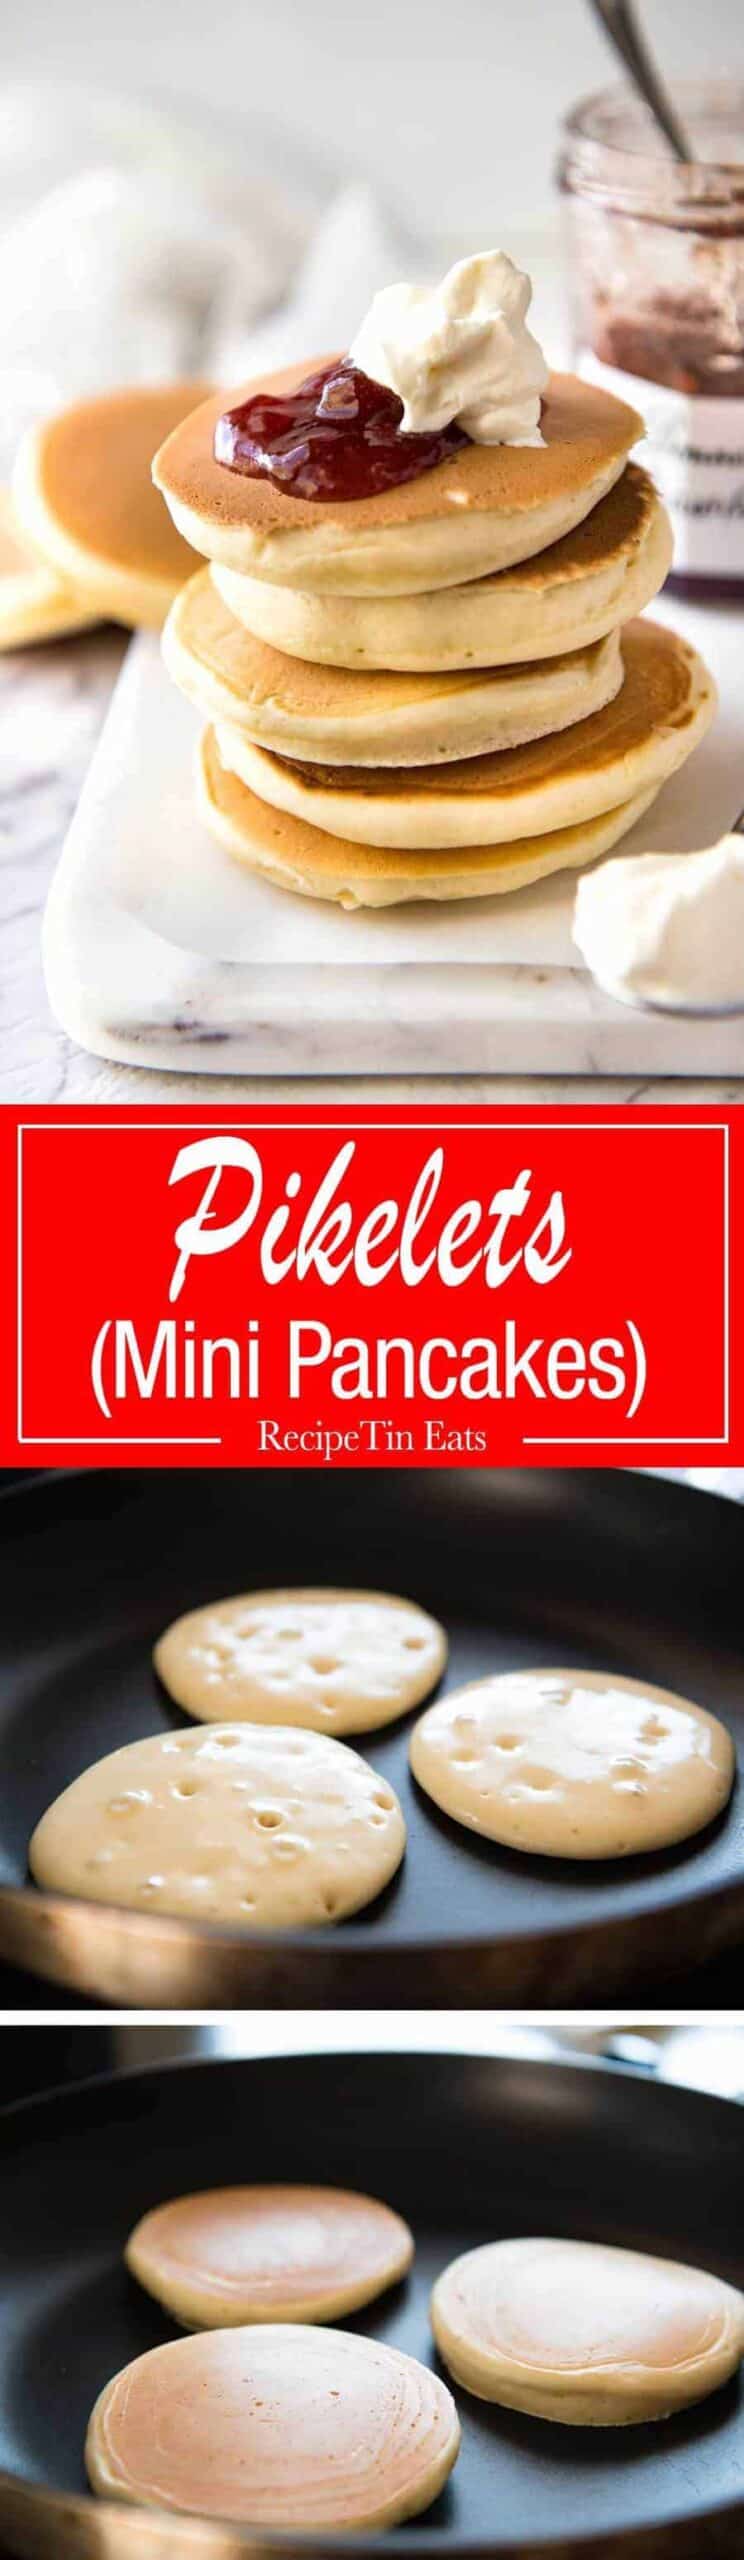
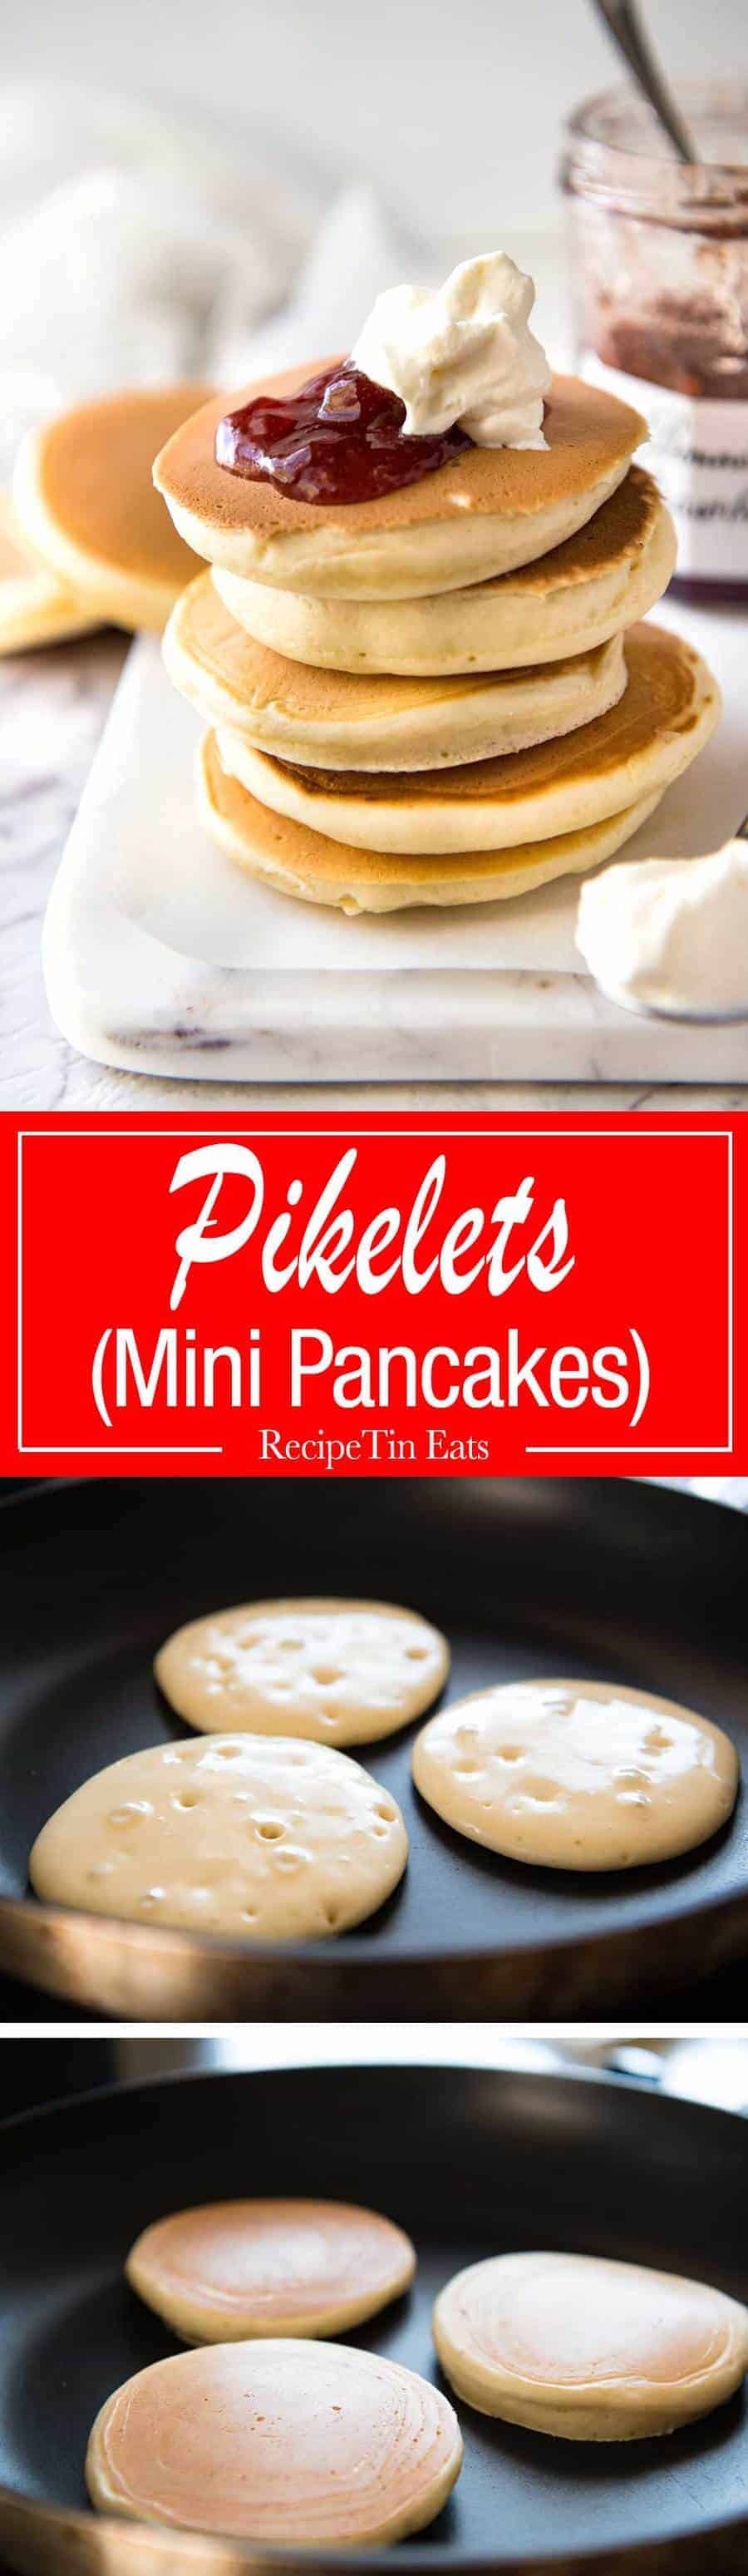
Pikelets are essentially mini pancakes, popular in Australia and New Zealand but loved worldwide. They’re cute, they’re tasty, and the best part? You likely have all the ingredients on hand right now! So, roll up those sleeves because we’re diving into the world of pikelets that are perfect for busy parents. ?
What You’ll Need for Your Pikelet Adventure
Let’s start with the essentials – the ingredients and tools you’ll need to create these mouthwatering treats. I promise you, it’s as simple as pie (or should I say, pikelet!). Here’s your checklist for success:
- Ingredients:
- 1 cup of all-purpose flour (or wholemeal flour for a healthier twist!)
- 2 tablespoons of sugar (honey or maple syrup are great substitutes)
- 1 teaspoon of baking powder (for that rise we love)
- A pinch of salt (just a pinch!)
- 1 large egg (free-range for an extra smile ?)
- 3/4 cup of milk (dairy or non-dairy, they both work wonders)
- A dollop of melted butter or olive oil (for a bit of richness)
- Tools:
- A mixing bowl (where the magic starts)
- A whisk or a wooden spoon (your wand in this culinary spell)
- A non-stick frying pan or griddle (your canvas)
- A spatula (for the grand flip)
Now, take a deep breath and get ready to embark on this pikelet journey! ? Next up, we’ll walk through the steps to create your family’s new favorite snack.
Step-by-Step: Crafting Perfect Pikelets
Baking with your kids can be one of the most rewarding—and fun!—activities. It’s about more than just the delicious pikelets you’ll end up with; it’s about the giggles, the flour on noses, and the warmth of shared achievements. So, let’s create those memorable moments with these easy steps:
- Mix the Dry Ingredients: In your mixing bowl, sift together the flour, sugar, baking powder, and salt. Making a well in the center is a great trick to prepare for the next step.
- Add the Egg and Milk: In the well you’ve created, crack the egg and pour in the milk. Begin stirring from the center, gradually bringing in the dry ingredients to form a lovely, smooth batter.
- Melt the Butter: Heat the butter or oil in your frying pan and watch it shimmer, like a miniature, greasy sunrise. ? You’ll just need enough to prevent sticking—no deep-frying here!
- Cook the Pikelets: Drop tablespoons of batter into the hot pan. Wait for bubbles to form on the surface of each pikelet before flipping them gently to cook on the other side. They should be golden brown and simply irresistible!
- Serve Warm: Once cooked, transfer your pikelets to a plate, where you can let the kids’ imagination run wild with toppings—think fruits, syrups, or a sprinkle of powdered sugar.
Gathering around a stack of homemade pikelets is not only about enjoying a treat; it’s about making treasured family memories. So, while those pikelets are cooking, remember to soak in the moments, the smells, and the love in the kitchen. ?
5 Things Parents Should Know When Preparing Easy Pikelets
Hey there, superstar parents! Before we jump into flipping those pikelets, here are five golden nuggets of wisdom that will guarantee your pikelet prep is as smooth as your batter:
- 1. Prepping Ahead Saves Time: You can mix the dry ingredients the night before and keep them in an airtight container. When you’re ready to cook, just add the wet ingredients, and you’re good to go! This can be your secret morning weapon for an almost instantaneous breakfast!
- 2. Consistency is Key: For the best pikelets, aim for a batter that’s thick but pourable, similar to heavy cream. This will ensure your pikelets are beautifully fluffy and cook evenly.
- 3. Keep the Heat Medium-Low: Pikelets cook best on a medium-low heat. This prevents the outside from burning before the inside is done, especially important to avoid those sad faces in the morning!
- 4. Personalize Pikelets with Fun Mix-ins: Keep the excitement high by stirring in blueberries, chocolate chips, or banana slices directly into the batter. It’s a fantastic way to introduce new flavors and make each batch special!
- 5. Involve the Kids: Cooking is a wonderful teaching moment. Let your children measure and mix or choose their toppings. It’s a delicious lesson in responsibility and creativity!
Armed with these pro tips, you’re well on your way to mastering the art of pikelet-making. Now then, shall we get to the batter-y goodness? Aprons on, little chefs! It’s time to whisk up some fun! ?
Variations and Tips for Perfect Pikelets
Your classic pikelet is just the beginning! From here, the sky (or rather the size of your frying pan) is the limit. Here’s how to keep your pikelets exciting every single time:
- Vegan Variations: No eggs? No dairy? No worries! Use a flax egg (1 tablespoon ground flaxseed mixed with 3 tablespoons water) in place of a chicken egg, and any plant-based milk will do the trick just nicely.
- Gluten-Free Goodies: Switch out the flour for your favorite gluten-free blend to accommodate everyone’s dietary needs. A kitchen filled with joy is also a kitchen filled with inclusivity!
- Sweet and Savory: Who says pikelets can’t be savory? Add grated cheese and herbs to your batter for a piquant treat. Or, for the sweet tooth, a dash of cinnamon or vanilla can work wonders.
- Size Matters: Mini pikelets are perfect as a snack or party finger food, while larger ones can be a satisfying breakfast. Use different spoon sizes for precision or freehand pour for a more rustic look.
- No-Stick Wisdom: Even with a non-stick pan, a little butter or oil goes a long way to ensure clean flips and intact pikelets. Plus, it adds a subtle flavor that’s just divine.
Remember, cooking should be stress-free, especially pikelet making. It’s about the laughter, the shared moments, and maybe a bit about licking the spoon. Each pikelet doesn’t have to be perfect. What matters is the love that goes into them, and of course, the joy they bring out.
So, go ahead and whip up a batch, play around with flavors, and let every pikelet tell its own delicious story. In the world of easy pikelets, you’re not just a parent—you’re a magician, spinning ingredients into gold. Cook on!
See more great Things to Do with Kids in New Zealand here. For more information see here
Disclaimer
The articles available via our website provide general information only and we strongly urge readers to exercise caution and conduct their own thorough research and fact-checking. The information presented should not be taken as absolute truth, and, to the maximum extent permitted by law, we will not be held liable for any inaccuracies or errors in the content. It is essential for individuals to independently verify and validate the information before making any decisions or taking any actions based on the articles.


