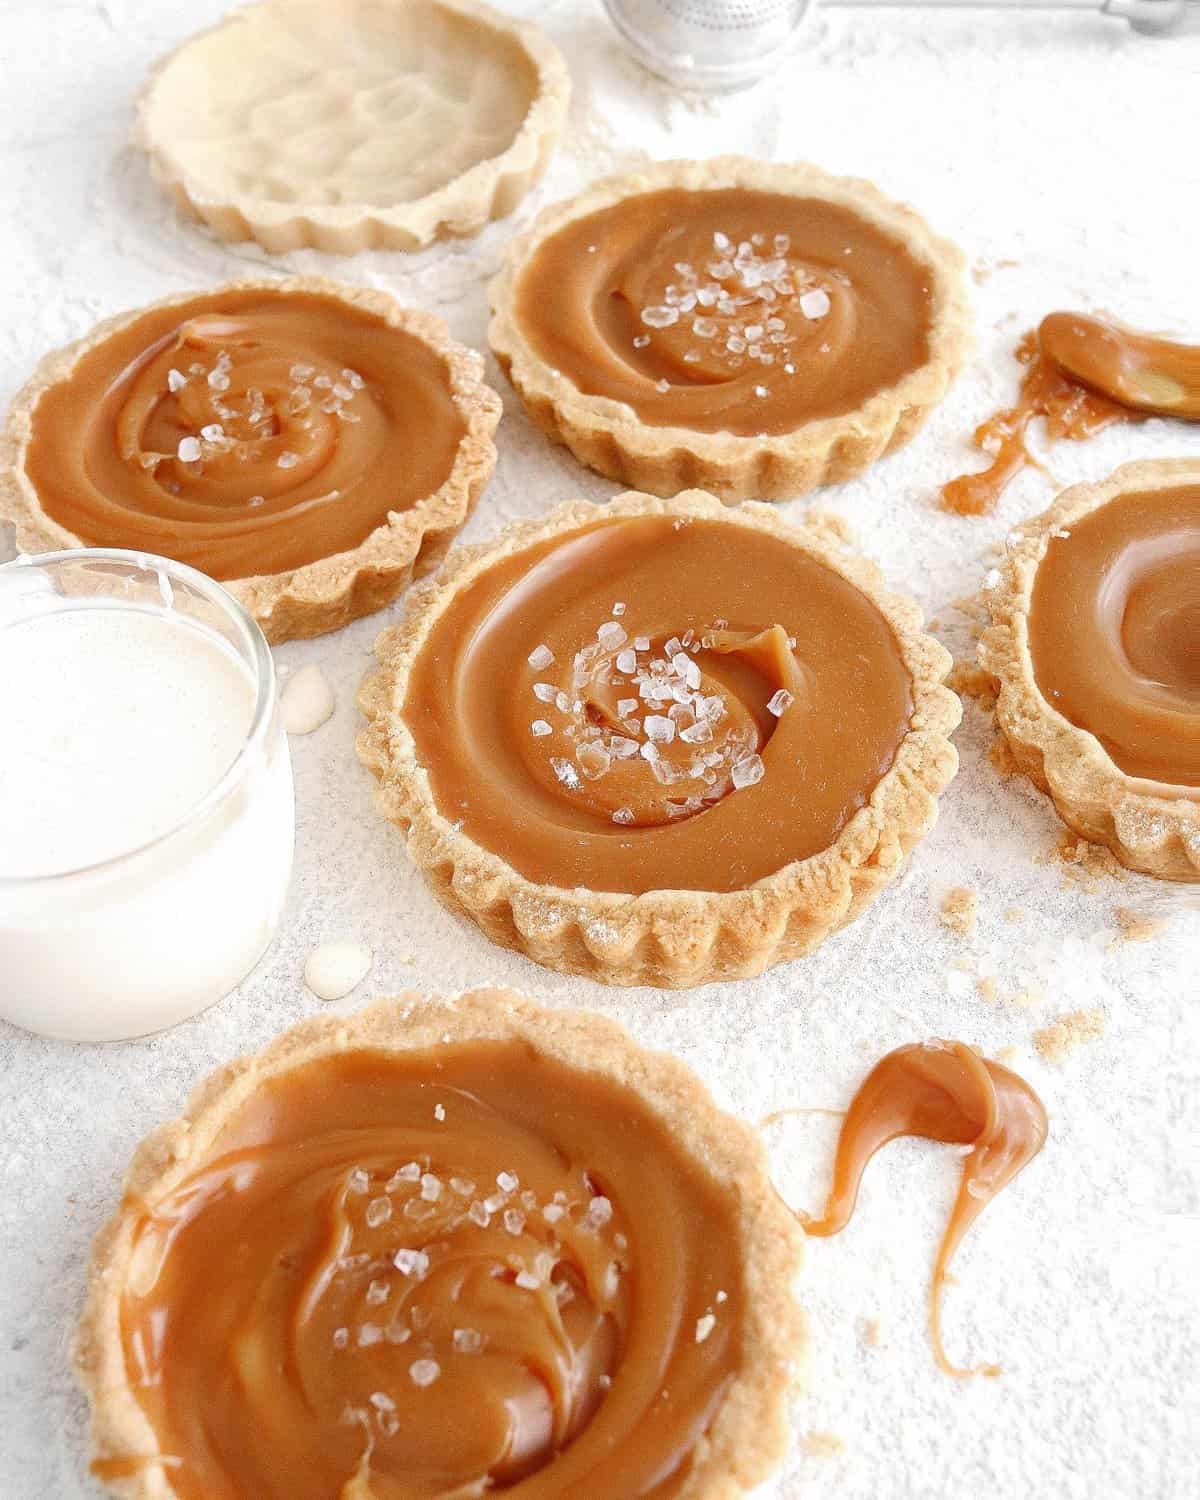
The Ultimate Caramel Tarts Guide for Parents: Fun, Easy, and Delicious!
Hello, lovely parents and baking enthusiasts! Are you looking for that perfect treat to bake with love and share with the whole family? Look no further, because today we’re diving into the wonderfully sweet world of caramel tarts. Whether it’s for a special occasion or just a delightful weekend activity, we’ve got you covered with step-by-step instructions, tips, and tricks to make the most scrumptious caramel tarts right at home. So, gather your little helpers, preheat the oven, and let’s get started on this fun and tasty adventure! ????????
What You’ll Need to Get Started
Before we jump into the nitty-gritty of baking, let’s ensure you have all the essentials ready. Here’s a quick checklist:
- High-quality, unsalted butter (because yum!)
- Fine sugar for that sweet foundation
- All-purpose flour for the perfect crust
- A pinch of salt to balance the flavors
- Fresh cream – it’s all about that creamy texture
- Golden syrup or honey for a touch of natural sweetness
- Vanilla extract for an aroma that fills the kitchen
- Dark or milk chocolate (or why not both?) for decorating
- Optional toppings: nuts, sea salt flakes, or fruit
And of course, don’t forget the main star – the caramel! We’ll dive into the simple yet magical process of creating the smoothest caramel filling in the next section.
The Joy of Baking Together
There’s something heartwarming about sharing the kitchen with your kids. Baking caramel tarts offers a perfect opportunity to teach them about measuring, mixing, and the importance of patience while waiting for the delicious results. Plus, the pride in their eyes when taking the first bite of their creation is priceless. A little tip: assign each kiddo a task – it’s a fantastic way for them to learn and feel involved!
Ready to roll up your sleeves? Let’s begin with the base of our caramel tarts: the buttery, crumbly, melt-in-your-mouth crust. It’s simple enough for even the youngest sous-chef, and nothing beats the old-fashioned way of getting your hands in the mix!
Crafting the Perfect Crust
Creating a good crust is essential for caramel tarts, as it holds the luscious caramel and provides a delightful texture contrast. Here’s a basic recipe to start with:
Ingredients for the Crust:
- 1 1/4 cups all-purpose flour
- 1/2 cup unsalted butter, chilled and cubed
- 1/4 cup sugar
- 1 egg yolk (save the white for a meringue or another recipe!)
- A dash of vanilla extract
- A pinch of salt
Directions:
- Preheat your oven to 350°F (175°C) and lightly grease your tart pans.
- In a large bowl, whisk together flour and salt.
- Add the cubed butter to the flour mixture and use your fingertips to rub the butter into the flour until the mixture looks like coarse crumbs.
- Stir in the sugar, egg yolk, and vanilla extract until the dough comes together.
- Press the dough into your tart pans, prick the bottom with a fork, and bake for about 15-20 minutes or until golden brown.
- Let the crusts cool while you prepare the caramel filling.
Remember that every oven is different, so keep an eye on your crusts – they’re the foundation of your tart and set the stage for caramel goodness.
Crafting the Caramel Filling
Now, let’s talk about the caramel. It can be intimidating for some, but we promise it’s easier than it looks, and the result is oh-so-rewarding ?. Here’s a basic caramel recipe to start:
Stick with us as we continue in the next section to create a caramel filling so delicious, it’ll want to jump right off the spoon and into your perfectly baked crusts!
Remember, patience is key to nailing that gooey caramel center. So, what are you waiting for? Let’s turn those golden ingredients into liquid gold together!

Five Things Parents Should Know Before Preparing Caramel Tarts
Preparing caramel tarts is an exciting activity, but there are a few key points to keep in mind to ensure your baking day is both fun and successful:
- Be Prepared:
Like any great adventure, it starts with preparation. Have all your ingredients measured and ready. A mis-en-place, or keeping everything in place, allows the process to be less hectic, especially when baking with kids. It streamlines your workflow and keeps stress at bay. - Temperature Matters:
For the buttery crust, having chilled butter is crucial for a flaky texture. Similarly, for caramel, room temperature ingredients blend smoother. Understanding the temperature and state of your ingredients can make or break your pastry masterpiece. - Time Management:
Certain steps require waiting, like chilling the dough or letting the caramel cool. Plan around these steps by preparing the crust first or having other activities for kids during cooling times. Good time management ensures you’re not rushing through the fun. - Safety First:
Baking is fun, but it involves hot surfaces and potentially dangerous tools. Implementing kitchen safety rules, like no touching the oven and always having an adult handle hot trays, is essential. Also, remember, caramel can splatter and is very hot, so save that task for the adults or older children with supervision. - Clean As You Go:
Let’s be honest, baking can get messy, especially with kids. Cleaning as you go not just prevents a mountain of dishes later but also teaches kids the importance of tidiness in cooking. Plus, it keeps workspaces clear for your next baking step.
Now that you’re equipped with this knowledge, let’s carry on to make these tantalizing tarts!
We left off at the step of preparing our crusts. Once the crusts are cooling, it’s time to create the most delectable caramel filling. Here’s a simple yet classic caramel recipe:
The Perfect Caramel Filling
Ingredients for the Caramel:
- 1 cup fine sugar
- 6 tablespoons unsalted butter at room temperature and cut into pieces
- 1/2 cup heavy cream at room temperature
- 1 teaspoon vanilla extract
- A pinch of salt (to taste)
Directions:
- Spread the sugar evenly in a heavy-bottomed saucepan over medium heat. Once the sugar starts to melt, stir gently with a heat-resistant spatula to ensure even caramelization.
- As soon as the sugar has melted and turned a deep amber color, carefully add the butter pieces. The mixture will bubble up, so be cautious!
- Slowly drizzle in the heavy cream while stirring continuously; again, watch out for splashing. Let the mixture boil for a minute until it all comes together into a smooth sauce.
- Remove from the heat and stir in vanilla extract and salt.
- Pour the caramel onto the cooled crusts. Let them set at room temperature and then chill in the fridge to firm up.
While you’re waiting for the tarts to chill, involve the kids in decorating. Melt some chocolate and let them drizzle it over the tarts, or let them choose and place nuts or fruit on top. This customization makes each tart a personal masterpiece. Remember, no decoration is too whimsical when you’re baking with love and joy!
As you can see, with a bit of preparation and enthusiasm, making caramel tarts can be a seamless and splendid way to create memories with your family. Carry these tips with you as we progress through our baking journey, and don’t forget to savor not just the sweet tarts but the precious moments of togetherness.
Next, we’ll look at how to present and serve your wonderful creations, uplifting your family events with the sweet charm of homemade caramel tarts. So, tie your apron tight, adorn your chef’s hat, and bake your heart out!
For more great articles please see here. For more information see here
Disclaimer
The articles available via our website provide general information only and we strongly urge readers to exercise caution and conduct their own thorough research and fact-checking. The information presented should not be taken as absolute truth, and, to the maximum extent permitted by law, we will not be held liable for any inaccuracies or errors in the content. It is essential for individuals to independently verify and validate the information before making any decisions or taking any actions based on the articles.


