
Whip Up The Perfect Oreo Cheesecake: A Step-by-Step Guide for Parents
Hello there, sweet-toothed parents and Oreo aficionados! Are you looking to add a sprinkle of joy to your family gatherings, or perhaps you’re searching for a decadent dessert that’s sure to be a crowd-pleaser? Look no further, because we’re about to dive into the creamy, dreamy world of Oreo cheesecake! Not only is this dessert a heavenly combination of crunchy chocolate cookies and smooth, tangy cheese, but it’s also a fun baking project to embark on with your kiddos. So, let’s get those aprons on and start delving into the scrumptious layers of deliciousness.
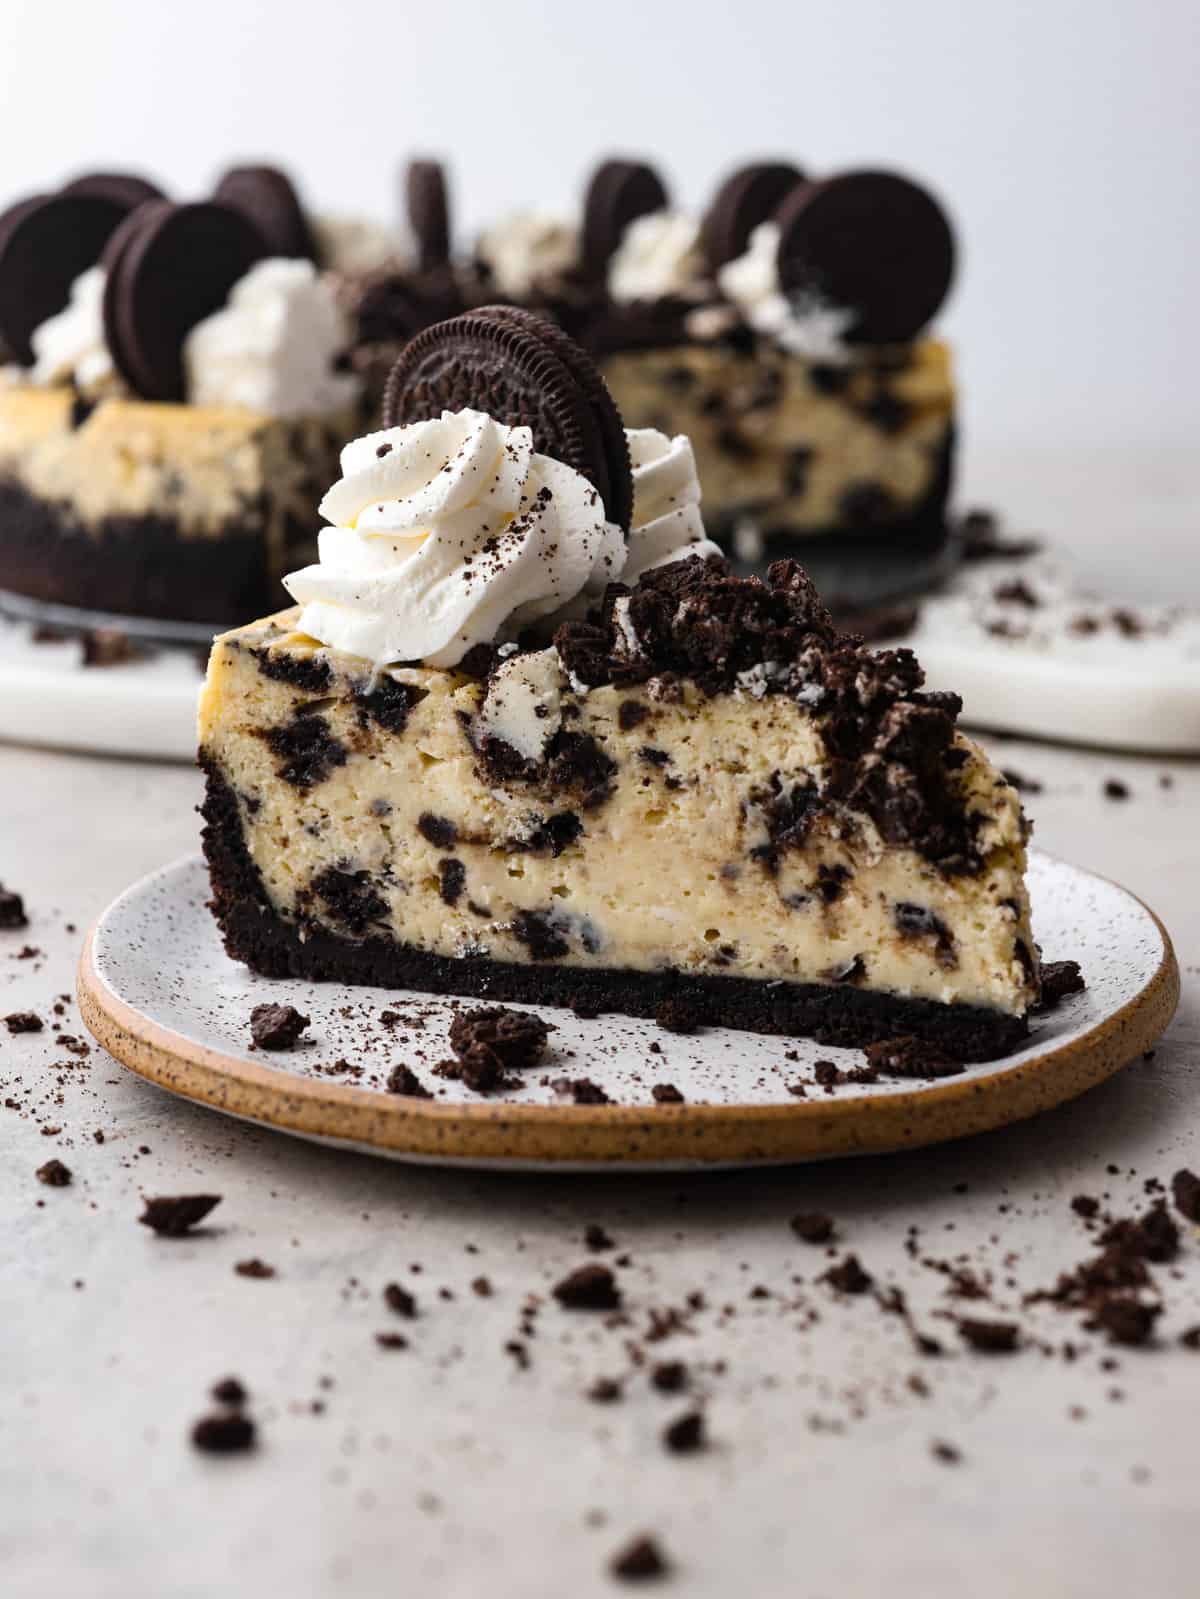
Why Oreo Cheesecake Is a Family Favorite
Oreo cheesecake is a classic dessert that unites the love of Oreos with the rich and velvety texture of cheesecake. It’s versatile and can be made for any occasion, be it a birthday, holiday, or just because you’re craving something utterly indulgent. The beauty of this dessert is that it’s surprisingly simple to make and offers an opportunity for your children to help along and learn a bit about baking and creativity in the kitchen.
The Ingredients You’ll Need
- Oreos: Of course, the star of the show. You’ll want to grab enough for the crust and for adding those Oreo chunks that everyone loves in their cheesecake.
- Cream Cheese: The base of any good cheesecake, ensure that your cream cheese is at room temperature for smooth mixing.
- Sugar: To sweeten up your cheesecake just right.
- Heavy Cream: This will help give your cheesecake that creamy, luxurious texture.
- Eggs: These help in setting your cheesecake perfectly as they bake.
- Butter: Needed to bind your Oreo crust together.
- Vanilla Extract: A splash of vanilla enhances the cheesecake flavor beautifully.
For the full list of ingredients and measurements, scroll down to our comprehensive Oreo cheesecake recipe section below!
Getting Ready to Bake
Before you get started, a few preparation steps will make the process smoother and more enjoyable:
- Preheat Your Oven: This might seem obvious, but it’s a step that’s easily overlooked in the excitement of baking. Ensure your oven is well-preheated to the required temperature.
- Ingredient Prep: Have your ingredients measured and ready to go. This is called mis en place and it’s a lifesaver!
- Springform Pan: This type of pan is ideal for cheesecakes, making it easy to release your masterpiece without a fuss.
- Water Bath: Cheesecakes love a humid environment, so you’ll learn how a water bath can help prevent cracks and ensure a creamy texture.
Now that you have your prep step pointers, let’s venture into the magical mix and match of flavors and textures with our Oreo cheesecake making!
Creating the Perfect Oreo Crust
Your Oreo cheesecake adventure begins with a solid foundation – the crust! This part of the process is super fun and one your children will love to partake in. You’ll crush Oreos, mix them with melted butter, and press them into the bottom of your springform pan to create a crust that’s both sturdy and delectably crumbly.
Knowing just how much to press the mixture and getting an even layer sets the stage for a great cheesecake experience. Plus, there’s the added bonus of taste-testing a few Oreo crumbs! Stay tuned, as we’ll provide you with tips and tricks to get this fundamental step just right in the sections that follow.
With a joyous heart and whisk in hand, we promise that you’re in for a delightful baking journey. Not only will you create a dessert that’ll have everyone’s taste buds dancing, but you’ll also be making sweet memories with your little ones in the kitchen. Keep reading to uncover the secrets of making the ultimate Oreo cheesecake that’s bound to become a treasured recipe in your family cookbook!
Five Must-Know Tips for Parents Preparing Oreo Cheesecake
Before diving into the full recipe, let’s make sure you’re well-equipped for the task. Here are five things every parent should know when preparing an Oreo cheesecake:
- Involve Your Kids: Make the experience memorable by involving your children in simple tasks like crushing Oreos for the crust or mixing ingredients. This is not only fun but also educational, teaching them cooking skills and patience as they wait for the cheesecake to chill!
- Choose Quality Ingredients: For the best-flavored cheesecake, opt for high-quality cream cheese and pure vanilla extract. The difference in taste is noticeable, and it will make your dessert stand out.
- Be Mindful of Allergies: While Oreo cookies are a hit among kids, they do contain gluten and soy. Always check for allergies among the little eaters and adapt the recipe if necessary, perhaps using gluten-free Oreos.
- Plan Ahead: Cheesecake isn’t a last-minute dessert – it takes time to set and chill. Bake your cheesecake the day before you plan to serve it, giving it plenty of time in the refrigerator to reach the perfect consistency.
- Embrace Imperfections: If your cheesecake gets a crack or the crust isn’t perfectly even, don’t fret. What matters most is the flavor and the joy you had while making it. Plus, imperfections have their charm – they’re a reminder that the dessert is homemade with love!
Mixing Up the Filling
When you have the perfect crust ready, it’s time to mix up that creamy, dreamy filling. You’ll want to combine your room-temperature cream cheese with sugar until it’s smooth and free of lumps. Adding one egg at a time ensures each is fully incorporated, creating the velvety texture we’re after. A dash of heavy cream and vanilla extract adds luxurious richness that balances the sweet Oreo base.
Tip: Don’t overmix the batter after adding the eggs, as this can introduce too much air into the mixture, leading to potential cracks when baking.
Baking and Cooling Your Masterpiece
Baking a cheesecake is where patience really pays off. Pour your filling over the crust and smooth the top with a spatula. Then, gently place your springform pan into a water bath and slide it into the oven. The water bath helps distribute heat evenly and keeps the oven’s humidity high, reducing the likelihood of cracks.
Once the baking is done, one of the most crucial steps comes – cooling. Turn off the oven, crack open the door, and let the cheesecake slowly cool inside. This gradual temperature change helps prevent sinking and cracking. Afterward, let it chill in the fridge for at least 4 hours, but preferably overnight.
There’s so much more to share with you, from decorating options like drizzling with chocolate ganache to storage tips ensuring your cheesecake stays as fresh as possible. Keep reading as we guide you through every luscious layer and share our mouthwatering recipe!
Remember, making Oreo cheesecake isn’t just about the dessert; it’s about the experiences you create and the stories you’ll tell. So go ahead, indulge in the sweetness and enjoy the bonding time with your kids. Stay tuned for more tricks and the complete recipe to create the ultimate Oreo cheesecake that’s sure to bring smiles and satisfied tummy rubs!
For more great articles please see here. For more information see here
Disclaimer
The articles available via our website provide general information only and we strongly urge readers to exercise caution and conduct their own thorough research and fact-checking. The information presented should not be taken as absolute truth, and, to the maximum extent permitted by law, we will not be held liable for any inaccuracies or errors in the content. It is essential for individuals to independently verify and validate the information before making any decisions or taking any actions based on the articles.


