
Ultimate Guide to Glass Cookies: A Magical Treat for Parents and Kids
Hello there, wonderful parents! Are you ready to dive into the enchanting world of glass cookies?
Glass cookies are not just ordinary cookies; they are a magical blend of deliciousness and creativity that can bring a sparkle to your little ones’ eyes (and yours too!). Whether you’re planning a birthday party, looking for a fun weekend baking project, or just aiming to impress at the next school bake sale, our Ultimate Guide to Glass Cookies is here to whisk you away!
What Are Glass Cookies?
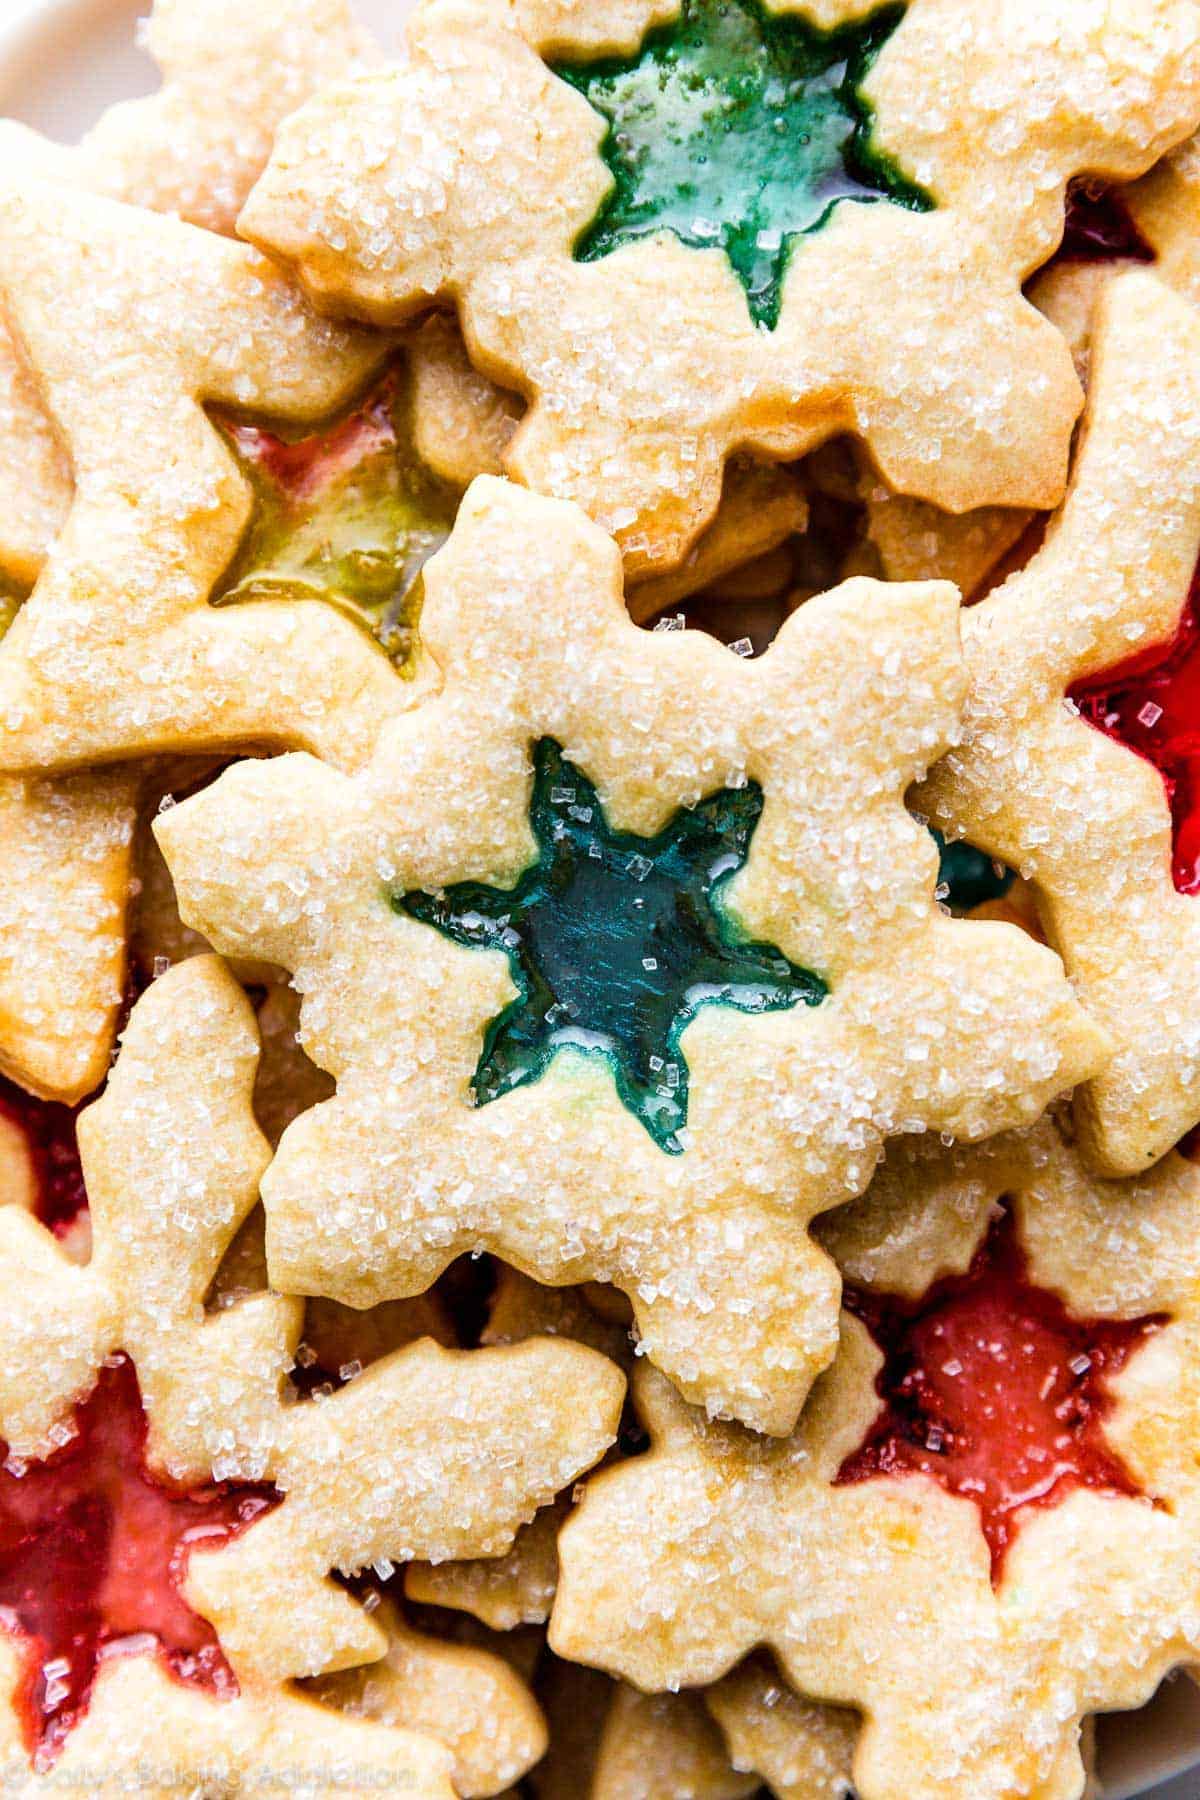
Glass cookies are a whimsical type of cookie that features a translucent, glass-like center made from crushed candy. These treats are as beautiful as they are tasty, and the best part? They’re deceptively simple to make! With a few basic ingredients and a sprinkle of creativity, you and your family can create a batch of these eye-catching delights.
The Joy of Baking with Your Kids
Baking with your children is a fantastic way to bond and create lasting memories. It teaches them valuable life skills like measuring, following instructions, and patience (we all know how hard it is to wait for cookies to bake!). Plus, the end result is a delicious treat that you all can share and enjoy together!
Ingredients for Glass Cookies
Before we roll up our sleeves and get our hands dough-y, here’s what you’ll need to get started on your glass cookie adventure:
- All-purpose flour: The foundation of our cookie dough.
- Butter: For that rich, melt-in-your-mouth texture.
- Sugar: To sweeten up the mixture.
- Egg: This will bind the dough together.
- Vanilla extract: A dash of vanilla for an aroma that sings through the kitchen.
- Salt: Just a pinch to balance the sweetness.
- Baking powder: Our little helper that ensures our cookies rise and shine.
- Hard candies: The secret to that ‘glass’ effect we’re after.
Getting Started: Creating Your Cookie Dough
Creating your cookie dough is the first fun step. Cream the butter and sugar until light and fluffy. Whisk in the egg and vanilla extract, then gradually mix in the dry ingredients until a beautiful cookie dough forms. But wait, don’t forget to preheat your oven! It’s a rookie mistake, and we’re all about pro tips here!
Rolling, Cutting, and Candy Crushing
Once your dough is ready, it’s time to roll it out and use your favorite cookie cutters to shape your treats. Kids absolutely love this part – it’s like arts and crafts, but with food! And do not fret if it gets a bit messy, that’s just part of the fun. Now, for the candy center. You’ll want to crush those hard candies – a perfect task for the little ones, albeit a bit noisy. (Tip: A rolling pin and a resealable plastic bag do wonders!)
Baking Your Glass Cookies to Perfection
With your cookies cut and candy crushed, it’s time to combine the two and bake them until they’re just right. The key is to keep an eye out to ensure the candy melts into that perfect glass-like state without over-baking the cookies. It’s quite a spectacle to watch the cookies transform in the oven – almost as good as magic!
The smell of freshly-baked cookies wafting through your home is truly irresistible, and the moment when you pull them out of the oven, revealing the colorful, glass centers, is pure joy. There’s nothing quite like presenting a tray of these stunning cookies to your excited kids, watching their amazement, and knowing that you made them together.
Decorating and Storing Your Masterpieces
Once your cookies have cooled, you can get as fancy as you want with icing and decorations, making them perfect for any theme or occasion. Then, store them right, and they’ll be just as delicious for days to come! It’s a great conversation starter about the importance of proper food storage and savoring treats mindfully.
So what are you waiting for? Grab your chef’s hat, gather the kiddos, and let’s embark on this glass cookie journey together. Keep reading as we roll out the detailed process, fun variations, and pro tips to become a glass cookie guru!
Five Things Parents Should Know When Preparing for Glass Cookies
1. Candy Selection is Key
Choosing the right candy for your glass cookies is more important than you might think. Go for hard candies that are colorful and translucent to ensure a beautiful stained-glass effect. Steer clear of candies that have wrappers that are tough to remove when you’re involving the little ones – we want to keep their enthusiasm sky-high!
2. Safety First!
When breaking down the candy into smaller pieces, make sure kids are supervised, especially if using any kitchen tools. Always prioritize safety over speed – we’re creating fun memories, not rushing for a world record!
3. Thickness Matters
Rolling out your cookie dough to an even thickness ensures that your cookies bake evenly – meaning no burned edges or gooey centers. A silicone rolling pin and mat can be great investments for those perfect dough sheets!
4. Keep It Chill
Literally – chill your dough before you start the cutting and baking process. A good rest in the refrigerator makes the dough easier to handle, especially for little hands eager not to let the dough stick everywhere.
5. Monitor the Oven
Once those cookies are in the oven, they need an attentive eye. The candy melts quickly, and you want to avoid it bubbling over too much, which could make your cookies stick to the tray. Encourage kids to watch the transformation through the oven door rather than opening it, to maintain the oven temperature.
Step-by-Step Guide to Making Glass Cookies
Mixing Your Cookie Dough
Begin by whisking together your flour, baking powder, and salt in one bowl, setting the stage for perfection. Cream your butter and sugar in a separate bowl until they’re good friends – think fluffy clouds on a sunny day! Then, love-drop in that egg and vanilla extract and mix until just combined. It’s time to introduce the dry ingredients to the wet – but not all at once. Avoid the snowstorm effect by gradually adding it in and mixing until a gorgeous dough forms. Remember, no sneaky taste tests – raw dough is a no-go!
Rolling & Chilling the Dough
Once your dough is ready to roll, pop some parchment paper down to keep things tidy. Roll out the dough, aiming for an even thickness akin to a pinkie’s width. Wrap it up and send it off to the refrigerator’s cool embrace for at least an hour.
Cutting Out Shapes
After the dough has chilled, invite your little sous-chefs to join in as you thrust those cookie cutters into action. Bells, stars, hearts – the sky’s the limit! Once your shapes are out and proud, use a smaller cutter or a knife (adults-only for this bit!) to make a hole in the center of each one. These will soon be your ‘glass’ windows.
Candy Crushing Workshop
Your kitchen turned candy crushing lab will be buzzing with excitement. Protect your countertops, place candies in zip-top bags, and let the kids have a go – safely – at turning those hard candies into tiny, gem-like shards.
Assembly and Baking
Now, the real fun begins! Place your cookies onto lined baking sheets and invite the kids to sprinkle their candy shards into the centers of the cookies. Then, into the oven they go! Bake until the candy has melted and the edges are a golden cheer.
Watching the Magic
The transformation from cutout cookie to stained glass masterpiece is something the whole family can enjoy. Just imagine: you’re watching the candy melt like little kaleidoscopes. It’s a fab science moment too – explain how the heat changes the candy from a solid to liquid and back again!
Cooling and Decorating
As tough as it is to wait, let those beauties cool completely on a rack before you start the grand icing performance. This is where the kids can truly shine, using their imaginations and a spectrum of icing colors to jazz up your translucent treats. Remember, it’s not only about making the prettiest cookie, but the tastiest memory.
Pro Tips for Success
Finally, a few extra nuggets of wisdom:
- Use parchment paper or a silicone mat to avoid sticking.
- Keep an array of candy colors for variety and creativity.
- Try this recipe for themed parties by picking cookie shapes and candy colors to match!
- Involving kids in the cleanup teaches responsibility and extends the fun (yes, cleanup can be fun too!)
Prepare to wow not just your family but everyone who lays eyes on these glass cookies. They are the perfect combination of fun, creativity, and deliciousness – simply a baking masterpiece!
Now, let the cookie story begin – and let it be a scrumptious one!
See more great Things to Do with Kids in New Zealand here. For more information see here
Disclaimer
The articles available via our website provide general information only and we strongly urge readers to exercise caution and conduct their own thorough research and fact-checking. The information presented should not be taken as absolute truth, and, to the maximum extent permitted by law, we will not be held liable for any inaccuracies or errors in the content. It is essential for individuals to independently verify and validate the information before making any decisions or taking any actions based on the articles.


