
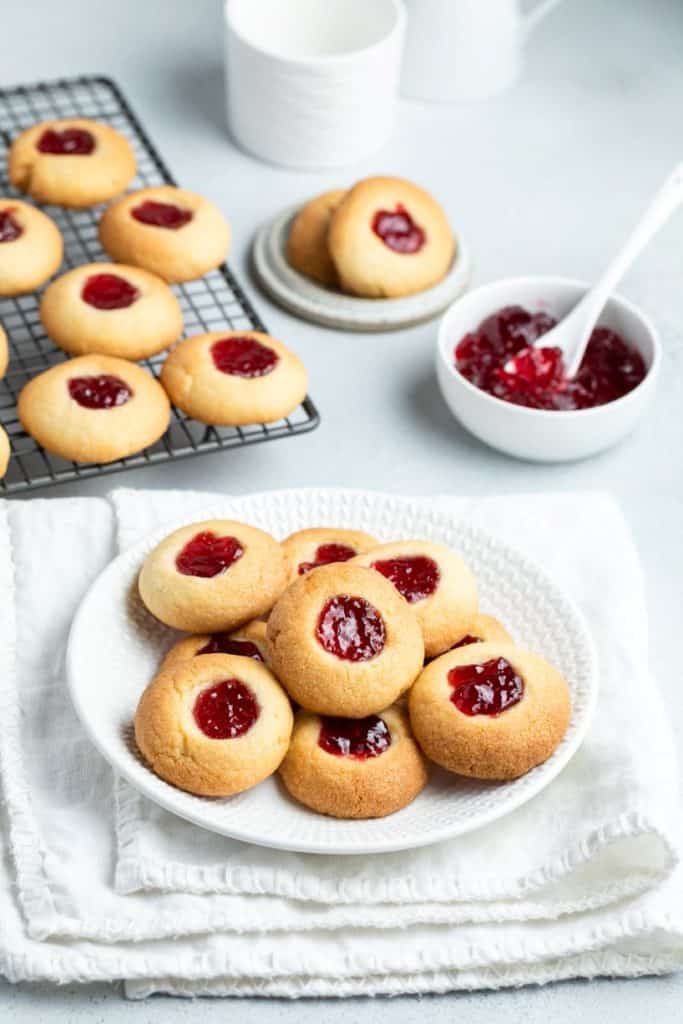
Delicious Recipe for Jam Drops: A Sweet Treat for the Family
Hello, lovely parents! Are you ready to whisk up some fun and make memories with your kiddos in the kitchen? Today, I have an absolutely delightful recipe for you: Jam Drops! These sweet little cookies, with their sparkling jewel centers, are not only a treat for the taste buds but also perfect for bonding with your little ones over the joys of baking. So, let’s put on our aprons and dive into the world of mouth-watering, easy-to-make Jam Drops!
Jam Drops: The Perfect Family Baking Adventure
If you’re looking for a recipe that’s both kid-friendly and a guaranteed hit at any family gathering, Jam Drops are your answer. Not only are they simple to make—with straightforward ingredients and easy steps—they also invite creativity. Kids love adding their personal touch by choosing their favorite jam flavors to fill the centers. Plus, Jam Drops are fantastic for developing those fine motor skills as your tiny chefs practice their spooning and scooping techniques.
What You’ll Need to Make Jam Drops
For this scrumptious recipe, you’ll be raiding your pantry for some baking essentials and maybe swinging by your local store for the rest. Here’s what you’ll need:
- 125g butter (softened)
- 1/2 cup caster sugar
- 1/2 teaspoon vanilla extract
- 1 large egg (room temperature)
- 2 cups self-raising flour (sifted)
- A pinch of salt
- Your choice of jam (strawberry, raspberry, apricot, etc.)
Remember, when baking with your bundles of joy, it’s important to organize your ingredients beforehand—little chefs can get quite excited, and you want to catch all the fun without having to hunt for that elusive teaspoon!
Step-by-Step Baking: Let’s Make Some Jam Drops!
Alright! With all your ingredients lined up, it’s time to create these drool-worthy treats. Follow these simple steps, and you’ll be the reigning monarch of Jam Drop kingdom in no time!
- Preheat Before the Heat: Kick things off by preheating your oven to 180°C (160°C fan-forced). Lining two baking trays with non-stick baking paper will also ensure your drops don’t stick.
- Creaming Together: In a large mixing bowl, cream together the softened butter, sugar, and vanilla extract until it’s pale and fluffy—this could be a mini workout for the kids!
- Egg-cellent Addition: Crack that egg in and mix it well with the creamed butter. It’s cool if it looks a bit curdled – the flour will sort it all out.
- Mixing in the Flour: Gently fold in the sifted self-raising flour and salt. You’re aiming for a soft, but not sticky, dough consistency. If it’s a tad too sticky, just add a sprinkle more flour.
- Shaping the Dough: Next, let the children roll teaspoons of dough into balls and place them on the prepared baking trays, leaving room for a little spread.
- Time to Indent: Now for the jammy bit! Make a small indent on each ball with your little one’s thumb or the back of a spoon. This will hold the magical dollop of jam.
- Spoonful of Jam: Fill those cute indents with your chosen jams but not too high to prevent an overflow during baking.
Tips to Nail Your Jam Drops Every Time
Before we continue to the baking bit, here are a few tips to ensure your Jam Drops are just perfect:
- Softened butter is key for that creamy texture, so don’t skip that step.
- Always pre-measure your ingredients to have a smooth-sailing experience, especially with excited kiddos around.
- If you’re using different jams, keep them separated to avoid mixed flavors (unless that’s your jam!).
- Let your drops cool down on the tray for a few minutes before transferring to a wire rack – they will be soft when hot.
With these tips in your baking belt, you’re well on your way to becoming the ultimate Jam Drop impresario.
So, there you have it! You’re well on your way to making some of the most delicious Jam Drops ever. The fun doesn’t stop here – stay tuned for the rest of the steps and some delightful variations of this classic recipe that will keep both you and your mini bakers thrilled. Let’s continue whipping up joy and jammy goodness in the kitchen, shall we?
Five Essential Tips for Parents Preparing Jam Drops
Before you and your little ones embark on this sugary adventure, here are five essential tips to enhance your jam drop baking experience:
1. Preparing Your Kitchen
Create a safe and accessible space for your kids to work in. Clear the countertops, ensure that all tools and ingredients are within reach, and preheat your oven as mentioned in the recipe. It’s also a good idea to go over kitchen safety, especially with regards to hot appliances and sharp utensils.
2. Involving Your Kids
Baking is an experiential learning activity for children, providing lessons in measurements, patience, and the reward of enjoying what they’ve made. Give them tasks suitable for their age, such as pouring, mixing, or rolling the dough into balls. The more involved they are, the prouder they’ll be of the end result!
3. Choosing the Right Jam
Select high-quality jam for the best flavor payoff. If you’re aiming for a healthier option or if allergies are a concern, you can always look for sugar-free or homemade jams. Also, be mindful of the color and texture; thicker jams tend to hold up better in the oven without spilling over.
4. Dough Consistency and Cooling
The dough should be soft but not too sticky to handle. If it’s too moist, add a little more flour. Chill the dough for about 15-30 minutes before shaping, if needed; this helps in handling and can also improve the overall texture of the cookies.
5. Perfect Timing and Cooling
Every oven is different, so keep a close eye on your cookies as they bake. You’re aiming for a light golden color. Once out of the oven, let them sit on the tray for a few minutes to firm up before placing them on the cooling rack. This prevents them from breaking when they’re still soft and warm.
These five tips should steer you towards making scrumptious Jam Drops that will have everyone smiling from ear to ear. Baking with children is about the process as much as the product, so embrace the moments of mess and laughter. Together, you’ll whip up not just cookies, but precious memories to cherish.
For more great articles please see here. For more information see here
Disclaimer
The articles available via our website provide general information only and we strongly urge readers to exercise caution and conduct their own thorough research and fact-checking. The information presented should not be taken as absolute truth, and, to the maximum extent permitted by law, we will not be held liable for any inaccuracies or errors in the content. It is essential for individuals to independently verify and validate the information before making any decisions or taking any actions based on the articles.


