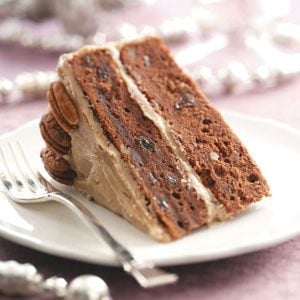
Delightful Cake Jam Recipe: A Sweet Addition to Your Family Desserts!
Hello there, sweet-loving parents! Are you ready to whip up a storm in your kitchen and create some mouthwatering memories with your little ones? Today, we’re diving into the colorful and delicious world of homemade cake jam! Whether it’s a spread for your tea-time toast or a scrumptious filling for birthday cakes, our cake jam recipe is sure to bring smiles to your family’s faces.
Why Homemade Cake Jam Rocks Your Taste Buds
Firstly, let’s chat about why making your own cake jam is just the bee’s knees! Going homemade means you can control the quality of ingredients — choosing organic fruits, limiting sugar, and saying goodbye to preservatives. Plus, there’s that unbeatable homemade taste that store-bought versions can’t touch.
Ingredients: The Foundation of Flavor
Okay, before we don our aprons and get jamming, let’s gather our ingredients. For simplicity, let’s start with a classic strawberry jam, but feel free to swap strawberries for your kids’ favorite fruits!
- 2 cups fresh or frozen strawberries (or fruit of choice)
- 1 cup granulated sugar (adjust to taste)
- 2 tablespoons lemon juice (freshness is key!)
- 1 teaspoon fruit pectin (this is optional for thicker jam)
Tools of the Trade
As for tools, you’ll need:
- A medium-sized heavy-bottomed pot
- A wooden spoon or spatula
- A ladle
- Sterilized jars and lids for storage
- A handheld potato masher or immersion blender (if you prefer a smoother jam)
Lets Get Started: The Jam-Making Process
Switch your chef mode on, and let’s create some jammy magic!
- Prepare Your Fruit: If you’re using fresh strawberries, wash them under cool water, remove the stems, and chop them up roughly. Frozen strawberries can be used as is – they’ll soften up nicely as they cook.
- Sugar and Strawberries Marination: In your pot, toss the strawberries with the sugar and let them sit for about 20-30 minutes (great time for a little dance party with the kiddos!). This helps the berries release their natural juices.
- Cooking Time: Place your pot on medium heat, add the lemon juice, and bring the mixture to a gentle boil. If you’re using pectin, now’s the time to sprinkle it in. Keep stirring to prevent sticking.
- Mash It Up: Once the berries have softened, which should take about 10 minutes, mash them to your desired consistency. Some like it chunky; some like it smooth — you do you!
- Test for Setting: To check if your jam will set, place a small plate in the freezer. Once cold, drop a dollop of jam onto it. If it wrinkles when you nudge it, it’s ready. If not, cook a bit longer and test again.
- Jar It: Carefully ladle the jam into your sterilized jars, wipe the rims if there are any spills, seal tightly with the lids, and turn them upside down for a vacuum effect.
- Cool Down: Let the jars sit undisturbed until they’re completely cool. You’ll know they’re sealed properly when the lids pop!
- Store or Enjoy! Store your jars in a cool, dark place or, if you’re like us and can’t wait, pop open a jar and spread some homemade love on a slice of warm, buttery toast.
There you have it, the building blocks to becoming a jam-making superstar in your own kitchen! But don’t stop here; we’ve got loads more tips and tricks up our sleeve to help you perfect your jammy creations.
Keep on reading for advanced tips on flavor combinations, the perfect pairing suggestions, and how to use this jam beyond just toast. With a bit of practice, you’ll be crafting jarfuls of joy that turn every snack into a celebration!
In the spirit of creative kitchen endeavors, remember that cooking with love provides food for the soul. So, let’s keep stirring, smiling, and spreading that delightful cake jam sweetness!

5 Essential Tips Every Parent Should Know Before Making Cake Jam
1. Freshness Is Key
When selecting fruits for your cake jam, always opt for the freshest ones you can find. Fresh fruits not only provide the best flavor but also contain natural pectins that help the jam to set. If you’re using frozen fruits, ensure they are of high quality and were frozen at the peak of their ripeness.
2. Safety First: Sterilize Your Jars
Ensuring the jars are properly sterilized before storing your jam is crucial to prevent the growth of bacteria. You can sterilize them by boiling the jars and lids for at least ten minutes or using a dishwasher on a hot cycle. Always handle the jars with clean hands and use them while they’re still warm.
3. Sweetness to Your Liking
Every family has its own preference for sweetness. Start with the recommended amount of sugar in the recipe, and adjust according to your taste. Keep in mind that sugar is not just a sweetener; it acts as a preservative, too. Reducing the sugar content may affect the shelf life of your jam.
4. Pectin or No Pectin?
Pectin is a naturally occurring substance in fruits that helps jam set. While some fruits have enough natural pectin, others might need a helping hand. For beginners, using a commercial fruit pectin can help ensure a successful set. But as you get more comfortable with jam making, you can experiment with how to coax out the natural pectins through the cooking process or by adding pectin-rich fruits like apples.
5. Patience Makes Perfect
Patience is indeed a virtue when it comes to making jam. Rushing the cooking process can lead to under or overcooked jam. Allow the fruit and sugar mixture enough time to reach the right setting point. Remember, the jam will continue to thicken as it cools, so don’t be tempted to overcook.
Advanced Tips for Perfecting Your Cake Jam
- Flavor Combinations: Be adventurous with your flavors! Mixing different fruits can create a unique taste that can complement your cakes perfectly. Try strawberry and rhubarb, blueberry and lemon, or peach and vanilla for a twist on the classic jam.
- Pairing Suggestions: Beyond spreading it on toast, your homemade jam can be used to fill cupcakes, swirl into yogurts, or glaze over desserts. It’s also a beautiful addition to cheese platters paired with a variety of cheeses and crackers.
- Texture Talk: If your jam turns out too chunky or too smooth for your preference, remember that you can always adjust the texture next time. For a chunkier consistency, reduce the mashing or blending time. For a smoother jam, cook the fruits down more before mashing or use an immersion blender to puree the jam to your desired smoothness.
By following these tips and keeping an open mind to variations, you can craft a cake jam recipe that is uniquely yours. Experiment with the ingredients and techniques until you find the perfect balance that your family loves.
Remember, the joy of cooking together and the delicious results are what truly make these moments special. Embrace the little hiccups along the way, and relish in the success of creating a scrumptious homemade cake jam. With these tools in hand, you’re not just making jam; you’re making memories. Happy jamming!
See more great Things to Do with Kids in New Zealand here. For more information see here
Disclaimer
The articles available via our website provide general information only and we strongly urge readers to exercise caution and conduct their own thorough research and fact-checking. The information presented should not be taken as absolute truth, and, to the maximum extent permitted by law, we will not be held liable for any inaccuracies or errors in the content. It is essential for individuals to independently verify and validate the information before making any decisions or taking any actions based on the articles.


