
White Christmas Recipe: A Family-Friendly Treat for the Holidays
Ho ho ho! Dear festive foodies and joyous parents, are you ready to sprinkle a little extra magic into your holiday season? Look no further than this charming White Christmas Recipe, bound to bring smiles and cheer to your family gatherings. Not only is this delightful treat a breeze to whip up, but it’s also a fantastic way to engage your little elves in the kitchen and create sweet Yuletide memories together!
What Is White Christmas?
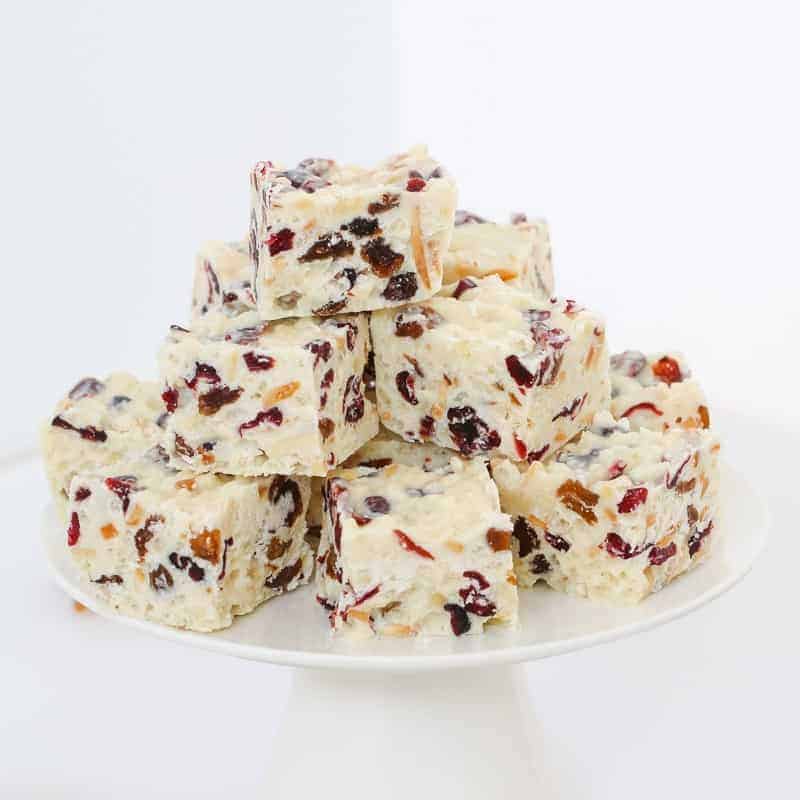
Before we dive into the recipe, let’s unwrap the mystery of White Christmas. This nostalgic no-bake confection hails from the land Down Under, where celebrating Christmas often means fun in the sun rather than snowball fights and icicles. White Christmas is a luscious blend of creamy ingredients dotted with colorful fruits and nuts, all set into a snowy slice that’s both eye-catching and mouth-watering. It’s a treat that truly embodies the whimsy and wonder of the season!
Gather Your Ingredients
Every recipe needs a sack of ingredients, and our White Christmas is no exception. Here’s what you’ll need to create this delightful treat:
- Copha or an equivalent solid vegetable shortening – This is the secret to that perfect sliceable texture. If Copha isn’t available where you’re at, look for a solid vegetable shortening that can be melted and reset.
- Powdered milk – For the milky, creamy base that gives White Christmas its name.
- Icing sugar – To add that sweet touch fit for a festive occasion.
- Glacé cherries – These add a pop of Christmas color and a chewy texture.
- Sultanas or raisins – For a little burst of natural sweetness and texture.
- Dried coconut – Because what’s a snowy treat without a sprinkle of coconut flakes?
- Rice bubbles or puffed rice cereal – For a light and crispy crunch that kids love.
- Extra goodies (optional) – Feel free to add your own mix-ins such as nuts, other dried fruits, or even edible glitter for a festive sparkle!
Now that you have your ingredients ready, make sure you’ve also got your kitchen tools on hand. You’ll need a large mixing bowl, a saucepan for melting the shortening, a wooden spoon or spatula for mixing, and a baking dish lined with parchment paper for setting your White Christmas masterpiece.
Step by Step: Creating Your White Christmas
Follow these simple steps, and you’ll have a batch of White Christmas that looks and tastes like pure holiday joy!
- Let’s start by melting that shortening. Place your Copha or vegetable shortening in a saucepan and gently melt it over low heat until it’s completely liquid. We want a silky smooth mixture without any lumps.
- In your mixing bowl, combine the powdered milk and icing sugar, giving them a good stir to remove any clumps. This is something the kids can help with – who doesn’t love a bit of mixing?
- Once your dry mix is ready, add in the glacé cherries, sultanas, and any other mix-ins you’re using. Toss them around to ensure they’re all coated and evenly distributed. These bursts of flavor are like the baubles on your Christmas tree, so distribute them with cheer!
- Pour in the melted shortening and mix everything together until it’s well combined. The resulting mixture should have a wet and glossy appearance, reminiscent of a winter wonderland! Remember, mix gently to keep the puffed rice from breaking too much.
- Now, carefully pour your White Christmas mixture into the prepared baking dish. Flatten it out with the back of a spoon or a spatula, pressing down gently to create an even layer.
- Patience is a virtue, especially when it comes to treats! Place your baking dish into the fridge and let it set for a few hours, until it’s firm to the touch and ready to be sliced into delightfully festive squares.
Troubleshooting tip: If your mixture seems too dry or crumbly, you might need a bit more melted shortening to help it stick together. And if it’s too wet, a sprinkle more powdered milk or coconut can save the day. The key to a merry White Christmas is balance – both in the kitchen and in life!
Once your White Christmas has set, it’s time to slice it up. This is a fun moment for the kids to get involved, perhaps using cookie cutters to create festive shapes that add that extra touch of holiday spirit. Dust with additional icing sugar for a snowy effect, and voila, your White Christmas is ready to serve and enjoy!
Remember, White Christmas isn’t just a scrumptious treat; it’s a wonderful opportunity for families to bond over the joy of cooking and the love of all things Christmas. So grab your aprons, gather the kids, and let’s make this holiday season the sweetest one yet with a homemade White Christmas that will melt hearts and satisfy sweet tooths!
Stay tuned for more tips on how to make this White Christmas recipe your own, including fun variations, decorating ideas, and how to turn this simple recipe into a new family tradition. Because after all, Christmas is about creating memories, and what better way to do that than with a delightful dessert that brings everyone together?
Happy holidays and happy baking, my dear festive friends! May your days be merry, your hearts be light, and your White Christmases be just as delightful as the company you share them with!
Five Things Parents Should Know When Preparing White Christmas Recipe
If you’re ready to don your Santa hat and start your festive baking, here are five helpful bits of wisdom to ensure your White Christmas recipe is nothing short of perfection:
1. Prep is Key
Before embarking on your culinary sleigh ride, ensure your mise en place is done. Have all your ingredients measured and chopped. Kids can help with tasks like measuring the dried fruits or lining the baking dish, making them feel like integral parts of the process. A little prep work makes the journey smoother and keeps any holiday kitchen chaos to a jolly minimum.
2. Quality Ingredients Matter
Since this is a no-bake treat, the flavor of each ingredient truly sings. Opt for high-quality dried fruits, and sift your icing sugar to avoid lumps. It’s the season of giving, and your treats should reflect that generosity in the care and ingredients you choose.
3. Customize to Your Family’s Taste
White Christmas is delightfully adaptable. Is your brood not fond of cherries? Swap them out for dried cranberries or apricots. Perhaps allergies are a concern? Substitute nuts with seeds like pumpkin or sunflower. Make this recipe your own and cater to what your family loves. It’s a fantastic way to ensure that every bite is as special as your family’s unique blend of tastes.
4. The Right Consistency
Achieving the ideal consistency is crucial. Your mixture should be moist enough to stick together but not overly greasy. If it’s too dry, it will crumble; too wet, and it may not set properly. If you run into either issue, remember the troubleshooting tips to adjust the consistency accordingly.
5. Chill Time Is Crucial
While it’s tempting to taste your creation right away, giving your White Christmas ample time to chill ensures it sets correctly and slices cleanly. Use this wait time to watch a holiday movie or craft some homemade decorations with the kiddos. After a few hours, you’ll be rewarded with the perfect texture and taste, with memories to match!
With these handy tips, you’re now ready to dive into the joyous world of White Christmas making! It’s a delightful opportunity to create a new tradition, enjoy quality time with your little ones, and of course, indulge in a sweet and creamy slice of holiday cheer. Happy baking, and may the spirit of the season fill your home with happiness and the scent of scrumptious sweets!
Variations and Decorations: Making White Christmas Your Own
Customizing your White Christmas is part of the fun! Here are some whimsical ways to make it your own:
- Chocolate Drizzle: Melt some white chocolate and drizzle it over the top for an extra layer of indulgence.
- Colored Sprinkles: Let the kids scatter festive sprinkles over the mixture before it sets for a dash of colorful joy.
- Themed Shapes: Use holiday cookie cutters to press into the set mixture and create shaped treats. Stars, trees, or even bell shapes can make this an even more enchanting experience for the little ones.
- Dust of Snow: A light dusting of powdered sugar before serving gives the illusion of fresh snow and adds a sweet finish.
- Personal Toppings: Encourage each family member to choose their own topping for individual squares. It could be anything from a piece of their favorite fruit to a marshmallow—anything goes!
Baking is about joy, sharing, and love—elements that are bountiful during the holiday season. Use this time to bond, indulge, and craft memories that will last well beyond December. Happy baking, and may your White Christmas be as wonderful as the twinkling lights on a tree! ??
For more great articles please see here. For more information see here
Disclaimer
The articles available via our website provide general information only and we strongly urge readers to exercise caution and conduct their own thorough research and fact-checking. The information presented should not be taken as absolute truth, and, to the maximum extent permitted by law, we will not be held liable for any inaccuracies or errors in the content. It is essential for individuals to independently verify and validate the information before making any decisions or taking any actions based on the articles.


