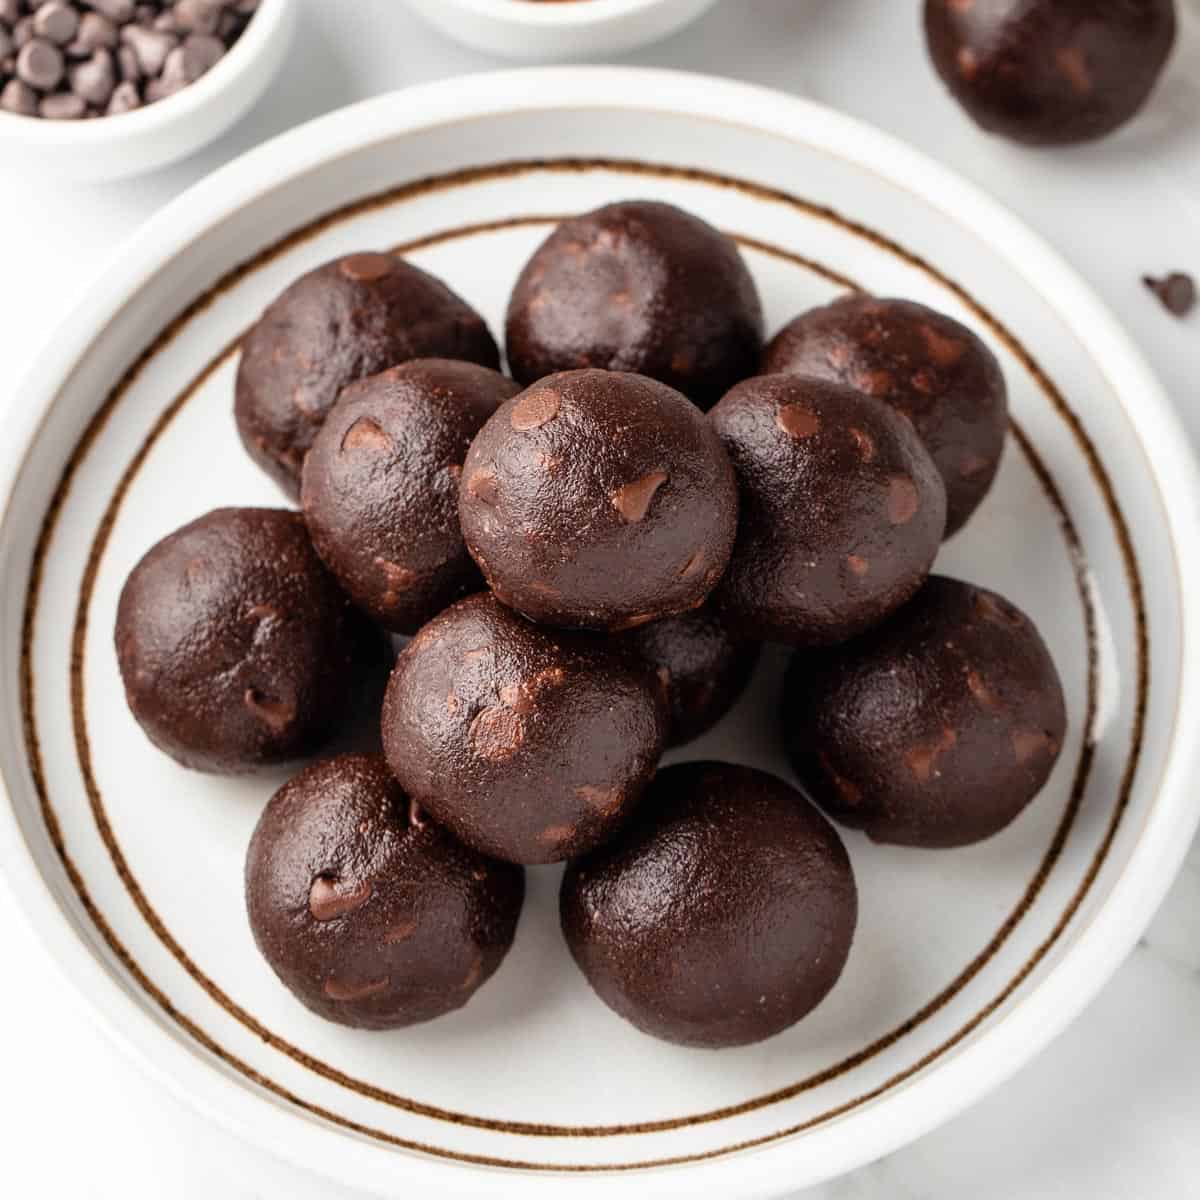
Delightfully Easy Chocolate Balls Recipe – A Parent’s Guide to Yummy Fun
Welcome, awesome parents! Are you ready to embark on a sweet adventure with your little ones? I’ve got the perfect treat for you! Our chocolate balls recipe promises to bring smiles, giggles, and some oh-so-delicious moments to your kitchen. Get ready to make memories and chocolate balls that will tantalize everyone’s taste buds!
Why Chocolate Balls Are a Hit with Kids & Parents Alike!
Chocolate balls are not just a treat; they’re an experience! They are the perfect combination of fun and flavor. Here’s why they’re a super star in the world of kid-friendly recipes:
- Easy to Make: With no baking required, these delightful sweets are perfect for chefs of all ages.
- Engaging Activity: Rolling and decorating the chocolate balls can be a fun, hands-on activity for your kids.
- Customizable: Whether it’s sprinkles, chopped nuts, or coconut flakes, chocolate balls can be decked in a variety of toppings.
- Perfect for Any Occasion: Whether it’s a birthday party, a school event, or a rainy day at home, these treats are always a hit.
Ingredients List
Prepping your ingredients beforehand makes the process smoother and allows the kids to jump straight into the fun part! Here’s what you’ll need for your basic chocolate balls:
- 1 cup of crushed biscuits (digestive or Graham crackers work well)
- 1/2 cup of cocoa powder
- 1/2 cup of desiccated coconut, plus extra for rolling
- 1/2 cup of sweetened condensed milk
- Optional: 1/2 teaspoon of vanilla extract for an extra flavor boost
Step-by-Step Instructions
Alright, it’s time to roll up your sleeves and dive into the chocolaty goodness. Just follow these simple instructions, and you’ll have irresistible chocolate balls in no time.
- Begin by laying out your ingredients and ensuring the kids are ready to go with clean hands.
- In a large mixing bowl, combine the crushed biscuits, cocoa powder, and 1/2 cup of desiccated coconut. If you’re using vanilla extract, now is the time to add it in!
- Pour in the sweetened condensed milk and stir the mixture until everything is nicely combined. It should be moist enough to hold its shape when rolled.
- Using a tablespoon, scoop the mixture and gently roll it between your palms to form small balls. If the kids are helping, this is their time to shine! They’ll love getting their hands chocolatey and creating the perfect-sized balls.
- Once you’ve rolled your chocolate mixture into balls, it’s time to make them pretty! Roll each ball into the extra desiccated coconut or any other toppings you chose. This adds an extra layer of taste and texture, plus it looks so fun!
- Place the finished chocolate balls onto a tray lined with baking paper. Once all of your balls are rolled and coated, pop the tray into the fridge for about an hour to set.
Voilà! You now have a batch of delectable chocolate balls that are ready to be devoured. But wait, there’s more! Let’s explore some variations and tips to make your chocolate balls even more spectacular.
Stay tuned for more mouthwatering variations that you and your kids will absolutely adore. Remember, making chocolate balls is not just about the delicious end product; it’s about the fun-filled journey of creating them together. So, get ready to laugh, lick some spoons, and make these scrumptious treats that will surely become a household favorite!
Not only are these chocolate balls a fantastic way to bond with your kids, but they also help in developing their motor skills, understanding measurements, and exploring creativity. What’s more, you can use this simple recipe as a base and let your imagination run wild with variations.
Now that you have the basics down pat, let’s move on to customizing these treats and creating a symphony of flavors that will make your family’s taste buds sing with joy!

5 Helpful Tips for Parents Preparing Chocolate Balls
Before you start creating those succulent chocolate spheres, here are five valuable tips to ensure everything goes smoothly:
1. Safe and Sanitary is the Way to Go
Teach your children the importance of washing their hands before they start helping in the kitchen. Establishing good hygiene practices can make cooking with kids a worry-free and joyful experience!
2. Mise en Place
This fancy French term simply means having everything prepared and in place before you begin. Measure out your ingredients, and have your utensils ready. This not only makes the process easier but also gives you more time to enjoy the fun parts with your kids.
3. Embrace the Mess, Avoid the Stress
It’s inevitable that things can get a little messy, especially with eager, tiny hands involved. Instead of worrying about it, lay down some parchment paper or a plastic tablecloth to make cleaning up afterwards a breeze. Remember, it’s all part of the fun!
4. Patience is Key
Things might not go perfectly according to plan, and that’s OK! Whether it’s a little spatula squabble or an unevenly rolled ball, it’s all part of the adventure. Be patient, and enjoy these precious moments of teaching and togetherness.
5. Keep it Fun and Flexible
When kids are involved, the goal is to keep the atmosphere light and enjoyable. Don’t worry too much about the chocolate balls being perfectly round or evenly coated. The uniqueness of each ball adds character and tells the story of a great time spent together.
Inspiring Variations for Your Chocolate Balls
Once you’ve got the hang of the basic recipe, it’s time to get creative! Here are some delicious twists to your chocolate balls that will keep everyone coming back for more:
- Add a crunch by mixing in some crispy rice cereal or crushed nuts into the biscuit and cocoa mixture.
- Go fruity by including dried fruits like raisins, cranberries, or chopped apricots.
- Make it a surprise by placing a marshmallow or a piece of your favorite candy in the center of each ball before rolling.
- Give it a festive touch with colorful sprinkles, edible glitter, or themed decorations depending on the holiday or occasion.
- For a more grown-up version, add a splash of rum, whiskey, or your favorite liqueur to the mix for a boozy treat.
The joy of this recipe is its versatility. Encourage your kids to come up with their own variation ideas – this not only makes them feel involved, but it also sparks their creativity and imagination.
Storage and Serving Ideas
Chocolate balls are best served chilled, so keep them stored in the refrigerator until it’s time to enjoy them. They can last up to a week in an airtight container, which is perfect for savoring the treats over several days.
When presenting your chocolate balls, get creative with presentation. Serve them in colorful cupcake liners, on a platter with a dusting of cocoa powder, or skewered on sticks to make chocolate ball lollipops. The presentation can be just as enjoyable as making them!
So there you have it, friends – a foolproof guide to making delightful chocolate balls that are sure to be a crowd-pleaser. Roll, decorate, chill, and most importantly, cherish the process. Now, gather your little sous-chefs, and let the chocolate ball bonanza begin!
For more great articles please see here. For more information see here
Disclaimer
The articles available via our website provide general information only and we strongly urge readers to exercise caution and conduct their own thorough research and fact-checking. The information presented should not be taken as absolute truth, and, to the maximum extent permitted by law, we will not be held liable for any inaccuracies or errors in the content. It is essential for individuals to independently verify and validate the information before making any decisions or taking any actions based on the articles.


