
? Hop into Fun with DIY Bunny Ears! ?
Welcome to the ultimate guide for creating DIY bunny ears that are bound to add an extra hop to your little one’s step! Whether you’re gearing up for Easter, planning a themed birthday party, or just looking for a fun weekend project, these homemade bunny ears are the perfect choice. Not only are they adorable and customizable, but they’re also an excellent way to bond with your kids through an easy and enjoyable craft activity. So, let’s get hopping on our bunny ear adventure!
? Why You’ll Love Making DIY Bunny Ears ?
- Simple Supplies: All you need are some basic craft materials you probably already have at home!
- Creative Freedom: The beauty of DIY is that you can customize your bunny ears to suit your child’s taste and personality.
- Cost-Effective: Skip the store-bought versions and save some carrots (money) by making your own!
- Memory Making: This isn’t just a craft; it’s a chance to create lasting memories with your family!
? Gather Your Materials
Before we start twitching our bunny noses, let’s hop over to the supply list! Make sure you’ve got all these items ready to go:
- Cardstock or construction paper
- Pink felt or pink construction paper
- Headband
- Scissors
- Glue gun (or strong craft glue)
- Markers or paint
- Decorative elements (stickers, glitter, etc.) – optional
? Step-by-Step Crafting Guide
Alright, it’s craft o’clock! We’re going to take you through this process step by delightful step:
1. Creating the Ear Shape ?
Cut two long ear shapes from the cardstock or construction paper. They should be about 8-10 inches long and 2-3 inches wide at the base, gently tapering to a rounded point at the top. Remember, it’s okay if they’re not perfect – each bunny’s ears are unique!
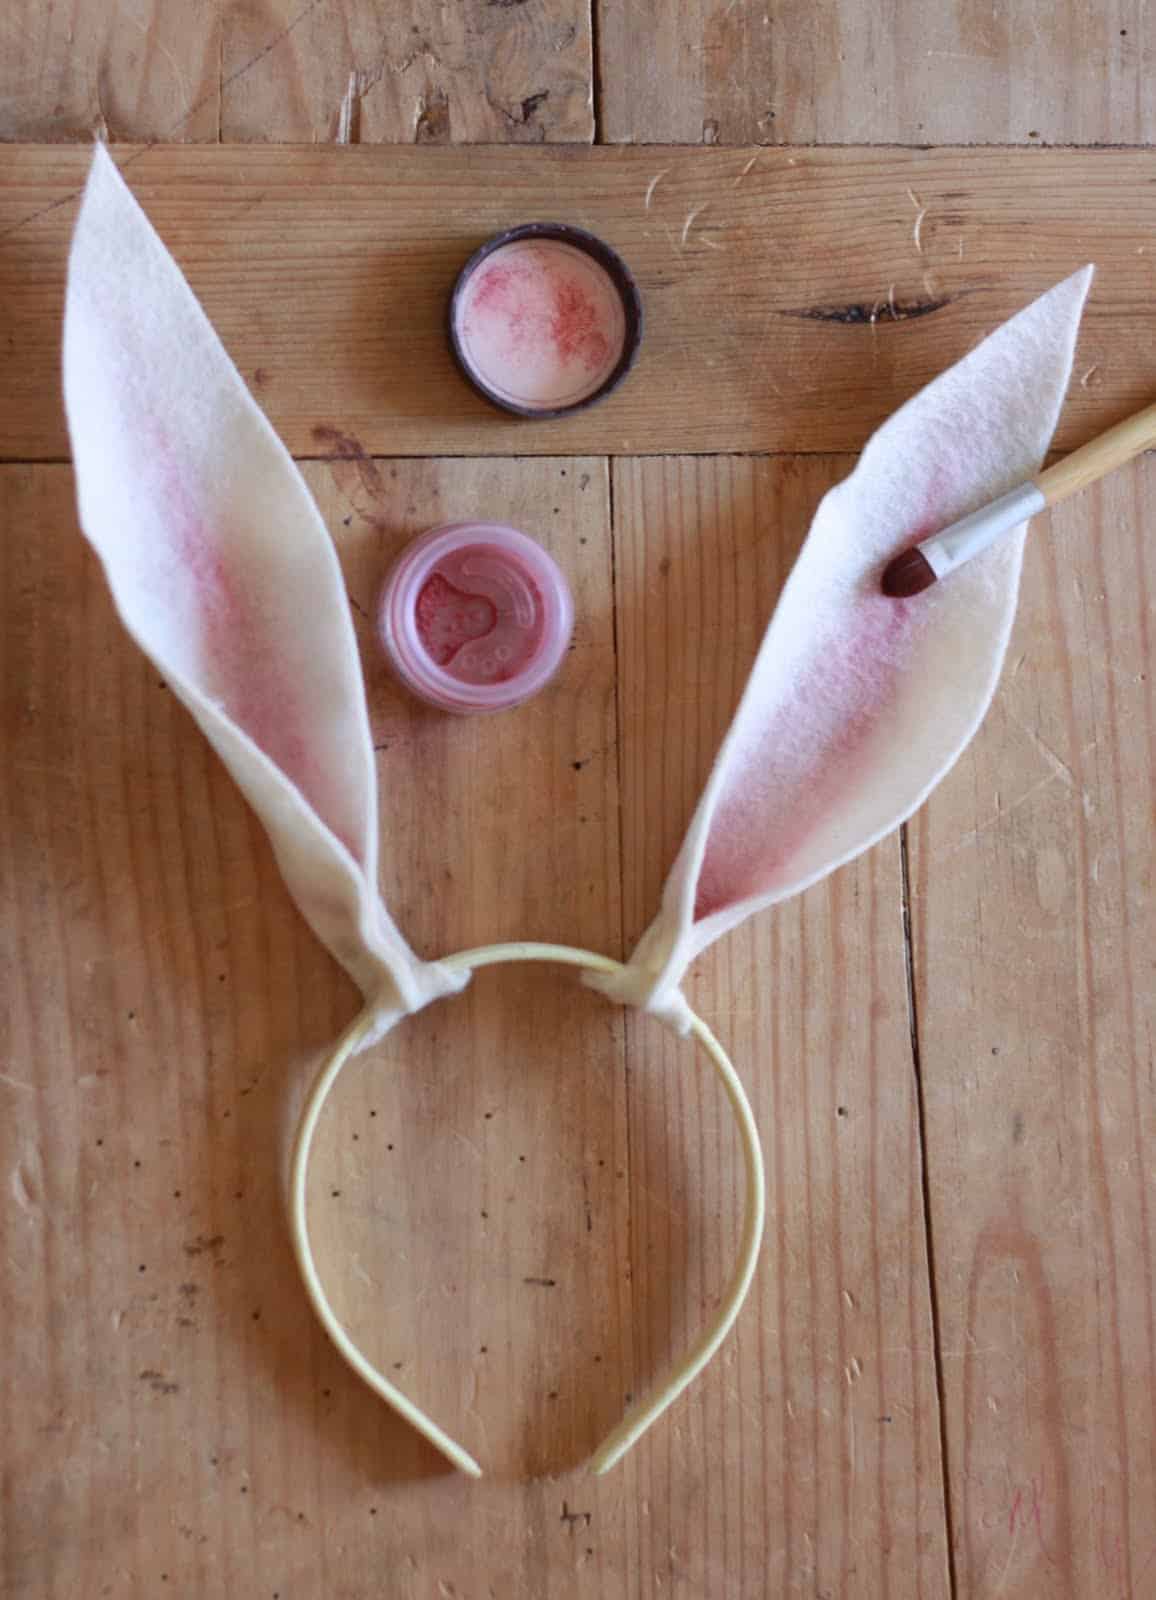
2. Pretty in Pink ?
Cut out two smaller pieces of pink paper or felt that mimic the shape of the larger ears, but slightly smaller. These will be the inner sections of the bunny ears to give them that iconic look. Glue these onto the cardstock ear shapes.
3. Giving the Ears Some Support ?
If you’re using thinner paper, you may need to reinforce the ears to make sure they stand tall. One way to do this is by gluing a strip of cardboard or thicker paper along the backside of each ear.
4. Attaching to the Headband ?
Once your ears have their shape and are reinforced, it’s time to attach them to the headband. Using your hot glue gun, affix the ears securely to the top of the headband. Ensure the distance between the ears looks natural – nobody wants wonky rabbit ears!
5. Personalize Your Bunny Ears ?
Now for the fun part – decoration time! Encourage your kids to let their imaginations run wild. You can add glitter, use markers to draw patterns, or stick on some playful stickers. Make them sparkle, shine, or even glow with personality! This step is truly where your DIY bunny ears will come to life.
It’s important to remember that crafting with little ones can get messy, so lay down some newspaper or a crafting mat before you begin. And always supervise the use of scissors and hot glue around children!
By now, you should have a pair of beautiful bunny ears that are almost ready for their debut. But our guide doesn’t stop here! In the next section, we’ll cover some extra tips and tricks for making your DIY bunny ears stand out from the hoppy crowd. Keep reading to discover how you can add the final touches to your crafty creation!
5 Things Parents Should Know When Preparing for DIY Bunny Ears
Now that we’ve covered the basics, let’s dig into some important tips to ensure your DIY bunny ears project is a smooth and enjoyable experience for the whole family!
1. Choose the Right Materials ??
When selecting materials for your bunny ears, opt for durability and flexibility. Cardstock is preferable over regular paper as it’s sturdier and holds up the ear shape better. For the inner ear, felt is a great option as it doesn’t fray and adds a nice texture.
2. Safety First! ?
Always practice safety when crafting, especially with little ones around. Ensure that scissors are child-friendly and that the use of a hot glue gun is closely supervised or handled by an adult. Also, opt for non-toxic markers and glues to keep your environment kid-safe.
3. Keep It Comfy ?
The headband you choose should be comfortable for your child to wear. Avoid materials that might scratch or pinch, and make sure it fits well. It shouldn’t be too tight or too loose – you don’t want those bunny ears flopping off mid-hop!
4. Crafting is a Process ?
Patience is key when crafting with kids. They may not get everything right on the first try, and that’s perfectly okay! Use this opportunity to teach them that it’s fine to make mistakes and that the real joy is in the creating, not just the final product.
5. Embrace the Mess ?
Crafting can be messy, but that’s part of the fun! Set up a designated craft area and dress for the occasion – maybe even in smocks or old clothes. Have cleaning supplies handy for any spills or sticky situations, and remember to relax and enjoy the creative chaos.
Adding Final Touches to Your Bunny Ears ?
With the basics out of the way and your freshly minted bunny ears at the ready, let’s hop into some final touches that will make your craft truly special.
Add Texture and Dimension ?
Adding a bit of cotton ball fluff or craft pom-poms can give your bunny ears a fluffy texture. You can also layer different shades of pink on the inner ears for a more dimensional effect.
Eco-friendly Options ?
Consider using recycled materials. Old cereal boxes can be cut up to reinforce the ears, and fabric scraps can replace construction paper for a more sustainable choice.
Interactive Elements ?
Make the ears interactive by adding elements like pipe cleaners inside the ears, which allow them to be bendable and adjustable, or hook and loop fasteners to add interchangeable decorations.
Your DIY bunny ears are not only super cute but an embodiment of love and laughter shared between you and your child. They’re a tangible keepsake of time spent together and the joyous spirit of creativity. So, wear those ears proudly, take lots of pictures, and most importantly, have a hopping good time!
Remember, every craft you embark on with your children is more than just an item you make – it’s about the moments you share, the giggles you have, and the memories you create. Happy crafting!
See more great Things to Do with Kids in New Zealand here. For more information see here
Disclaimer
The articles available via our website provide general information only and we strongly urge readers to exercise caution and conduct their own thorough research and fact-checking. The information presented should not be taken as absolute truth, and, to the maximum extent permitted by law, we will not be held liable for any inaccuracies or errors in the content. It is essential for individuals to independently verify and validate the information before making any decisions or taking any actions based on the articles.

