
DIY Drum Fun: A Creative Craft for Musical Families
Welcome, crafty parents and music lovers! If you’ve been searching for a fun, interactive activity that merges creativity with music, you’ve come to the right place. Building a DIY drum is not only an enjoyable project for the whole family, but it also offers a world of benefits for your children—enhancing their fine motor skills, rhythm, and appreciation for music. Let’s march to the beat of our own drums and dive into this exciting DIY journey!
Why Making a DIY Drum is a Hit with Kids
Before we break out the craft supplies, let’s explore the many reasons why making a DIY drum is a superb idea. For one, it’s an affordable way to introduce your child to the world of percussion without immediately investing in expensive instruments. Plus, there’s something magical about playing an instrument that you’ve created with your own hands. It’s sure to spark your child’s imagination and could even inspire other DIY musical endeavors.
Materials You’ll Need to Assemble Your Homemade Drum
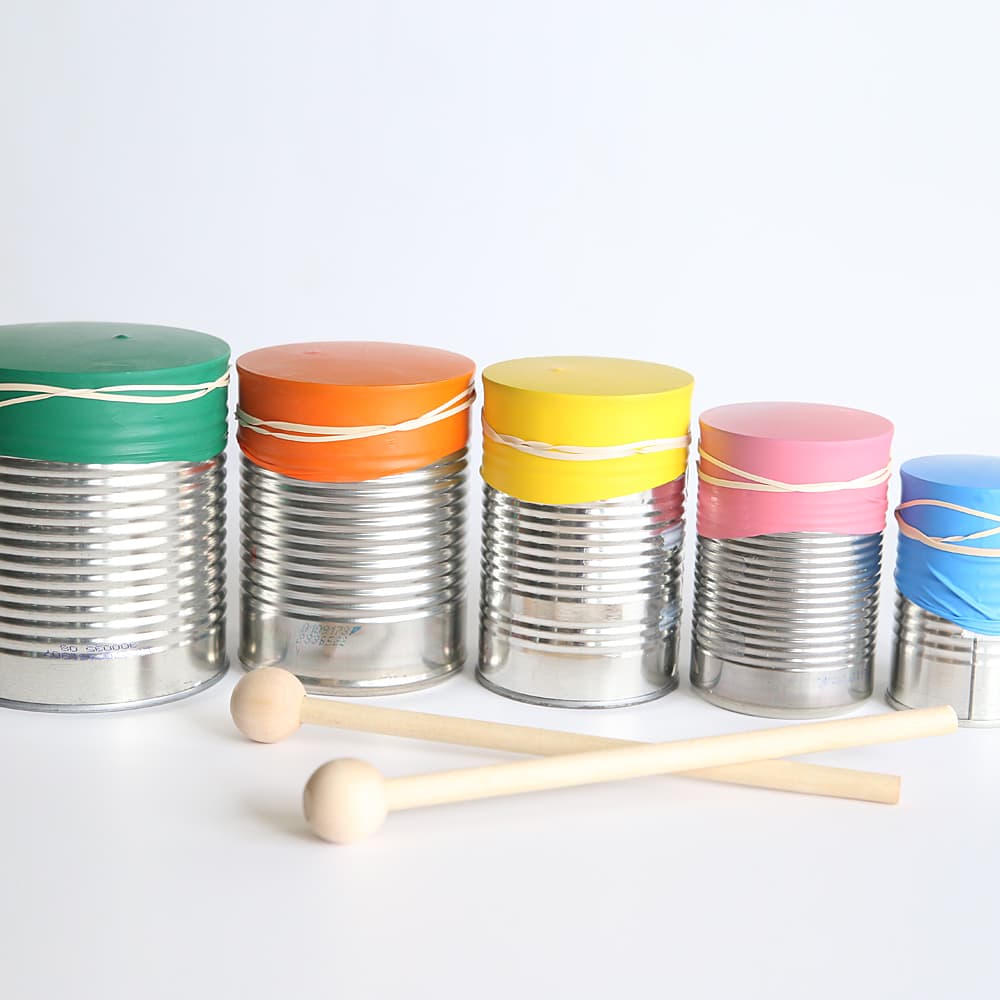
- Cylindrical Container: An oatmeal container, coffee can, or any sturdy cardboard tube.
- Drum Skin: Balloons or any flexible, durable material like synthetic leather.
- Tape or Glue: To secure the drum skin onto the container. Duct tape or strong adhesive works well.
- Decorating Supplies: Stickers, paints, markers, or any artistic tools your child loves.
Step-by-Step Guide to Crafting Your Drum
Now that we have our materials ready, it’s time to get our hands busy with some crafting magic! Follow these simple steps, and soon you’ll be ready to host your very own family drum circle.
Step 1: Preparing Your Drum Body
Start by selecting your cylindrical container, which will serve as the body of your drum. A standard-sized oatmeal container or coffee can is perfect. Make sure it’s empty and clean—the cleaner the surface, the better the sound. And don’t worry about any dents; they add character and uniqueness to your DIY drum!
Step 2: Choosing and Attaching the Drum Skin
The next step is to choose your drum skin. If you’re using a balloon, cut off the stem and stretch it over the opening of your container until it’s taut. Secure it in place with strong tape or glue. For a more traditional vibe, use synthetic leather, which you can glue or tape down just as well. Be sure there are no wrinkles or folds; a smooth, tight surface is key for a great sound.
Step 3: Decorating Your Drum
Now it’s time for the fun part—decorating! Let your child’s creativity run wild with stickers, paints, markers, or even fabric. Personalizing the drum makes the experience even more special and gives your child a sense of ownership over their new instrument. Remember, there are no rules in art, so encourage them to express themselves freely!
Tips for an Epic Drumming Session
With your newly crafted DIY drum, you’re almost ready to make some music. Here are a few tips to make your drumming session enjoyable:
- Play some music and encourage your children to drum along to the beat.
- Explore different areas of the drum to find various sounds.
- Learn simple rhythms and practice them with your child.
- Consider making multiple drums for a family drum circle experience.
Creating a DIY drum with your kids is an enriching activity that doesn’t just end with the crafts. It opens doors to an exciting world of rhythm and sound, encouraging your child to develop a lifelong love for music. Plus, you get a unique, handcrafted instrument that can be featured in many family jam sessions to come.
Stay tuned for the next stages, where we’ll delve into some advanced DIY drum techniques and ideas for taking your homemade drum to the next level. The rhythm adventure is just beginning, and the beats you and your kiddos create will echo the happy memories crafted alongside your DIY drum!
5 Things Parents Should Know in Preparing for DIY Drum
As you embark on this musical craft with your little ones, here are five important tips to keep in mind:
- Safety First: Always keep safety in mind. If the project involves cutting or handling sharp objects, make sure an adult does these steps, or at the very least, supervises closely. Choose non-toxic, child-friendly decorating materials, especially if your kids are young and likely to put objects in their mouths.
- Choosing the Right Materials: You want to find a balance between using materials that are easy enough for your kids to work with and durable enough to create a playable drum. Don’t hesitate to get creative! Many household items can be repurposed into parts of a DIY drum. Remember that the sound quality will vary depending on the materials you select.
- Prep Work: Do some prep work before inviting the kids to participate. Have all materials and tools ready and accessible. This can save time and keep the focus on fun and creativity, rather than logistics. If some steps require waiting periods (like glue drying), plan some other activity to keep the youngsters engaged.
- Space Matters: Arrange a crafting space that can handle a bit of mess. It’s a wise idea to cover tables with newspapers or a disposable tablecloth, and ensure ample space for the kids to work without feeling cramped. The more at ease they are, the more they’ll enjoy the process!
- Timing is Everything: Choose a good time for the drum-making activity when there is no need to rush. Ensure that you and your children are relaxed and can savour the experience. Building the drum should be as enjoyable as playing it!
Advanced DIY Drum Techniques for the Ambitious Crafter
As your family gets more comfortable with basic drum crafting, there are ways to elevate your DIY drumming experience:
- Incorporate different sizes of drums to create an array of sounds.
- Experiment with materials like rubber bands or springs to add unique audio effects.
- Build percussion accessories such as drumsticks or shakers using wooden spoons and filled containers.
The journey of making music is infinitely rewarding and deeply bonding for families. By taking the time to engage in these kinds of creative activities, parents nurture not only the musical talent of their children but also their cognitive and emotional development. The beats of your homemade drum can be the soundtrack to many cherished family moments.
Remember, the best part about DIY is the chance to make something uniquely yours. Encourage your kids to experiment and let their imagination dictate the rhythm. Every tap, every bang, and every roll will carry the signature of their joyful creativity. Get ready to make some noise and big smiles with your fantastic DIY drums!
See more great Things to Do with Kids in New Zealand here. For more information see here
Disclaimer
The articles available via our website provide general information only and we strongly urge readers to exercise caution and conduct their own thorough research and fact-checking. The information presented should not be taken as absolute truth, and, to the maximum extent permitted by law, we will not be held liable for any inaccuracies or errors in the content. It is essential for individuals to independently verify and validate the information before making any decisions or taking any actions based on the articles.


