
Unleash Your Inner Carpenter: Crafting a DIY Pallet Table Together
Hello, creative parents! Are you searching for a fun and resourceful weekend project that will not only add a homemade touch to your decor but also bring you and your little ones closer through crafting? Well, roll up your sleeves because we’re diving into the wonderful world of DIY pallet tables!
Pallets are versatile, generally inexpensive, and can be transformed into just about anything with a little imagination and effort. Plus, recycling wooden pallets is a green choice, which teaches your kiddos about upcycling and sustainability!
But before we grab our hammers and paint, let’s go through what we’re going to cover in this handy guide. We’ll start from selecting the perfect pallet, move on to gathering your tools, and guide you through each step to create your very own pallet table masterpiece. Ready? Let’s get started!
Choosing the Right Pallet
First things first, you’ll need to find a good-quality pallet. Not all pallets are created equal, and some might be treated with chemicals or be too damaged to use. Look for pallets marked with an “HT,” which means they’ve been heat-treated instead of chemically treated – much safer for indoor use and around kids. Pallets can often be found for free at local stores or warehouses, but always ask permission before taking them.
Gathering Your DIY Toolkit
With your pallet in hand, it’s time to gather your tools. Here’s what you’ll need:
- Hammer or nail gun
- Primer and paint or wood stain
- Paintbrushes and sandpaper
- Saw
- Screws and a drill
- Measuring tape and pencil
- Protective gear such as gloves and goggles
- Optional: Wood glue, castor wheels, and clear varnish
Having all supplies on hand before you start will streamline your project and minimize any mid-project store runs (we all know how that can go with little helpers in tow!)
Getting Started on Your DIY Pallet Table
Now, for the fun part – breaking down your pallet and starting the transformation! Here’s the step-by-step process to get your DIY pallet table underway:
- Prepping Your Pallet: Clean your pallet thoroughly and remove any loose nails or splinters. Sand it down to get a smooth surface and a more finished look.
- Disassembling the Pallet: Carefully take apart your pallet. This step can be tricky, so take your time to pry or saw the boards without splitting them.
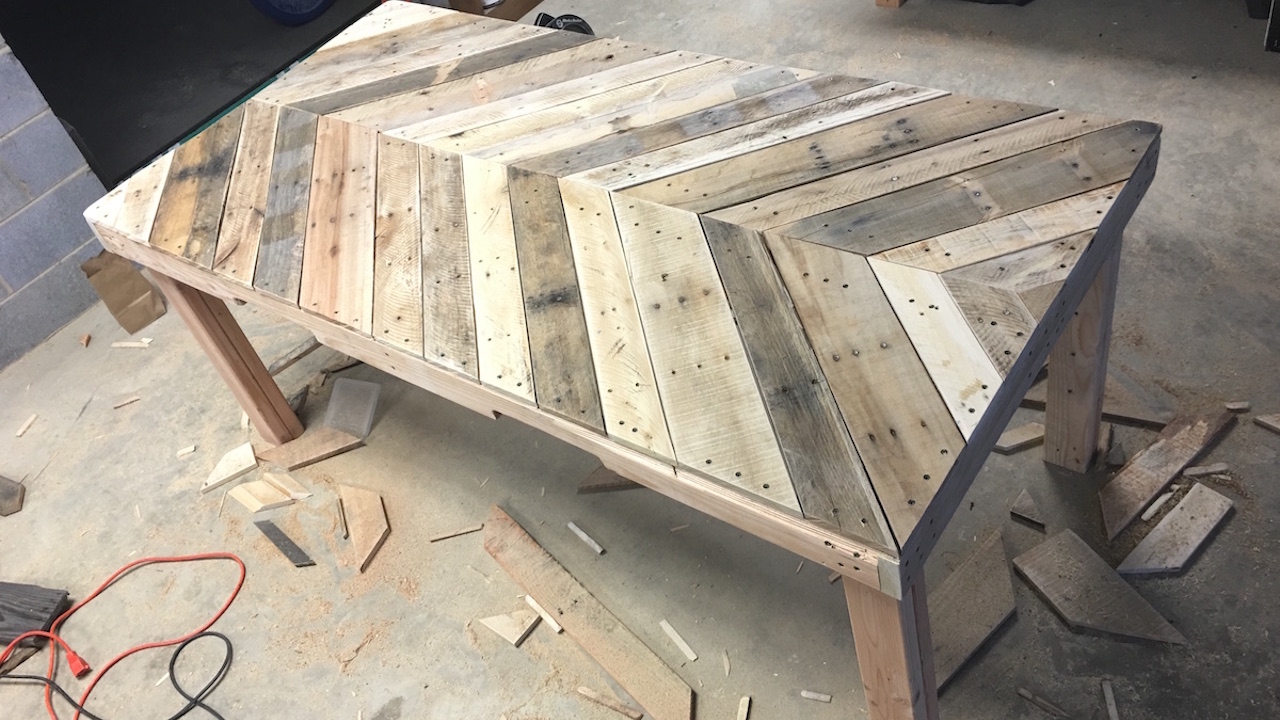
- Designing Your Table: Decide on the design of your table. It could be as simple as a classic rectangular coffee table or more complex, like one with built-in storage or creative patterns.
Remember to measure twice and cut once! Consistent measurements are key to making sure your pallet table is stable and symmetrical. And don’t stress about perfection; the rustic charm of your pallet table lies in its handmade character.
Let your creativity flow and get the kids involved with the simpler, safer tasks. They can help with painting or arranging the pallet boards. This hands-on experience not only nurtures their creative spirit but also instills in them a sense of accomplishment in building something tangible.
As you embark on this journey to craft your very own pallet table, remember that the process is as precious as the product. Enjoy the messy, laugh-filled sessions of sawdust and paint, and the joy of watching your creation come to life. Stay tuned for the next part of our guide, where we will dive into the assembly, finishing touches, and how to ensure your pallet table is both beautiful and kid-proof!

5 Things Parents Should Know in Preparing for a DIY Pallet Table
1. Safety First
When transforming a pallet into a beautiful piece of furniture, safety is paramount. Ensure that you’re working in a well-ventilated area, especially when painting or staining. Little ones are naturally curious, so keep all tools and materials out of their reach when not in use. Encourage children to wear safety goggles if they’re participating in sanding or painting to protect their little eye twinkles!
2. Pallet Inspection and Preparation
Look for pallets stamped with ‘HT’ for ‘Heat Treated’ to avoid chemical contamination. A good scrubbing and sanding are vital to prevent splinters and create a smooth surface, making it safe for the kids’ participation. Check for and remove any metal like nails or staples that could cause injuries during or after the project.
3. Keep the Design Kid-Friendly
Choose a table design with rounded corners and ensure that it is sturdy to withstand enthusiastic play. Engage your kids in the design process, allowing them to share their brilliant ideas, whether it’s choosing a paint color or adding personal touches like handprints or drawings sealed in the finish.
4. Upcycling and Sustainability Education
Using a pallet for furniture is a fantastic opportunity to educate your children about upcycling and the environment. Explain how reusing materials can reduce waste and show them the value of turning something old into a new treasure. It’s a practical and fun environmental lesson!
5. Patience and Flexibility
Working with children requires a healthy dose of patience and the understanding that projects may not go as quickly as if you were doing it alone. Stay flexible and remember that the bonding experience and the life skills they’re acquiring are far more valuable than a flawless finish.
By keeping these five points in mind, parents can ensure that this DIY project is not only an opportunity to create a charming and functional pallet table but also a chance to make memories and learn together as a family. Embrace this DIY adventure and get ready to add a personal touch to your home that’s full of heart and crafted with love!
Preparing the Pallet Boards
Pallet planks come in all sorts of conditions. Some may be rough and weathered, others might be stained or even have a beautiful aged patina. No matter what they look like, they all need a little TLC to become part of your new table. Keep the little ones busy by involving them in washing and drying the boards, a task that’s safe and even a bit splashy — perfect for giggly youngsters. Once dry, turn up some tunes and start sanding down the boards to a smooth finish that’s free from any rough spots.
Engage your children in environmental conservation by chatting about why using pallets is a great way to reuse materials. They’ll get a kick out of thinking they’re helping the planet while painting and sanding. Plus, by using child-friendly paints and finishes, you can make this project a worry-free art session!
Pallet projects really do bring the magic of creativity, sustainability, and family time together. Just picture the priceless look of pride on your kiddos’ faces when they see the pallet table they helped make, standing proud in your home. So go ahead, grab those pallets, and let’s create something beautiful and cherished for your family abode!
See more great Things to Do with Kids in New Zealand here. For more information see here
Disclaimer
The articles available via our website provide general information only and we strongly urge readers to exercise caution and conduct their own thorough research and fact-checking. The information presented should not be taken as absolute truth, and, to the maximum extent permitted by law, we will not be held liable for any inaccuracies or errors in the content. It is essential for individuals to independently verify and validate the information before making any decisions or taking any actions based on the articles.


