
Deliciously Healthy Homemade Muesli Bar Recipe for Kids
Hello dear parents! Are you in a snack-time scuffle trying to find the perfect balance between what’s healthy and what your kids will actually eat? Worry not, because we’re about to embark on a culinary journey into the world of homemade muesli bars!
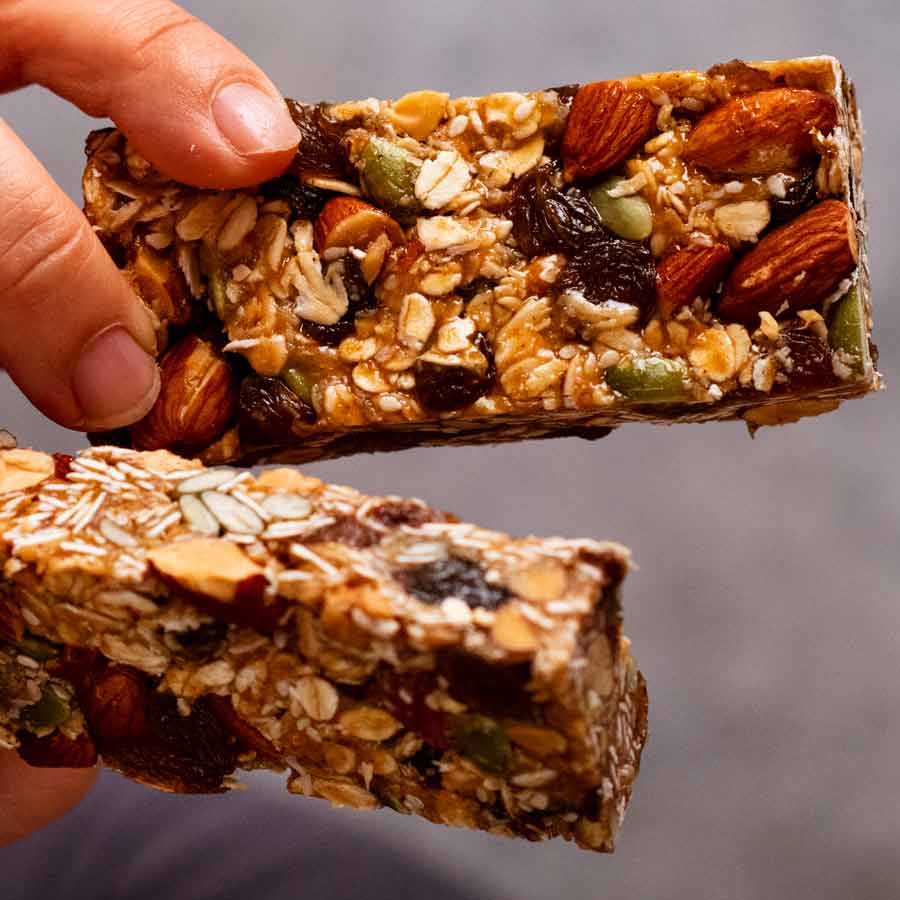
These nutritional powerhouses are not your average store-bought snacks. Filled with wholesome ingredients, our recipe for muesli bars is a game-changer, offering a delicious blend of oats, nuts, seeds, and sweet goodies to keep those little tummies full and happy. So, grab your apron, and let’s get started on a snack that’s sure to please everyone in the family!
Why Homemade Muesli Bars Are A Win-Win
Before we dive into the nitty-gritty of making these bars, let’s talk about why they’re a smart choice for your family. Commercially available snacks can be full of artificial sweeteners, preservatives, and other not-so-great ingredients. By making your own, you control what goes into them, ensuring your kiddos get only the best.
Additionally, homemade muesli bars are:
- Customizable: Whether your child is a fan of raisins or can’t get enough of chocolate chips, you can alter the recipe to suit their taste buds.
- Nutrient-dense: Packed with fiber, protein, and healthy fats, our muesli bars make for a nutritious snack that fuels those active bodies and minds.
- Convenient: Perfect for on-the-go breakfasts, school lunchboxes, or an after-school snack, these bars are handy and easy to store.
Gather Your Ingredients for Muesli Bars
Creating a delicious muesli bar is all about the mix-ins. Here’s a list of what you’ll need to prepare this scrumptious treat:
- 2 cups rolled oats
- 1/2 cup nuts (such as almonds, walnuts, or pecans), chopped
- 1/2 cup seeds (like sunflower or pumpkin seeds)
- 1/2 cup dried fruits (raisins, cranberries, or chopped apricots work well)
- 1/4 cup honey or maple syrup
- 1/4 cup unsalted butter or coconut oil
- 1 teaspoon vanilla extract
- 1/2 teaspoon cinnamon (optional)
- A pinch of salt
- Add-ins: dark chocolate chips, coconut flakes, or anything else you fancy!
Now that you have your ingredients all lined up, let’s make some magic happen in the kitchen!
Step-by-Step Guide to Crafting Your Muesli Bars
Alright, it’s time to transform these simple ingredients into the ultimate treat. Follow this step-by-step process, and you’ll have delicious muesli bars that are ready to be devoured.
- Preheat your oven to 350°F (175°C). This ensures your muesli bars will bake evenly and come out with the perfect texture.
- Line an 8-inch square baking dish with parchment paper, leaving an overhang on the sides to make it easier to lift out the muesli bars once they’re done.
- In a large mixing bowl, combine the oats, nuts, seeds, dried fruits, and any additional add-ins you’ve chosen. If you’re using cinnamon and salt, mix them in at this stage as well.
- Preparation Is Key: Start by gathering all your ingredients and equipment. This will make the process smoother and will prevent any mid-recipe mishaps. Make sure you have a good quality baking dish, parchment paper for easy removal, and a sturdy mixing spoon.
- Involve Your Kids: Preparing muesli bars is a fantastic opportunity to get your kids involved in the kitchen. They can help mix the ingredients and choose their favorite add-ins, making them more excited to try the healthy snack they’ve helped create.
- Nut Allergies and Substitutes: If your child or any of their friends have nut allergies, it’s important to substitute nuts with seeds or allergy-friendly ingredients. Seeds like hemp or chia can provide similar nutritional benefits without the risk.
- Watch the Sweetness: While honey and maple syrup are natural sweeteners, it’s vital to use them sparingly. Too much sweetness can overshadow the other flavors and decrease the nutritional value of the bars. Balancing the sweetness with the other ingredients is the secret to a delicious muesli bar.
- Storage Tips: Once your muesli bars are cooked and cooled, storing them correctly will keep them fresh and tasty. An airtight container is your best bet, and you can keep them in the refrigerator to extend their shelf life even further.
- In a small saucepan, melt the butter or coconut oil over low heat. Stir in the honey or maple syrup and vanilla extract, then pour this wet mixture over your dry ingredients. Mix thoroughly until everything is well coated.
- Transfer the mixture to your lined baking dish. Press it down firmly with the back of a spoon—you want the mixture to be packed tight so that the bars hold together after being baked.
- Bake in the preheated oven for 20-25 minutes or until the edges start to turn golden brown. The baking time can vary slightly depending on your oven, so keep an eye on them to avoid overbaking.
- Remove from the oven and let the muesli slab cool completely in the dish on a wire rack. Once cool, use the parchment paper to lift out the slab, and cut it into bars or squares.
- Q: How can I make these muesli bars gluten-free?
A: Simply use certified gluten-free oats and ensure that all your add-ins do not contain gluten. - Q: Can I make these muesli bars vegan?
A: Absolutely! Swap out the honey for maple syrup or agave nectar, and use coconut oil instead of butter. - Q: What if my child is sensitive to grains?
A: Try using puffed quinoa or rice to replace the oats for a grain-free alternative.
Our journey through crafting homemade muesli bars has only just begun! In the next section, we’ll continue with the baking process and share some top tips for storing your tasty creations. We’ll also dive into some FAQs and variations for those with dietary restrictions. Keep your mixing spoons at the ready, and let’s prepare for some muesli bar magic!

5 Things Parents Should Know When Preparing Muesli Bars
Before you dive into the delightful task of creating these muesli bars, there are a few key points to keep in mind that will ensure your snack-making adventure is both fun and successful:
Completing the Baking Process
And there you have it, sumptuous homemade muesli bars that are sure to be a hit with the kids and adults alike! Let’s not forget that you can play around with this recipe to create numerous variations. Are your kids fanatical about fruit? Why not try adding banana chips or dried mango? Feeling adventurous? Experiment with a pinch of nutmeg or cardamom for an exotic twist.
Storing Your Muesli Bars
Now that you’ve got these beauties all set, let’s talk storage. To keep them fresh and chewy, store your muesli bars in an airtight container. They’ll last up to a week on the counter or in the pantry, and placing them in the fridge can extend their freshness for up to two weeks. If you’ve made a big batch, you can even freeze them for up to 3 months. Just make sure to separate the bars with parchment paper so they don’t stick together.
FAQs and Variations for Dietary Restrictions
We understand every family has unique dietary needs, and it’s important to adapt recipes accordingly. Here are some common questions and alternative options you can consider:
Remember, experimenting with recipes is all about having fun and discovering what works for your family. Whether it’s swapping, omitting, or adding new ingredients, homemade muesli bars are versatile and always delectable!
For more great articles please see here. For more information see here
Disclaimer
The articles available via our website provide general information only and we strongly urge readers to exercise caution and conduct their own thorough research and fact-checking. The information presented should not be taken as absolute truth, and, to the maximum extent permitted by law, we will not be held liable for any inaccuracies or errors in the content. It is essential for individuals to independently verify and validate the information before making any decisions or taking any actions based on the articles.


