
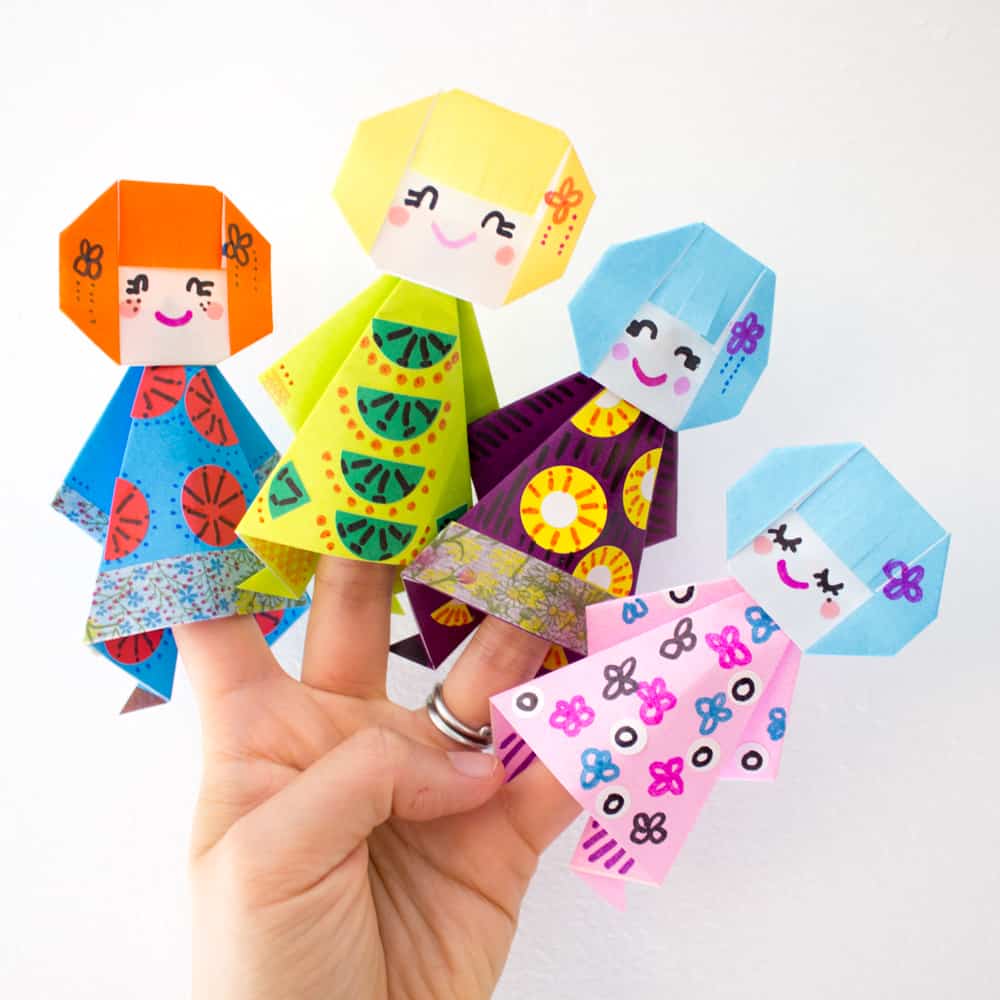
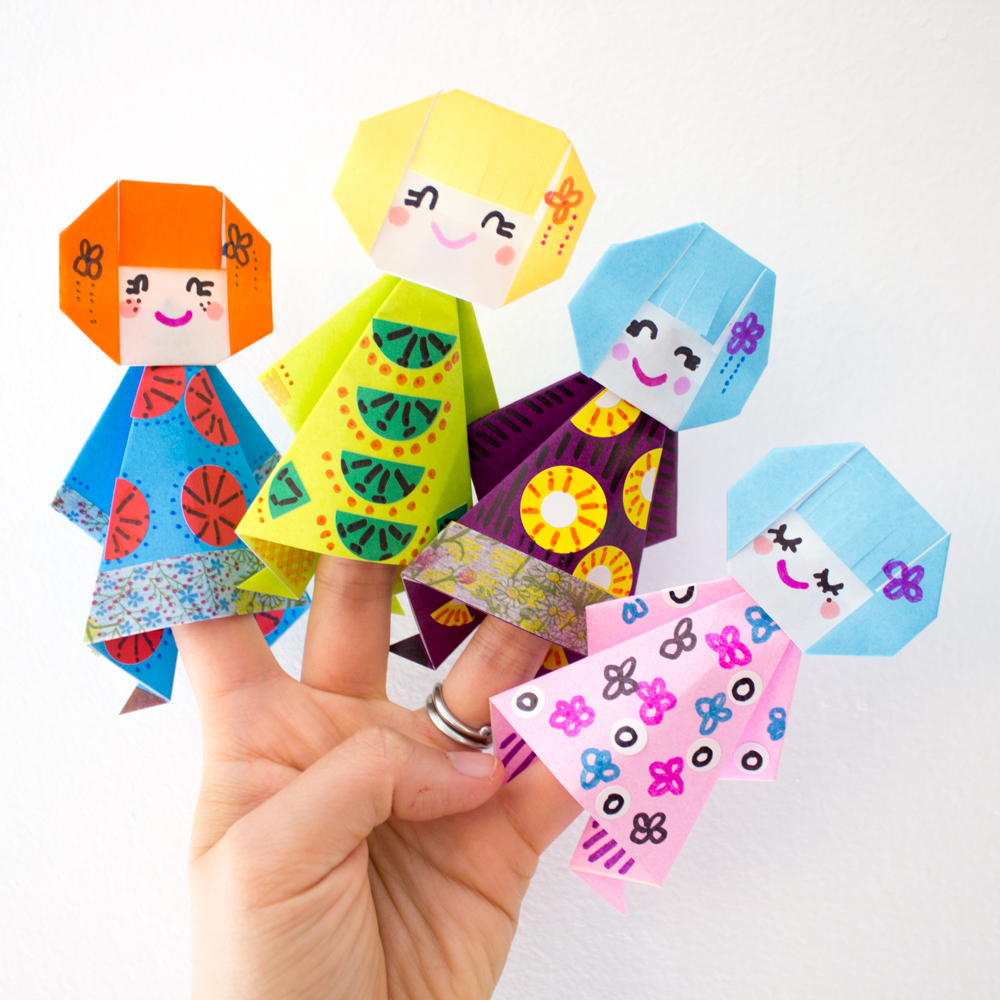
Crafting Memories: How to Make Paper Dolls with Your Little Ones
Hello crafty parents and guardians! Are you on the lookout for a delightful activity that can spark creativity and provide endless hours of fun for your kids? Look no further, because paper dolls are not just a nostalgic throwback; they’re a perfect way to enhance your child’s creativity and fine motor skills. In this ultimate guide, we’re going to explore the whimsical world of paper dolls and how you can make them with ease. So, grab your crafting kit, summon your little ones, and let’s dive into this timeless activity!
What You’ll Need to Start
- Cardstock or sturdy paper: The base of your paper dolls should be firm enough to withstand play, but flexible enough to cut into shapes. You can opt for colored or patterned paper to make it more exciting!
- Scissors: A good pair of scissors is crucial. Make sure they are safe for little hands if they’ll be doing the cutting.
- Pencils and markers: For drawing and decorating your paper dolls. Let your imagination run wild with colors!
- Templates or creativity: You can either download paper doll templates online or create your own unique designs.
- Adhesives: Glue sticks or double-sided tape will help in adding clothes and accessories to the dolls.
- Optional embellishments: Think glitter, fabric scraps, buttons, and yarn – these can add wonderful texture and character to your paper dolls.
Step-by-Step Guide to Crafting Paper Dolls
The most fantastic thing about paper dolls is that they can be simple or elaborate depending on you and your child’s preferences. Here’s a beginner-friendly way to get started:
Step 1: Design Your Doll
Before you get to cutting and coloring, the first step is to design your doll. You can create a basic figure shape or go for something more complex if you’re feeling artsy. If drawing isn’t your strong suit, don’t fret! Plenty of templates are available online to give you a helpful starting point. Choose one that resonates with you and your child and print it out on your cardstock or sturdy paper.
Step 2: Cut Out the Doll
With your template ready, it’s time to cut out your paper doll. If your children are old enough, allow them to do the cutting under your supervision. This process helps them to develop their fine motor skills and the satisfaction of having helped create their new paper friend!
Step 3: Customize with Color and Features
Once your doll is cut out, it’s time to get creative! Use your pencils and markers to draw on facial features, hair, and any specific details that will bring your doll to life. Encourage your children to express their creativity. There’s no “right” way to color a paper doll—it’s all part of the unique handcrafted charm.
We’re just scratching the surface of the delightful process of making paper dolls. Stay tuned for more steps and tips on creating fabulous outfits, styling picturesque settings, and sparking imaginative play with your wonderful paper creations!
By now, your children should be smiling ear to ear with their custom-made companions. But remember, this is only the beginning. In the next section, we’ll reveal how to craft an entire wardrobe that can teach your kids about colors, patterns, and styles. Join us as we continue our journey in creating paper dolls that will not only entertain but also educate. Keep those scissors handy—adventure awaits!
5 Things Parents Should Know Before Making Paper Dolls
Before you embark on this fun-filled craft journey, here are five essential tips every parent should know:
1. Preparation is Key
Having everything organized and prepped in advance makes the paper doll-making process smoother for both you and your little ones. Ensure all the necessary materials are within arm’s reach to keep the focus on creativity and fun.
2. Safety First
When it comes to scissors and adhesives, safety should be your top priority. Invest in child-safe scissors with rounded edges and non-toxic glue, especially when crafting with younger children. Supervision is crucial to maintain a safe craft environment.
3. Patience is a Virtue
Remember, making paper dolls is not about perfection. It’s about spending quality time with your kids and encouraging their creativity. Be patient and open to their ideas, even if it means the dolls will have purple hair or three arms. It’s their masterpiece after all!
4. Creativity Comes in Many Forms
While templates are great for beginners, encourage your children to explore their own designs as they get more confident. This isn’t just about following instructions; it’s about igniting their imagination and seeing where it takes them.
5. It’s More Than Just Paper and Glue
Through this activity, your children will learn valuable skills such as color matching, pattern recognition, and basic fashion design. It can also be an opportunity to discuss historical or cultural attire, broadening their educational horizons through play.
Creating a Paper Doll Wardrobe and Accessories
Now that you and your little designers have crafted the perfect paper companions, it’s dress-up time! Making a wardrobe for your paper dolls is not only fun but it’s also an amazing opportunity to explore styles and fashions from different eras or cultures.
Step 4: Design Fashionable Outfits
Start by sketching out some outfit ideas on a separate piece of paper. Once you and your child are happy with the designs, trace them onto embellished or colored paper that will serve as your doll’s clothes. You can create everything from everyday outfits to fancy ball gowns, superhero costumes, or traditional attire from around the world.
Step 5: Carefully Cut and Fit the Apparel
After designing the outfits, carefully cut them out, keeping in mind that the clothes will need to fit the dolls snugly. You can create tabs to fold over the doll’s shoulders or sides, which will keep the clothes in place without adhesive.
Step 6: Add Details and Accessories
No outfit is complete without the right details and accessories! Encourage your kids to add sequins, ribbon, stickers, or even fabric scraps to give each piece of clothing texture and flair. Don’t forget to craft accessories such as hats, bags, and shoes.
Step 7: Organize a Paper Doll Fashion Show
With an array of stunning outfits and accessories ready, it’s time to let the dolls strut down the runway. Create a simple ‘catwalk’ using a long strip of cardstock. Not only is this a great way for the kids to showcase their work, but it also adds an element of storytelling and performance to your creative afternoon.
Creating paper dolls is much more than just an arts and crafts project; it’s an opportunity to bond with your kids, watch their imaginations soar, and maybe even relive a bit of your own childhood. This guide is your starting point, but the possibilities are limitless. Each paper doll can have its own story, and every outfit is a chapter in their tiny paper lives that your children create and narrate. Let the crafting begin!
See more great Things to Do with Kids in New Zealand here. For more information see here
Disclaimer
The articles available via our website provide general information only and we strongly urge readers to exercise caution and conduct their own thorough research and fact-checking. The information presented should not be taken as absolute truth, and, to the maximum extent permitted by law, we will not be held liable for any inaccuracies or errors in the content. It is essential for individuals to independently verify and validate the information before making any decisions or taking any actions based on the articles.

