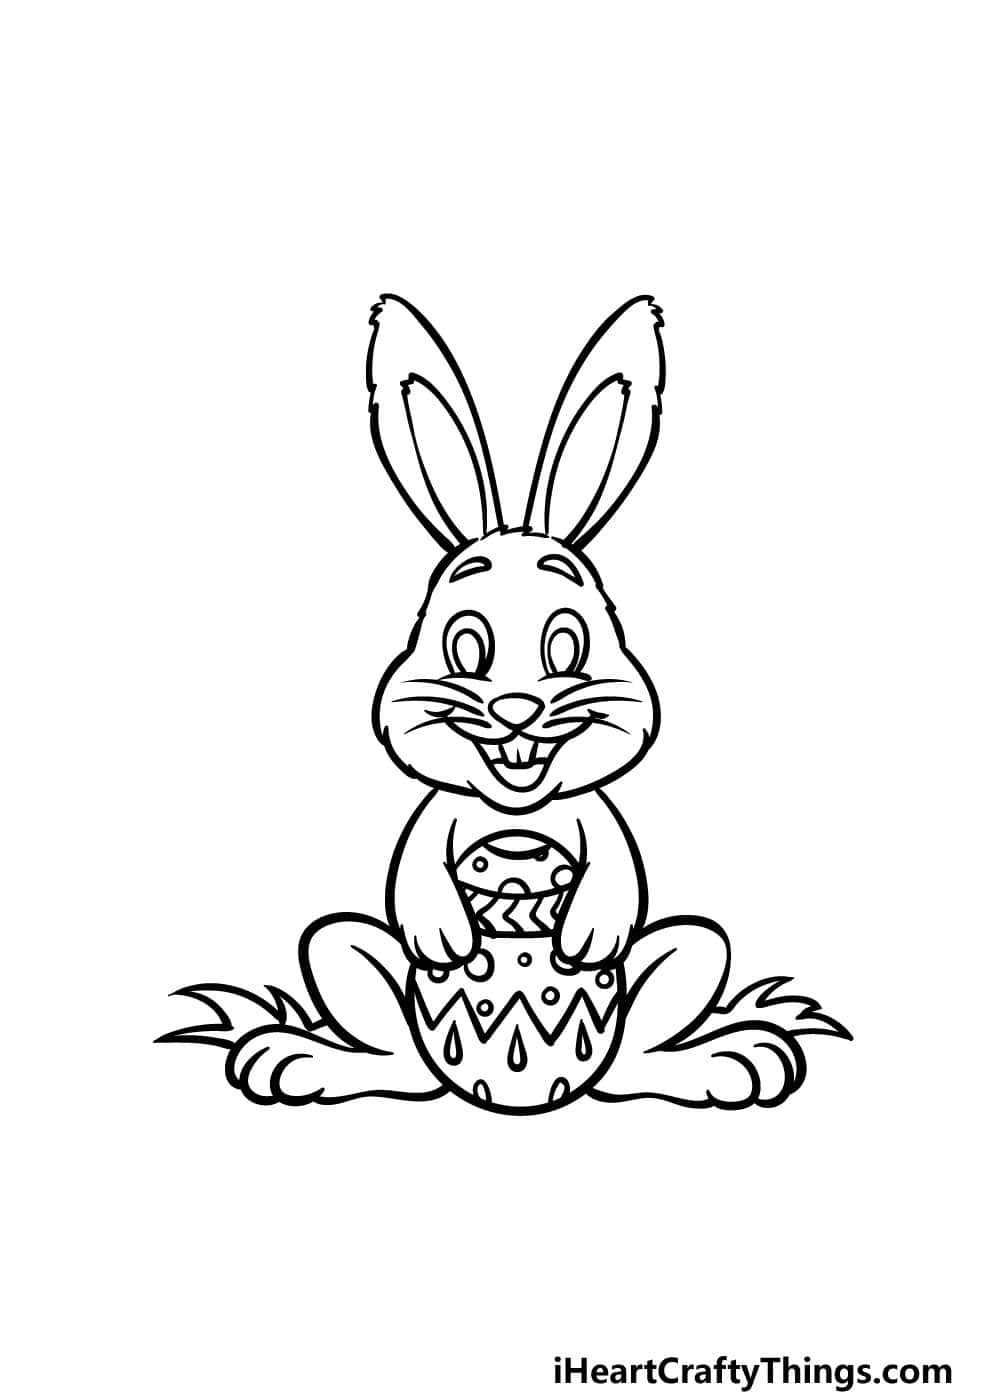
Hop Into Art: Easy Easter Bunny Drawing for Fun Family Time
Hello there, sunny parents and creative kiddos! Are you ready to sprinkle some artistic charm into your Easter celebrations? Well, get your pencils and paper ready because we’re about to dive into the delightful world of easy Easter bunny drawing!
We all love the excitement that comes with Easter: the vibrant egg hunts, the sweet chocolate treats, and the heartwarming family gatherings. But what’s Easter without our favorite fluffy friend, the Easter Bunny? Drawing this hoppy little character can be a hoppin’ good time for the entire family, and I’m here to guide you every step of the way. So, let’s make this Easter a memorable one with some drawing fun!
Get Ready to Draw!
Before we start, let’s gather our creative tools. All you need is a few simple items:
- Plain white paper or a sketchpad
- Pencils
- An eraser (for those tiny oopsies)
- Colored pencils or crayons (to bring your bunny to life)
Once you’ve got your drawing kit assembled, find a cozy spot where you and your little artists can work together. A kitchen table or a well-lit floor space works wonders.
Step-by-Step Guide to Drawing Your Easter Bunny
Now let’s hop into the step-by-step guide on how to create a simple, cute Easter bunny that everyone can enjoy:
Step 1: Start with the Head
Draw a circle in the center of your paper. This will be the bunny’s head. It doesn’t have to be perfect – bunnies come in all shapes and sizes, after all!
Step 2: Add the Bunny Ears
On top of the head, add two long ovals for ears. Make one ear slightly bent for a touch of character!
Step 3: Bunny’s Body
Just below the head, draw an oval shape for the bunny’s body. Keep it proportionate to the head for a balanced look.
Step 4: Face Features
Next, give your bunny some personality. Two small circles for the eyes, a triangle for the nose, and a gentle curve for the mouth. Don’t forget those whiskers!
Step 5: Bunny Paws
For the front paws, draw two small ovals on either side of the bunny’s body. For the feet, draw two larger ovals at the bottom. They can be slightly pointed at the ends.
And there you have the initial sketch of your easy Easter Bunny drawing!
Tips for a Successful Drawing Session
Creating art with your little ones can be a joyful yet educational experience. Here are a few tips to make sure this art activity is filled with giggles and pride:
- Be Patient: Remember, the goal is joy, not perfection. Each bunny will have its unique charm, just like your child’s imagination.
- Encourage Creativity: Let your kids add their own touch. Maybe the bunny is holding an Easter egg, or wearing a bow tie – let their creativity shine!
- Praise the Effort: Celebrate each stroke of the pencil. Every drawing is a masterpiece worth hopping about!
Stay tuned for more details on how to add the finishing touches to your Easter bunny drawing, including shading, coloring, and personalizing your bunny. Keep those pencils dancing, folks, because this is just the beginning of our festive Easter drawing adventure!

5 Things Parents Should Know When Preparing for Easy Easter Bunny Drawing
Drawing with your children can create not just art, but memories that last a lifetime, especially during festive occasions like Easter. Here are five important things you should keep in mind to ensure a smooth and enjoyable drawing session with your little ones:
1. Keep It Simple and Fun
Starting with a simple and achievable drawing is crucial. Overly complicated pictures might discourage young artists. Stick with basic shapes like circles, ovals, and curves that children can easily replicate. Remember, the process is supposed to be fun, not rigorous!
2. Prepare the Right Environment
It’s essential to have a calm and comfortable environment for drawing. Ensure the space is clutter-free and well-lit, which helps kids to concentrate and reduces eye strain. A peaceful setting encourages kids to focus and enjoy their art without distractions.
3. Have All Materials Ready
Before starting, have all materials at hand to avoid disrupting the creative flow. Aside from the essentials—paper, pencils, erasers, and colors—consider covering the table with an old tablecloth or newspapers for easy cleanup, especially if markers or paints are involved.
4. Embrace Imperfections
Let go of the idea of creating a perfect drawing. What matters most is the experience and the joy it brings. Praise your child’s attempt, regardless of how the bunny turns out. It’s the effort and creativity that count, not the end result.
5. Guide, Don’t Dictate
As you help your child with their drawing, offer guidance while allowing them autonomy. Encourage them to try their own interpretations and ideas, and avoid taking over or correcting their work too much. This nurtures their confidence and creativity.
With these tips in mind, parents can set the stage for a successful and memorable drawing experience. Let’s brighten this Easter with some artistic flair and joyful learning!
Adding Personality to Your Easter Bunny
Once you have the basic outline of your Easter bunny, it’s time to hop into the fun part—personalizing and coloring your creation!
Step 6: Adding Details and Texture
Draw soft lines inside the ears and on the body to create fur texture. Add a cute fluffy tail at the back with a few squiggly lines, and maybe even a little bowtie or a collar around the bunny’s neck for added cuteness.
Step 7: Bring Your Bunny to Life with Color
Choose light, spring-like colors to fill in your bunny. Soft pastel pinks for the inner ears, a gentle brown or gray for the fur, and bright colors for any accessories your bunny might wear. Coloring is also a great time for children to learn about different color combinations and shading.
Step 8: Background and Setting
To put your bunny into the Easter spirit, draw a background. This could be an Easter basket, a field of flowers, or even an Easter egg hunt scene. Encourage kids to imagine where their bunny might be celebrating Easter.
Drawing is a fantastic way for families to bond and for children to express their creativity. This easy Easter bunny drawing guide is a wonderful opportunity for parents to engage with their children in a creative, educational, and fun activity — perfect for celebrating the joy of Easter together.
So there you have it, folks – with a touch of creativity, some simple supplies, and a dash of enthusiasm, you’re well on your way to creating an adorable Easter bunny. Let’s make this Easter an egg-stra special one with a masterful piece of bunny art!
See more great Things to Do with Kids in New Zealand here. For more information see here
Disclaimer
The articles available via our website provide general information only and we strongly urge readers to exercise caution and conduct their own thorough research and fact-checking. The information presented should not be taken as absolute truth, and, to the maximum extent permitted by law, we will not be held liable for any inaccuracies or errors in the content. It is essential for individuals to independently verify and validate the information before making any decisions or taking any actions based on the articles.


