
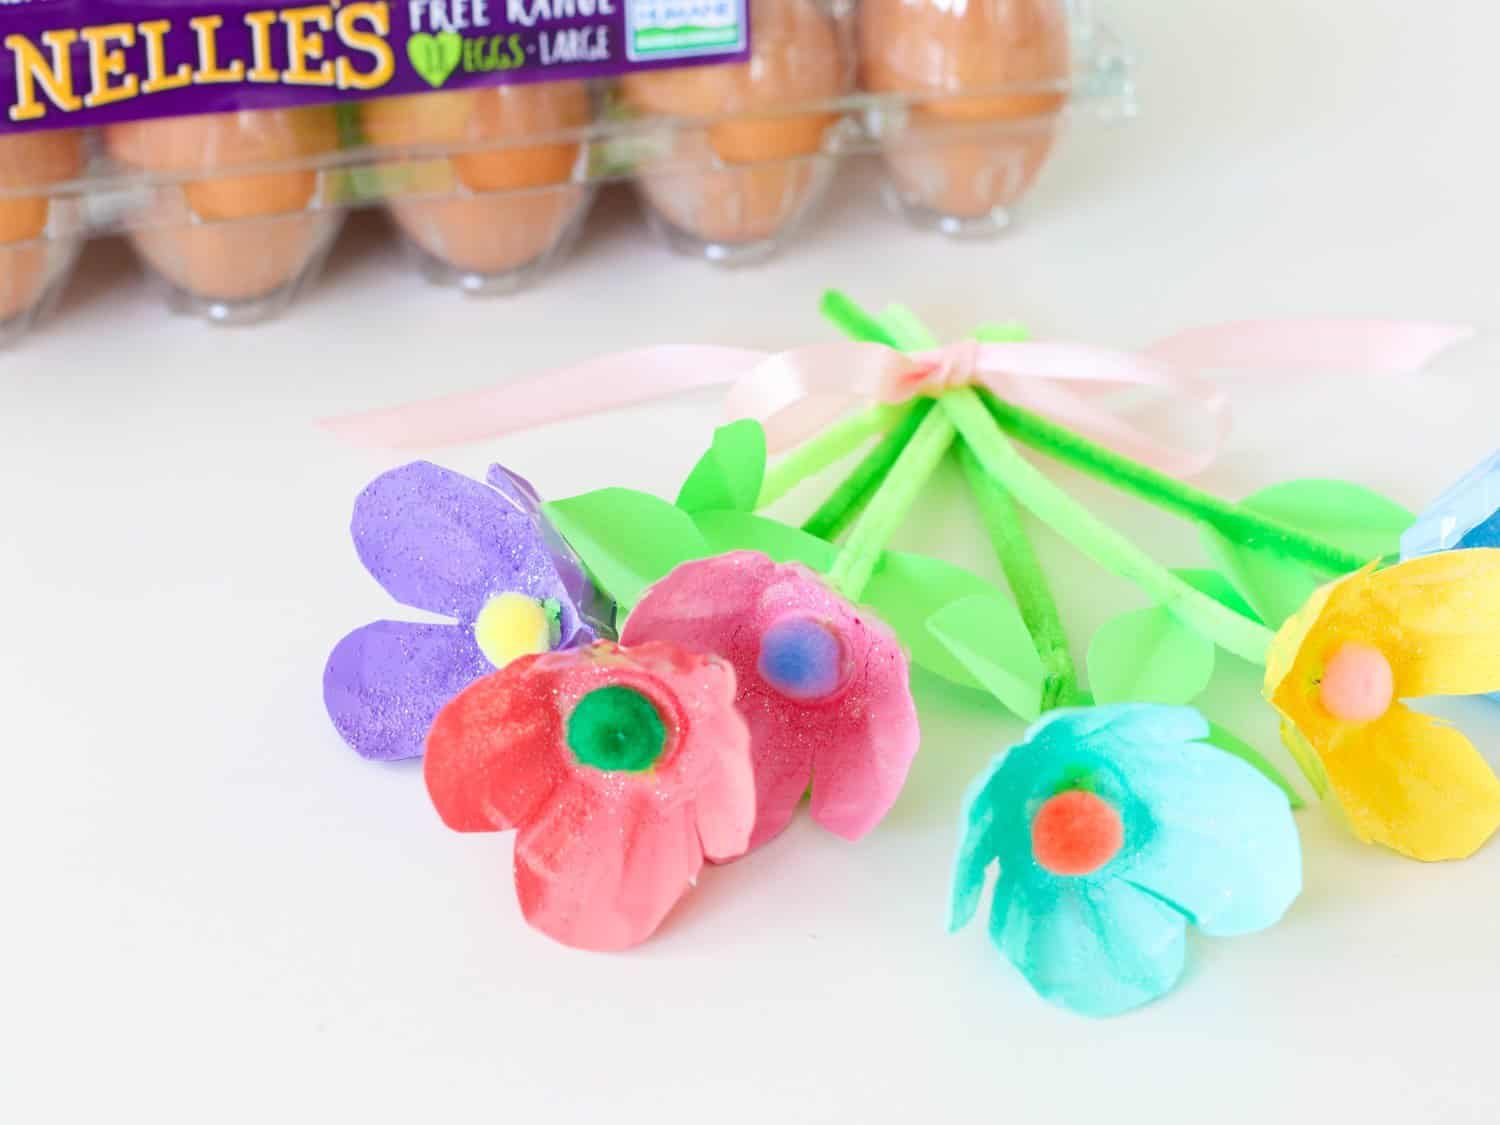
Unleash Your Child’s Creativity with Egg Carton Flowers!
Hello, craft-loving parents! Welcome to your go-to guide for turning those everyday egg cartons into something extraordinary. If you’re looking for a fun and earth-friendly activity to enjoy with your kids, you’re in for a treat! Making egg carton flowers is not only a great way to recycle but it also sparks creativity and develops fine motor skills in children. So, roll up your sleeves, get your paintbrushes ready, and let’s dive into the colorful world of egg carton flowers together!
Why Egg Carton Flowers Are Perfect for Kids
- Environmentally Friendly: By using egg cartons, you teach your kids the value of recycling and transforming waste into something beautiful.
- Enhances Motor Skills: Cutting, painting, and assembling the flowers are great for developing your child’s coordination and dexterity.
- Cheerful Decor: Egg carton flowers brighten up any room or make adorable gifts for friends and family.
- Anytime Activity: Whether it’s a rainy day or a sunny afternoon, crafting these flowers is always a great idea.
Materials You’ll Need to Make Egg Carton Flowers
Before we get started, let’s ensure we have all the right materials. Don’t worry—all of these items are easy to find and you might already have most of them at home:
- Clean egg cartons (cardboard or styrofoam will work)
- Non-toxic paint (watercolors or acrylics) and brushes
- Scissors (safety scissors are great for younger children)
- Glue or a hot glue gun (use with adult supervision)
- Pipe cleaners or straws for the stems
- Add-ons for decorating: glitters, pom-poms, beads, etc.
Step-by-Step Guide for Making Egg Carton Flowers
Step 1: Prepare the Egg Cartons
Begin by cutting out individual egg cups from the carton. Trim the edges to make them look like flower petals—round, pointy, or fringed, it’s all up to you and your child’s imagination! Remember, it doesn’t have to be perfect; the charm is in the uniqueness of each flower.
Step 2: Paint the Flowers
Once you have your petal shapes, it’s time to add color. Lay out some newspaper or a plastic sheet to protect your surfaces, and let the kids splash on their favorite colors. You can guide them to paint the inside one color and the outside another, or mix it up to create multi-colored blooms. Let the paint dry completely before moving to the next step.
Step 3: Create the Stems
While the painted cups are drying, work on the stems. Pipe cleaners are flexible and easy for kids to handle. If you’re using straws, attach a small piece of egg carton to the end as a base for the flower. You can also paint the stems green for a more realistic look.
As parents, we know that sometimes crafts can get a little messy, but that’s just part of the fun! Remember to praise your little ones for their efforts and creativity as they work on their floral masterpieces.
Stay tuned for more detailed steps on assembling your egg carton flowers, plus tips on how to use them in various crafts and décor projects. We love seeing families come together to create something beautiful, and we are thrilled to be a part of your crafting journey.
Let’s nurture the seeds of creativity in our children and watch as they bloom with pride over their handmade egg carton flowers. And remember, the magic of crafting is not just in the final product but in the shared moments of joy and bonding. Keep crafting, and let those flowers unfold!
Join us in our next segment as we continue to explore the blossoming world of egg carton crafts, where we’ll assemble our flowers and use them to decorate our homes and lives with a touch of handmade beauty. Keep your paintbrushes at the ready!
5 Things Parents Should Know When Preparing for Egg Carton Flowers
1. Prep Space and Materials
First things first: designate a crafting area that’s easy to clean. A kitchen table covered with newspapers or a wipeable tablecloth works wonders! Gather all materials beforehand to ensure a smooth and uninterrupted crafting experience. The items listed above are a great start. Remember, it’s more about the creative process than the tools you use.
2. Choose the Right Egg Cartons
Not all egg cartons are created equal. Cardboard cartons are preferable as they absorb paint well and can be cut more easily than styrofoam. Plus, they’re more eco-friendly! Ensure the cartons are clean and dry to avoid any unwanted messes or smells.
3. Select Age-Appropriate Tools
Younger children will fare better with safety scissors, while older kids can handle sharper ones under supervision. When it comes to paint, non-toxic options are a must. Washable paints are ideal for easy cleanup. Also, if you’re going to use a hot glue gun for assembly, make sure an adult is always present to help.
4. Emphasize the Fun of Recycling
Use this opportunity to teach your children about recycling and upcycling. Explain how repurposing materials can lead to less waste and more fun! Show them pictures of different types of flowers for inspiration, and talk about how they’re giving new life to something that would otherwise be thrown away.
5. Set Expectations and Embrace Imperfections
Clarify that the goal isn’t perfection, but enjoyment and learning. Praise their efforts, creativity, and unique ideas. Encourage them to experiment with colors and shapes. And most importantly, have fun with it! These flowers will be beautiful because they made them, imperfections and all.
Assembling Your Egg Carton Flowers
Once everything is painted and dried, gather your blooms and stems for assembly. Use the glue or hot glue gun to attach each flower to its stem. If you’ve opted for pipe cleaners, they can be twisted on easily. Arrange your colorful bouquet in a vase or use them individually to adorn various crafts and corners of your home.
But don’t stop there! Egg carton flowers can be just the beginning. Invite your kids to imagine what other wonders can be fashioned from these versatile containers. From fairy lights with blooming covers to whimsical wreaths adorned with these recycled blossoms, the possibilities are endless.
By engaging in this project with your children, you’re not only nurturing their creative spirits but also spending invaluable quality time together. These moments are the ones that build memories and skills that last far beyond the crafting table.
So, what are you waiting for? Let the flower crafting commence, and watch as your little ones’ faces light up with the joy of making something by hand. And as they craft, watch their confidence grow, petal by petal, in their abilities to create, problem-solve, and contribute to a more sustainable world.
Gather your supplies, gather your kids, and most importantly, gather those laughs and smiles as you embark on this delightful crafting adventure. The journey through the world of egg carton crafts is just beginning, and it’s already blooming with opportunities for fun and learning. Enjoy the process, and let the beauty of your combined creativity shine through each uniquely crafted egg carton flower. Keep those little hands busy, and may your home be filled with the joys of crafting and the beauty of blooms made with love.
See more great Things to Do with Kids in New Zealand here. For more information see here
Disclaimer
The articles available via our website provide general information only and we strongly urge readers to exercise caution and conduct their own thorough research and fact-checking. The information presented should not be taken as absolute truth, and, to the maximum extent permitted by law, we will not be held liable for any inaccuracies or errors in the content. It is essential for individuals to independently verify and validate the information before making any decisions or taking any actions based on the articles.
