
Shave Up Some Fun: Your Guide to Shaving Foam Art for Kids
Hey there, creative families! Ready to dive into a world of colorful swirls and sensory fun with your little ones? Shaving foam art is not just a blast to make; it’s also a fantastic way to develop fine motor skills, color recognition, and just have a plain old good time. So, let’s get our hands foamy and our hearts happy with this step-by-step guide!
What Is Shaving Foam Art?
Shaving foam art is a process art activity perfect for toddlers to older children (and let’s be real, adults love it too!). It involves using shaving cream as a base for creating colorful marbled prints. The best part? It’s a low-cost, high-fun activity that requires minimal supplies but delivers maximum joy.
The Benefits of Shaving Foam Art
- Sensory Play: The foamy texture adds a sensory touch that stimulates the tactile senses of your kiddos.
- Messy, but Easy Cleanup: It’s a wonderfully messy play, but it cleans up easily, making it parent-approved!
- Creativity Booster: There are no rules! Kids have the freedom to experiment with colors and patterns, boosting their creativity and imagination.
- Educational Fun: Shaving foam art is a fantastic opportunity to discuss color mixing, chemical reactions, and more.
Materials Needed for Shaving Foam Art
Before we get started, let’s make sure we have everything we need. Don’t worry, most of these items can be found right at home or at the local store:
- Foam shaving cream (sensitive or unscented if possible, to protect little ones’ sensitive skin)
- Food coloring or liquid watercolors
- A large tray or baking sheet
- Thick paper or cardstock
- A squeegee or old credit card
- Toothpicks, skewers, or the end of a paintbrush
- Disposable gloves (optional, but helps with cleanup)
Setup Steps for Shaving Foam Art
Let’s set the stage for our foamy masterpiece:
- First things first, cover the work area with newspaper or a tablecloth for easier cleanup.
- Place your tray or baking sheet on the flat surface.
- Shake the can of shaving cream well, then spray it onto the tray to create a layer about an inch thick.
- Smooth out the surface slightly with the squeegee or card, but don’t make it too perfect – a little texture is a good thing!
Creating Your Colorful Canvas
Now for the really fun part – adding color:
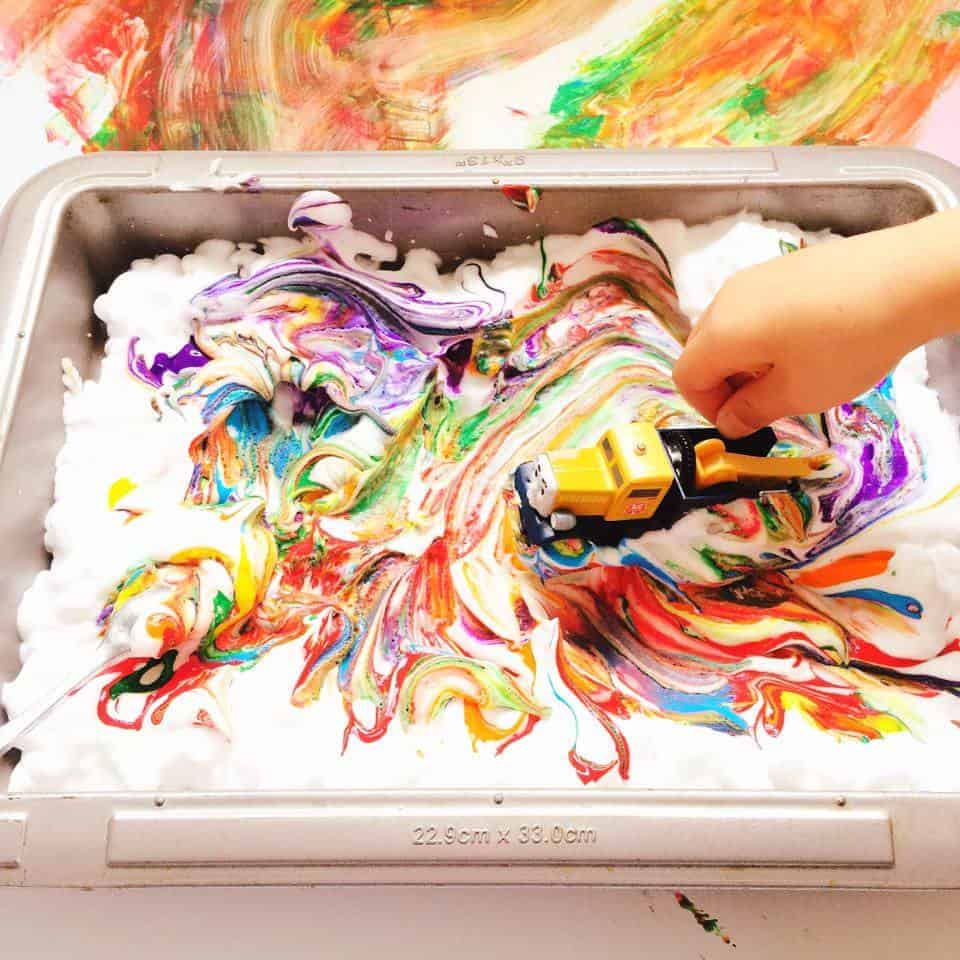
- Add a few drops of food coloring or liquid watercolor in different spots on the shaving foam. Mix it up! Try different colors and patterns.
- Using a toothpick, skewer, or the end of a paintbrush, swirl the colors around. Watch as they marble and create beautiful, abstract designs.
- Once your child is happy with their design, gently press a piece of paper onto the foam, ensuring good contact on all sides.
Ready for the big reveal part? That’s coming up next, but here’s a quick tip – double the fun by trying out different shapes of paper or even cutting out silhouettes for some artsy experiments!
The joy of shaving foam art doesn’t stop here! In the following sections, we’ll walk you through the transfer process, creating more intricate designs, and ways to preserve your child’s foamy creations. Get set to transform your home into a mini art studio, where laughter and vibrant artworks are just a squirt of shaving cream away.
Stay tuned for more tips, tricks, and foamy fun as we continue our adventure into the whimsical world of shaving foam art!
5 Things Parents Should Know in Preparing for Shaving Foam Art
1. Choosing the Right Shaving Cream
When selecting shaving cream, opt for the foam variety rather than gel, as it provides the correct consistency for art. Sensitive or unscented options are gentler for children who may have allergies or sensitive skin. Make sure it’s a brand that squirts out thick and fluffy for the best art medium!
2. Clothing and Safety Precautions
Even though shaving foam art is simple to clean, it can get messy! Dress your little artists in old clothes or aprons. If you’re concerned about the dye, consider using gloves for both you and your child. Also, make sure the room is well-ventilated, especially if you’re sensitive to the smell of shaving cream.
3. Preparing the Workspace
Avoid a lingering mess by covering the surface with newspaper, a plastic sheet, or a disposable tablecloth. Secure the protective covering with some tape to prevent it from sliding around. It’s also handy to have a wet cloth or wipes nearby for quick hand cleaning as needed.
4. Understanding Color Theory
Before beginning, have a brief chat with your kids about primary colors and how they mix to form secondary colors. This educational moment can help prevent a brown, muddy mix from an over-eagerness with color selections.
5. Paper Choices and Drying
Use thicker paper like cardstock to avoid tearing when wet and to absorb the color well. After pressing the paper onto the foam, let your child lift it to see their masterpiece. Then, use the squeegee to scrape off the excess foam and reveal the vibrant colors. Let the prints dry on a flat surface before displaying.
With these tips in mind, you and your kiddos are all set for a fun and successful shaving foam art session. Remember, the process is as valuable as the product. Enjoy watching your children learn, explore, and express their creativity through this engaging and hands-on activity!
Shaving foam art is an excellent opportunity for children to learn through sensory play, work on their fine motor skills, and develop an understanding of color mixing. It’s a beautiful way to combine play, learning, and art-making in one fun-filled afternoon.
As you progress, feel free to incorporate other elements into the mix like glitter, small paper cutouts, or stencils for additional artistic effects. The possibilities with shaving foam art are only as limited as your imaginations. Have fun, get creative, and prepare to marvel at the wonderful artwork your children create!
Remember, the goal is to create joy and shared memories through art. There’s no wrong way to do shaving foam art, and every print will be unique and special, just like the little hands that made them. So go ahead, let the foam fly and the colors blend, and watch the magic happen!
See more great Things to Do with Kids in New Zealand here. For more information see here
Disclaimer
The articles available via our website provide general information only and we strongly urge readers to exercise caution and conduct their own thorough research and fact-checking. The information presented should not be taken as absolute truth, and, to the maximum extent permitted by law, we will not be held liable for any inaccuracies or errors in the content. It is essential for individuals to independently verify and validate the information before making any decisions or taking any actions based on the articles.


