
Ultimate Guide to Paper Mache Crafts for Fun-Filled Family Time
Hello creative parents and craft-lovers! ??? Are you ready to dive into the whimsical world of paper mache? It’s an incredible way to have some good old-fashioned crafting fun with your youngsters. Not only is paper mache an enjoyable and eco-friendly craft, but it also sparks imagination and builds dexterity. In this ultimate guide, we’ll explore the ins and outs of paper mache crafts, ensuring that you have all the know-how to get started on this artistic adventure with your little ones!
What is Paper Mache?
Ah, paper mache! It’s the art of combining paper pieces or pulp with a glue-like adhesive to form three-dimensional objects. Once dried, these creations become hard and durable — perfect canvases for painting and decoration! The beauty of paper mache lies in its simplicity; with just a few basic ingredients and materials, you can whip up an array of impressive crafts from the comfort of your home.
Materials Needed for Paper Mache Crafts
Before we begin our paper mache extravaganza, let’s gather our materials! Here’s a simple list of what you’ll need:
- Recycled paper (newspaper, tissue paper, or magazines)
- Adhesive mixture (glue and water or flour and water paste)
- Paintbrushes (for spreading the adhesive)
- Balloons or recyclable items to use as molds (old containers, boxes, etc.)
- Paints, markers, and decorative items to jazz things up!
Getting Started with Paper Mache
Roll up your sleeves, it’s time to get messy (in the best way possible)! Follow these simple steps to start your paper mache adventure:
- Cut or tear your paper into strips or small pieces. This is a step where the kids can put their fine motor skills to work!
- Create your adhesive by mixing equal parts of flour and water or using a diluted white glue solution. If you’re using the flour mix, a dash of salt can prevent mold. Stir it up until it’s smooth and creamy.
- Blow up a balloon or find a form to use as a mold for your craft. Cover the work area with plastic or newspapers to keep the cleanup easy.
- Dip your strips of paper into the adhesive, gently squeezing off excess liquid, and lay them over your mold.
- Continue layering the paper strips, crisscrossing them to create a strong structure. Be sure to let each layer dry before adding another for best results.
- Once dry, you can pop the balloon (if used) and decorate to your heart’s content!
Remember, paper mache crafts require drying time, often overnight, so plan ahead. It’s a perfect way to teach a little patience with the promise of decoration and play to come.
With just a few steps, you’ve begun your journey into paper mache magic! ? Stay tuned as we delve deeper into creative project ideas, tips for perfecting your crafts, and ways to keep the joy flowing in our comprehensive guide to paper mache for parents and children. Get ready to mold, create, and embellish as we unlock the potential of paper mache together!
Five Things Parents Should Know in Preparing for Paper Mache Crafts
Preparing for a paper mache project with your kids is an exciting venture, but it pays to be prepared! Here are five essential tips to consider before getting those hands sticky:
Tip 1: Choose the Right Space
Remember, paper mache can be a messy affair, so select an area that’s easy to clean. A kitchen table covered with old newspapers or a plastic tablecloth works wonders. Better yet, take the fun outside for easy cleanup with the garden hose!
Tip 2: Prepare All Materials in Advance
Nothing halts fun like missing materials. Gather all your supplies before starting – this includes not just paper and adhesive, but also any paints, brushes, or other decoration materials you’ll use later. Having everything at arm’s reach keeps the process smooth and enjoyable.
Tip 3: Dress for Success
By ‘success,’ we mean getting messy without worrying about stains! Make sure that everyone is dressed in old clothes or aprons. Consider slip-on shoes or bare feet – you’ll thank us when they inevitably step on a glue-soaked strip of paper!
Tip 4: Balance Leading and Learning
While it might be tempting to correct every misplaced paper strip, it’s important for kids to learn through doing – even if that means their creations are a bit lumpy or asymmetrical. Of course, feel free to guide them, but also allow them to make and learn from their mistakes.
Tip 5: Set Expectations
Projects can take a while to dry, often requiring multiple sessions to complete. Ensure the kiddos understand the timeline from the get-go to help manage their anticipation and teach them about the creative process, which sometimes requires patience.
With these tips in mind, you’re all set to embark on a paper mache project that’s both fun and frustration-free! You’ll soon be on your way to making lasting memories (and maybe a bit of a mess) with creative crafts that you and your children will be proud of!
Going Beyond the Basics: Creative Project Ideas
Once you’ve mastered the foundational skills of paper mache, the possibilities are endless. Here are some project ideas to spark your creative flow:
- Eco-Friendly Decor: Think vases, picture frames, and trinket bowls decorated with eco-friendly paints and finishes.
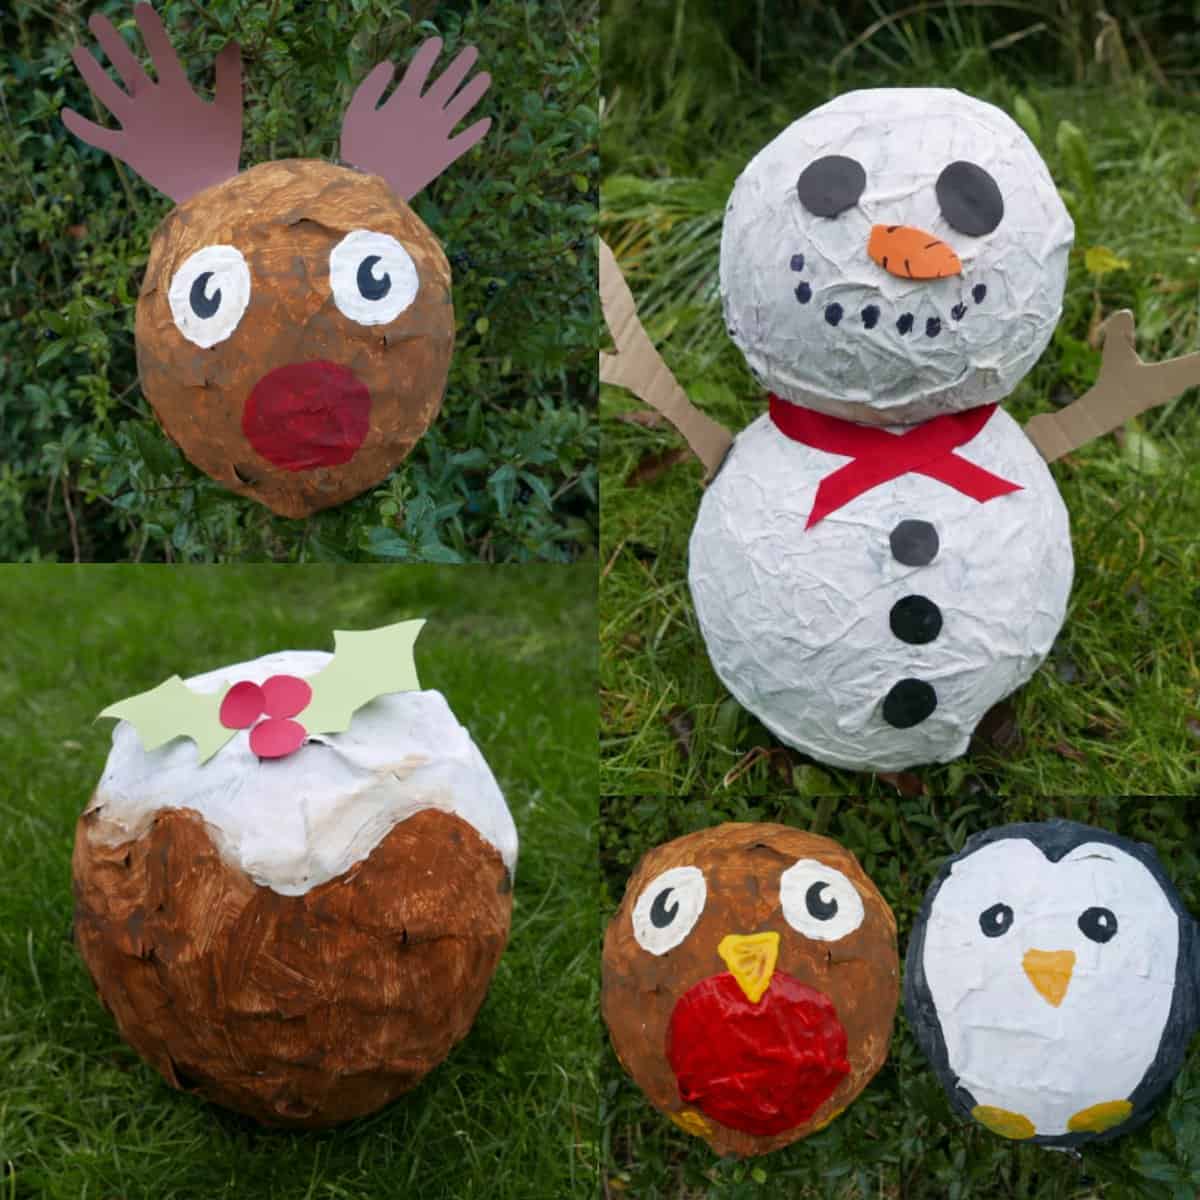
- Seasonal Ornaments: Create festive ornaments for holidays throughout the year – Halloween pumpkins, Christmas baubles, or Easter eggs!
- Animal Sculptures: It’s a zoo in here! From giraffes to dragons, crafting creatures delights children of all ages.
- Functional Art: Why not make something that can be used like piggy banks, pen holders, or masks for pretend play?
- Storytelling Starters: Recreate scenes or characters from your child’s favorite storybook to bring storytelling to life.
Remember to tailor projects to your child’s interests and abilities for engaging and successful craft time. Happy creating!
See more great Things to Do with Kids in New Zealand here. For more information see here
Disclaimer
The articles available via our website provide general information only and we strongly urge readers to exercise caution and conduct their own thorough research and fact-checking. The information presented should not be taken as absolute truth, and, to the maximum extent permitted by law, we will not be held liable for any inaccuracies or errors in the content. It is essential for individuals to independently verify and validate the information before making any decisions or taking any actions based on the articles.


