
Shaving Cream Marbling Paper: A Fun and Creative Craft for Families
Hello, creative parents and guardians! Are you on the lookout for a delightful and colorful craft to share with your kids? Well, today is your lucky day because we are about to dive into the whimsical world of shaving cream marbling paper. This craft is not just a wonderful way to spend quality time with your little artists, but it also results in gorgeous swirls and patterns that can be used for personalized greeting cards, custom wrapping paper, or even beautiful wall art.
What is Shaving Cream Marbling?
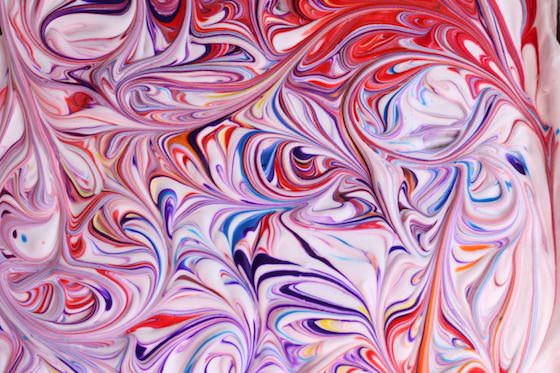
Shaving cream marbling is a simple and engaging art technique that uses shaving cream as a base to create a marbled effect on paper. With a few drops of food coloring or acrylic paint, the surface of the shaving cream transforms into a vibrant palette, which transfers uniquely onto paper. It’s a magical process that’s sure to captivate the imagination of your kiddos!
Benefits of Shaving Cream Marbling for Kids
- Sensory Play: This activity is a feast for the senses. It’s tactile, colorful, and even has a fun scent, depending on the shaving cream you use!
- Motors Skills Development: From swirling the colors to scraping off excess cream, your child’s fine motor skills get a great workout.
- Fosters Creativity: Each piece of marbled paper is as unique as a snowflake, boosting your child’s imagination and creative thinking.
- Versatile Craft: The finished papers can be used in so many different ways, providing an endless supply of crafting opportunities.
Materials You Will Need:
Before we start creating beautiful marbled masterpieces, let’s make sure you have all your materials handy. This project is splendidly simple, and you might even have most of these items at home!
- Shaving Cream: Any standard shaving cream will do. Just avoid the gel type as it won’t spread as nicely.
- Food Coloring or Acrylic Paint: Depending on the intensity of color you want and what you have on hand, both of these work great.
- Thick Paper or Cardstock: It’s best to use paper that can absorb moisture without warping too much.
- A Ruler or a Straight Edge: This will be used to scrape off the shaving cream from the paper.
- A Tray or Baking Sheet: This helps to contain the shaving cream and also provides a flat surface to work on.
- Toothpicks or Skewers: Great for swirling the paints to create that marbled look.
- Gloves (optional): To keep your hands clean while crafting, or just get messy and have fun! It washes off easily either way.
- Plastic Tablecloth or Newspaper: To protect your surfaces from spills and splatters.
Let’s Get Started with Shaving Cream Marbling!
Ready to begin? Make sure you’re set up in a well-ventilated area or outside if possible, because while shaving cream smells delish, you don’t want to be overwhelmed by the fragrance. Also, wearing clothes you don’t mind getting a bit of color on is a smart choice.
First, lay down your plastic tablecloth or newspaper on your work surface to keep things clean and tidy. Next, have your kiddos help you by shaking the shaving cream can well before dispensing a nice, thick layer onto the tray or baking sheet. Smooth it out a bit, but you don’t need it to be perfectly even—texture can make for more interesting patterns!
Now for the super fun part—adding color! Let the little ones squeeze drops of food coloring or dabs of acrylic paint across the surface of the shaving cream. Encourage them to mix the colors a bit, but remind them not to overdo it; we want marble, not mud, after all!
Once your colorful canvas is prepped and ready, take the toothpicks or skewers and show your kids how to drag the colors through the shaving cream to create the marbled effect. This is where their creativity can really shine—there’s no wrong way to make swirls, loops, and zigzags!
Once your masterpiece looks swirly enough, it’s time to press the paper lightly onto the shaving cream. Just make sure the shaving cream covers the paper surface entirely, then gently lift the paper off. Let it sit for a few moments to allow the colors to transfer onto the paper fully.
After a few minutes, place the paper on a clean surface and use the ruler or straight edge to scrape the shaving cream off the paper. This reveals the beautiful marbled pattern beneath. Allow the paper to dry completely before using it in any of your craft projects.
And there you have it—a stunning piece of marbled paper ready to be turned into a custom card, unique wall art, or personal touch to any craft project. The possibilities are as boundless as your children’s imaginations!
Now that we’ve covered the basics, stick around because we’re about to delve into tips and tricks to take your marbling to the next level. In the meantime, gather your supplies, get those creative juices flowing, and most importantly, have a blast with your family!

5 Things Parents Should Know in Preparing for Shaving Cream Marbling Paper
1. Set Expectations and Prepare for a Little Mess
One of the joys of crafting with kids is embracing a bit of chaos. Prepare for the adventure by setting up your crafting area in a space where you’re comfortable with a little mess. Consider having a ‘mess mat’ like a plastic tablecloth, and dress for the occasion in clothes that can handle a splash of color. Quick tip: keeping a roll of paper towels or wet wipes on hand for immediate clean-up can be a real life-saver!
2. Safety First: Non-Toxic Supplies
Ensure all supplies are child-friendly and non-toxic, especially when it comes to shaving cream and paint. Younger children have a habit of touching their faces or mouths, so it’s crucial to use materials that won’t harm them if accidentally ingested. When picking out shaving cream, opt for sensitive skin varieties to avoid any harsh chemicals.
3. The Right Paper Makes All the Difference
Choose your paper wisely. Thicker paper like cardstock is preferable as it won’t buckle or tear when wet. If you don’t have cardstock, try a watercolor paper or even a ream of drawing paper designed for mixed media. The better your paper can handle the moisture, the more vibrant and crisp your marbled patterns will turn out.
4. Trial and Error is Part of the Process
Marbling is an art, not a science. Each attempt can yield different results, so encourage your kids to experiment with different swirls and color combinations. Trial and error are valuable parts of the learning process, and every piece will turn out beautiful in its own unique way. To inspire confidence, celebrate all outcomes, even the unexpected ones!
5. Prep Your Drying Station
Once you’ve scraped the excess shaving cream off your marbled creations, they will need a place to dry. Set up a drying area ahead of time with plenty of space for the artwork. Ensure that it’s flat and out of the way of curious pets or accidental bumps. A bonus tip is to have some books or pressing boards available to place over the papers after they’ve dried a bit to ensure they dry flat without curling edges.
With these preparatory tips in mind, you and your family are all set to enjoy a fantastic day filled with colors, creativity, and fun memories. Remember, the joy is as much in the process as it is in the beautiful results. So grab your materials, roll up your sleeves, and prepare to craft some stunning marbled paper!
See more great Things to Do with Kids in New Zealand here. For more information see here
Disclaimer
The articles available via our website provide general information only and we strongly urge readers to exercise caution and conduct their own thorough research and fact-checking. The information presented should not be taken as absolute truth, and, to the maximum extent permitted by law, we will not be held liable for any inaccuracies or errors in the content. It is essential for individuals to independently verify and validate the information before making any decisions or taking any actions based on the articles.


