
Crafting Memories: A Parent’s Guide to Air Dry Clay Decorations
Hey there, creative families! ? Are you looking for a fun and engaging activity that will not only keep your little ones entertained but also provide a wonderful opportunity for family bonding? Look no further than the wonderful world of air dry clay decorations! Whether it’s a rainy day indoors or you’re just itching to make some memorable crafts, this guide is your one-stop shop for all things clay-tastic!
Why Choose Air Dry Clay for Family Crafting?
Before we dive hands-first into the nitty-gritty of molding and shaping, let’s chat about why air dry clay is an absolute gem for family craft time:
- No Bake, No Fuss: Air dry clay doesn’t require an oven or kiln – it hardens all by itself! This means easy setup, easy clean-up, and no fretting over hot surfaces with the kids.
- Unleash Creativity: It’s pliable, versatile, and ready to morph into whatever your imagination conjures up. From custom ornaments to hand-made jewelry, the possibilities are endless!
- Sensory Play: Engaging with clay is not just fun, it’s also great for sensory development. Squishing, rolling, and sculpting can help fine-tune motor skills!
- Decor & Gifts: The creations can spruce up your home and also make heartfelt gifts for family and friends. Each piece will be a cherished keepsake for years to come.
Getting Started With Your Air Dry Clay Project
Now that we’ve sparked your interest, let’s gather the troops and materials for an epic clay-creation session.
Materials You’ll Need:
- Air dry clay (Available in various colors or paintable white)
- Rolling pin or a smooth, cylindrical object
- Clay sculpting tools or household items (like toothpicks and straws)
- Wax paper or a non-stick surface to work on
- Paints and brushes (if you’re planning to paint your creations)
- Clear sealant (to protect your piece after it’s dry and painted)
With your materials at the ready, you’re all set to start crafting. Remember, one of the best parts about working with air dry clay is learning to let go of perfection and enjoy the process. Every lopsided pot and charmingly wonky figurine is a reflection of your child’s unique creativity and a moment in time you spent together. ??
Step-by-Step Guide to Making Your First Clay Decoration
Take a peek at this simple step-by-step breakdown to kickstart your clay adventure:
- Prep Your Space: Lay down the wax paper to create a clean, non-stick surface for working. Gather all your materials so everything is within reach.
- Bring Out the Clay: Take out a small amount of clay to start with. You can always add more! Begin by kneading the clay to warm it up and make it more flexible.
- Shape Your Creation: Use your hands or a rolling pin to shape the clay. If making a flat decoration like a plaque or ornament, roll it out to an even thickness of about 1/4 inch.
- Add Details: Use your sculpting tools or found items to add texture or designs. Don’t forget to make a little hole if you’ll want to hang it up!
- Dry with Care: Follow the instructions on your clay package for drying times and conditions. Typically, it takes about 24-48 hours for clay to dry completely.
This is just the beginning of your air dry clay extravaganza! ?
Endless Possibilities: Craft Ideas to Get You Started
Stuck on what to make? Here are some adorable ideas to spark inspiration for your family’s first clay project:
- Handprint Keepsakes: Perfect for capturing tiny hands and feet. Just press your little one’s hand or foot gently into the rolled-out clay and cut around the imprint.
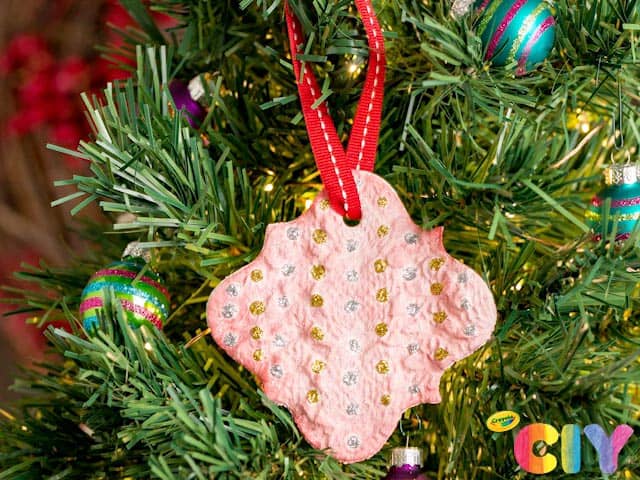
- Charming Ornaments: Use cookie cutters to make shapes for any occasion – hearts for Valentines, stars for Christmas, or animals just for fun!
- Personalized Name Tags: Roll out the clay and cut into small rectangles or circles and carve your child’s name into them, for a custom touch to their room or backpack.
- Funky Fridge Magnets: Create cute characters or abstract shapes and attach a magnet to the back once they’re dry.
These clay decorations make air dry clay an amazing medium for both fun times and functional art. So flex those crafting muscles, parents and kiddos – you’re about to forge some fabulous clay creations that will last a lifetime! With every piece, you’ll not only make a decoration, but a special memory to go with it. Keep scrolling for even more clay-tastic tips and ideas.
5 Essential Tips for Parents Preparing for Air Dry Clay Decorations
Creating air dry clay decorations with your kids is an amazing way to spend quality time together while fostering their creativity. Here are five vital tips to keep in mind as you prepare for this delightful adventure:
1. Choosing the Right Clay
Not all air dry clays are created equal. Some clays are softer and more suitable for small children, while others may offer a more durable finish or a variety of colors. Consider what you’re planning to create, and select a clay that best suits your decoration goals. Look for non-toxic options to ensure the safest crafting environment for your little ones.
2. Managing Messes
Though air dry clay is less messy than traditional clay, it can still leave residue on hands and surfaces. Dress your kids in clothes that can get a little dirty, and set up your crafting area on a surface that’s easy to clean. Placemats, old newspapers, or a plastic tablecloth can protect your workspace. Keep a damp cloth nearby to wipe hands and surfaces as needed.
3. Embrace Imperfection
Working with air dry clay is about the experience more than the end product. Encourage your kids to experiment with shapes and styles, even if the outcome is less than perfect. Those imperfections add character and create a unique story for each decoration. Plus, it’s a good lesson in the beauty of imperfection and the importance of creative expression.
4. Pacing Your Project
Air dry clay can take a day or more to fully harden, and patience is key. Be sure your kids understand that their creations will need time to dry before they can be painted or hung up. You can use this waiting period to plan your next steps, such as choosing paint colors or deciding where to display your new decorations.
5. Sealing the Deal
To preserve your air dry clay decorations for years to come, it’s important to seal them properly after they’ve dried completely. This can be done using a clear acrylic sealant or varnish that is child-safe. Sealing will help protect against moisture, dust, and the wear and tear that comes from being cherished by little hands.
Now that we’ve covered these key preparations let’s go beyond the basics and explore more inspiring ideas and techniques you can use to create stunning air dry clay decorations. The moments you’ll cherish most are those spent laughing, creating, and learning together as a family. Happy crafting!
See more great Things to Do with Kids in New Zealand here. For more information see here
Disclaimer
The articles available via our website provide general information only and we strongly urge readers to exercise caution and conduct their own thorough research and fact-checking. The information presented should not be taken as absolute truth, and, to the maximum extent permitted by law, we will not be held liable for any inaccuracies or errors in the content. It is essential for individuals to independently verify and validate the information before making any decisions or taking any actions based on the articles.


