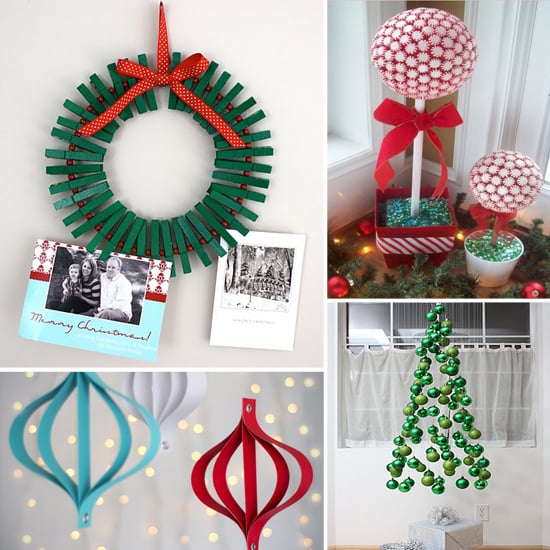
Jolly DIY Christmas Decorations to Spruce up Your Home!
Ho-ho-ho! Welcome to the merry world of DIY Christmas decorations, where the magic of the holidays meets the joy of crafting! As the thick blankets of snow start to adorn the city and the smell of gingerbread lingers in the air, it’s time for you, dear parents, to deck the halls with boughs of holly and so much more! This guide is here to sprinkle your festive season with creativity, family fun, and of course, plenty of sparkle!
Why Choose DIY for Your Christmas Decor?
Before we jump into the beautiful mess of ribbons and glitter, let’s talk about why DIY Christmas decorations can make your holiday season even brighter:
- Quality Family Time: Crafting together is a perfect way to bond and create wonderful memories that will last a lifetime.
- Personalized Touch: DIY decorations allow you to tailor the festive decor to your family’s tastes and home’s theme.
- Eco-Friendly: Upcycling and hand-making decorations is not only fun but also kinder to our planet.
- Cost-Effective: Save a few pennies for Santa’s cookies by making decorations with items you already have at home.
Setting the Scene for Your Christmas Creation Station
Before we dive into the crafting, let’s create the perfect setting:
- Gather Your Supplies: Stock up on craft essentials like paper, scissors, glue, tape, and anything sparkly. Keep an eye out for natural elements like pine cones and branches that can add a rustic touch to your decorations.
- Protect Your Surfaces: Use old newspapers or a tablecloth to cover your workspace. Things can get a bit messy when creativity flows!
- Create the Mood: Play your favorite Christmas tunes and maybe light a cinnamon-scented candle to get everyone in the festive spirit.
Classic Paper Snowflakes
Nothing says winter wonderland like the unique intricacy of snowflakes. Here’s a simple guide to making your own paper snowflakes that can hang gracefully in your living room or dance on the windows of your children’s bedrooms.
What You’ll Need:
- White paper
- Scissors
- String
- Optional: Glitter or confetti for that extra sparkle
Follow these steps and soon your home will be a flurry of beautiful, hand-crafted snowflakes:
- Fold your paper into a square and then into a triangle. Repeat this step until you have a smaller triangle.
- With the paper folded, cut out various shapes from the edges. Be creative – no two snowflakes are alike!
- Carefully unfold your paper to reveal your snowflake. If you like, embellish it with a bit of glitter.
- Poke a small hole in one point of the snowflake and thread a piece of string through so you can hang it up.
This activity is not only a fantastic way to add a personal touch to your Christmas decor, but it’s also a great opportunity to teach your kids about symmetry and patterns – talk about educational fun!
Stay tuned as we continue to unwrap more whimsical DIY Christmas decoration ideas. By the end of this guide, your home will be the talk of the North Pole! It’s never been easier or more delightful to customize your festive ambiance, one homemade ornament at a time.
We’ve covered the snowy aspect of Christmas with our delightful paper snowflakes; next, we’ll tackle some other treasured symbols of the season – think twinkling stars, glistening garlands, and adorable reindeer crafts. The holiday cheer is just beginning, and with a sprinkle of creativity, we’re set to make this Christmas one for the books!
Gather your craft supplies, keep your hot cocoa close, and let your Christmas spirit soar as we delve deeper into holiday crafting projects that will fill your home with joy, comfort, and warmth. Because after all, the best Christmas decorations are the ones made with love and laughter.

5 Essential Tips for DIY Christmas Decor with Kids
Before you start untangling the tinsel and lighting up the fairy lights, here are five nuggets of wisdom to help you prepare for DIY Christmas decor with the kiddos:
- Plan Ahead: Decide on which decorations you’d like to craft before the flurry of activity begins. Not only will this help you organize your materials, but it will also ensure that you have the right tools for each project. This step saves time and helps keep the crafting session smooth and enjoyable for everyone.
- Safety First: Keep in mind that some craft materials may not be suitable for younger children. Be sure to use child-friendly scissors, non-toxic glues and glitters, and keep small objects that could be swallowed out of reach. Supervise the little ones constantly to ensure a safe crafting environment.
- Embrace Imperfection: Remember that when crafting with kids, it’s the experience that counts, not the final product. If a snowman’s scarf is a little crooked or the glitter isn’t evenly spread, don’t fret. Celebrate their effort and creativity instead of aiming for perfection.
- Include a Variety of Crafts: Children’s attention spans can be short, so it’s wise to have a variety of simple and more involved projects. Quick wins like decorating pre-cut ornaments can give kids an immediate sense of accomplishment, while longer projects like assembling a wreath can teach patience and perseverance.
- Keep it Cheerful: Crafting should be fun, not stressful. Keep the mood light with Christmas music, warm drinks, and plenty of encouragement. If a craft isn’t working out, laugh it off and move on to the next one. The goal is to build happy memories, not just beautiful decorations.
Adorable Pine Cone Elves
Transform ordinary pine cones into a troop of enchanting elves with this charming DIY project:
What You’ll Need:
- Pine cones
- Felt sheets in various colors
- Small pom-poms
- Googly eyes
- Glue gun (to be used by adults)
- Small bells (optional for a jingle effect)
Creating your pint-sized pine cone friends is easy as pie:
- Choose a pine cone for each elf, making sure they can stand upright.
- Cut pieces of felt to make tiny hats and clothes for your elves. Allow your children to choose colors and assist them in gluing the outfits onto the pine cones.
- Glue on googly eyes, a pom-pom for the nose, and another for the tip of the hat.
- If you have small bells, glue them to the elves’ hats for a bit of extra festive jingle.
These adorable elves can line your mantle, nestle into your Christmas tree branches, or watch over your holiday feasts from the dining table.
As we continue on this yuletide crafting journey, remember that each creation tells a story – the story of your family’s holiday season. From hanging stockings crafted from old sweaters to stringing popcorn garlands while snuggled by the fireplace, these DIY projects aren’t just about the decorations themselves. They’re about the laughter that fills the room as you work together, the little hands covered in paint, and the pride in your children’s eyes as they put their homemade ornaments on display.
It’s easy to get wrapped up in the hustle and bustle of the holidays, but by embracing the spirit of DIY, you’re also embracing the wonder and joy of Christmas as seen through your child’s eyes. So, ready those scissors, prepare the glue, and let the magic of the season shine through your home with every piece of craft you and your children bring to life.
After all, when the holidays come to a close and the decorations are tucked away, it’s the memories of making those very decorations that will warm your heart throughout the year. Let’s continue to fill our homes with merriment, our hearts with joy, and create a truly enchanting Christmas ambiance that glows with the love of our families and the spirit of the season.
. For more information see here
Disclaimer
The articles available via our website provide general information only and we strongly urge readers to exercise caution and conduct their own thorough research and fact-checking. The information presented should not be taken as absolute truth, and, to the maximum extent permitted by law, we will not be held liable for any inaccuracies or errors in the content. It is essential for individuals to independently verify and validate the information before making any decisions or taking any actions based on the articles.


