
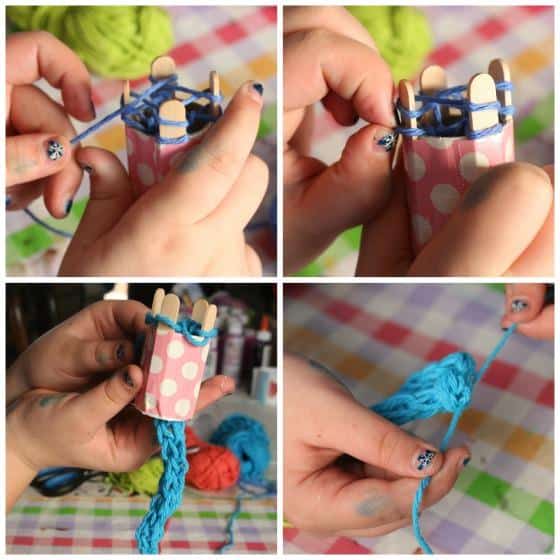
Knitting Toilet Roll: A Whimsical and Practical Guide for Crafty Parents
Hey there, creative moms and dads! Ready to add a sprinkle of whimsy and a dash of practicality to your bathroom decor? Then you’re going to absolutely adore diving into the world of knitting toilet roll covers! ? ?? You might be thinking, “Knitting what, now?” But trust us, once you see these charming little creations, you’ll wonder how your bathroom ever went without one!
Not only are hand-knitted toilet roll covers totally cute, but they also keep those extra rolls of paper clean and dust-free. And the best part? They’re a fantastic and quick knitting project for all levels, from beginners to seasoned yarn veterans. So, let’s gather up those needles and colorful yarns and transform the loo into your canvas of comfort and craft!
Why Knit a Toilet Roll Cover?
In today’s hustle and bustle, it’s the little things that bring us joy, right? A hand-knitted toilet roll cover effortlessly adds a touch of personality and humor to even the most utilitarian of spaces: the bathroom. Plus, for those of you who love themed rooms or special holiday decor, these charming accessories offer endless possibilities for customization. Go ahead, knit a pumpkin for Halloween, a sparkling snowman for winter, or a floral arrangement for spring—the sky’s the limit!
Materials You’ll Need
- Yarn: The magical foundation of our project. Pick cotton or acrylic yarn for durability and easy washing.
- Knitting Needles: Suitable for the yarn weight you’ve chosen. Commonly, sizes 4-7 (US) work well for this project.
- Pattern: We’ve got you covered! Below you’ll find an easy-to-follow pattern suitable for every skill level.
- Extras: Embellishments such as buttons, ribbons, or appliques to give your cover some zest and charm.
Take a moment to personalize your project by picking colors that match your bathroom theme or express your unique family vibe. Who knows, lavender stripes? Aquamarine polka dots? The palette is your oyster!
Beginning Your Knitting Adventure
Before you begin, here’s a quick primer on the basic knitting stitches you’ll need:
- Cast On: This is the first step in your knitting journey, getting those initial loops on the needle.
- Knit Stitch: The classic stitch which forms the V-shaped textures in your fabric.
- Purl Stitch: The reverse of the knit stitch, creating a bumpy texture.
- Cast Off (or Bind Off): This is how you’ll elegantly finish your creation, sealing those stitches in place.
As you prepare to cast on, envision the smiles and the inevitable “Oh, that’s adorable!” comments you’ll receive. Excited? You should be! Let’s get to the nitty-gritty:
Step-By-Step Guide to Your First Toilet Roll Cover
Don’t worry, we’re keeping it simple and soothing, just like the best crafting sessions should be. Ready to embark on this journey of toilet roll transformation? How fun! ? Here’s a straightforward pattern to start with:
- Cast On: Begin by casting on enough stitches to wrap comfortably around a toilet roll. This will usually be around 45-60 stitches, depending on your yarn and needle size.
- Knit the Base: Work in a knit 1, purl 1 ribbing for about two inches to create a snug bottom edge.
- Body of the Cover: Switch to a stockinette stitch, knitting all stitches on the right side and purling all stitches on the wrong side. Continue until the piece measures about four inches from the cast-on edge.
- Add Personality: Feel free to incorporate color changes, stripes, or simple intarsia designs to jazz up your cover.
- Shape the Top: Decrease rows can be introduced to taper the cover, ensuring a nice fit over the top of your toilet roll.
- Cast Off: Finish off the knitting by binding off all stitches. Make sure to keep the last row a little loose for stretch!
This delightfully easy pattern provides a blank canvas for your creative embellishments—experiment with different textures or stitch patterns to make each toilet roll cover a small work of heartwarming art.
5 Things Parents Should Know When Preparing to Knit Toilet Roll Covers
1. Choose the Right Yarn for Durability and Ease of Care
As a parent, you know the importance of selecting materials that stand up to daily use and are a breeze to maintain. For toilet roll covers, opt for yarns that are washable and resilient. Cotton and acrylic yarns are fabulous choices as they can withstand the humid environment of a bathroom and are machine-washable, ensuring they stay fresh and bright through constant use.
2. Understanding Yarn Weight and Needle Size
Matching your yarn weight with the appropriate needle size is key to a successful project. A mismatch can result in a cover that’s too tight or too loose. Typically, the yarn label suggests the ideal needle size. If you’re using a medium-weight yarn (like worsted), needles in the range of 4-7 (US) are usually recommended for a tidy, even stitch.
3. Keeping It Simple with Patterns
When you’re looking after kids and juggling a million little tasks, intricate knitting patterns can be a bit much. Stick to simple patterns and stitches that you can easily pick up and put down. The basic stockinette and ribbing patterns provided above are just perfect for sneaking in a few rows between playtime and chores.
4. Involve the Kids in the Creative Process
Knitting toilet roll covers can be a great family activity. Let the little ones help choose colors and themes for the covers. It’s a splendid opportunity to teach them about colors, patterns, and the joy of creating something with their hands. Plus, having their input makes the finished product that much more special to everyone.
5. Prep Your Space and Materials
Before diving into your project, organize your knitting nook. Make sure you have all your materials within reach: yarn, needles, stitch markers, scissors, and any adornments for your finished cover. A well-prepared space means you can maximize your crafting time and perhaps share this cozy corner with your kids as they watch and learn.
Embrace these tips, and you’re all set to create not just a snugly dressed toilet roll, but also a bundle of warm memories with your family. Knitted toilet roll covers are practical, yes, but they’re also about the smiles, the shared moments, and the quirky addition to your home that reflects the unique spirit of your family. So, take those needles in hand and let the purl and plain weave a story of your family’s creativity and togetherness.
By following this guide, you’ll be well on your way to creating practical, endearing, and conversation-sparking pieces that guests and family members alike will cherish. Whether it’s creating a seasonal rotation of toilet roll outfits or simply adding a pop of color to an oft-overlooked corner of the house, your hand-knitted covers are sure to be a hit!
And who knows? This small project might just spark a knitting passion that leads to sweaters, hats, and a whole wardrobe of yarn-crafted masterpieces. But let’s not get ahead of ourselves; one adorable toilet roll cover at a time. Happy knitting!
See more great Things to Do with Kids in New Zealand here. For more information see here
Disclaimer
The articles available via our website provide general information only and we strongly urge readers to exercise caution and conduct their own thorough research and fact-checking. The information presented should not be taken as absolute truth, and, to the maximum extent permitted by law, we will not be held liable for any inaccuracies or errors in the content. It is essential for individuals to independently verify and validate the information before making any decisions or taking any actions based on the articles.


