
Creative Crafting for Families: A Beginner’s Guide to Paper Mache Fun
Hey there, creative families! Are you on the lookout for a delightful and easy craft that you can enjoy with your kids? Look no further because paper mache is the perfect blend of messy, imaginative, and educational fun that can bring smiles and a sparkle of creativity to your family time!
What is Paper Mache?
Paper mache, or papier-mâché, is a fabulous and versatile crafting technique that involves using strips of paper soaked in a gluey mixture, then layered and molded to create all sorts of fantastic shapes and sculptures. Once dried, these creations become solid and can be painted or decorated to bring your imaginations to life.
Why Choose Paper Mache for Family Crafting?
- It’s Inexpensive: No need to break the bank! Paper mache projects can often be made with materials you already have at home.
- Enhances Creativity: From animals to masks to decorative bowls, there’s no limit to what you can create with paper mache.
- Develops Motor Skills: Working with paper mache helps younger family members practice fine motor skills and hand-eye coordination.
- Eco-Friendly: An excellent way to recycle paper and minimize waste while having fun!
Materials You’ll Need for Paper Mache
- Newspaper or Paper Towels: Torn into strips, these will form the main structure of your creation.
- Adhesive: You can use a flour and water mixture, white glue diluted with water, or a commercial paper mache paste.
- A Base or Mold: Balloons, cardboard, or other household items can serve as the initial shape of your project.
- Paint and Decorations: Acrylic paints, glitter, and other craft supplies will bring your project to life once it’s dry.
- Work Space: Cover your crafting area with plastic or newspaper to make cleanup a breeze!
Getting Started: Your First Paper Mache Project
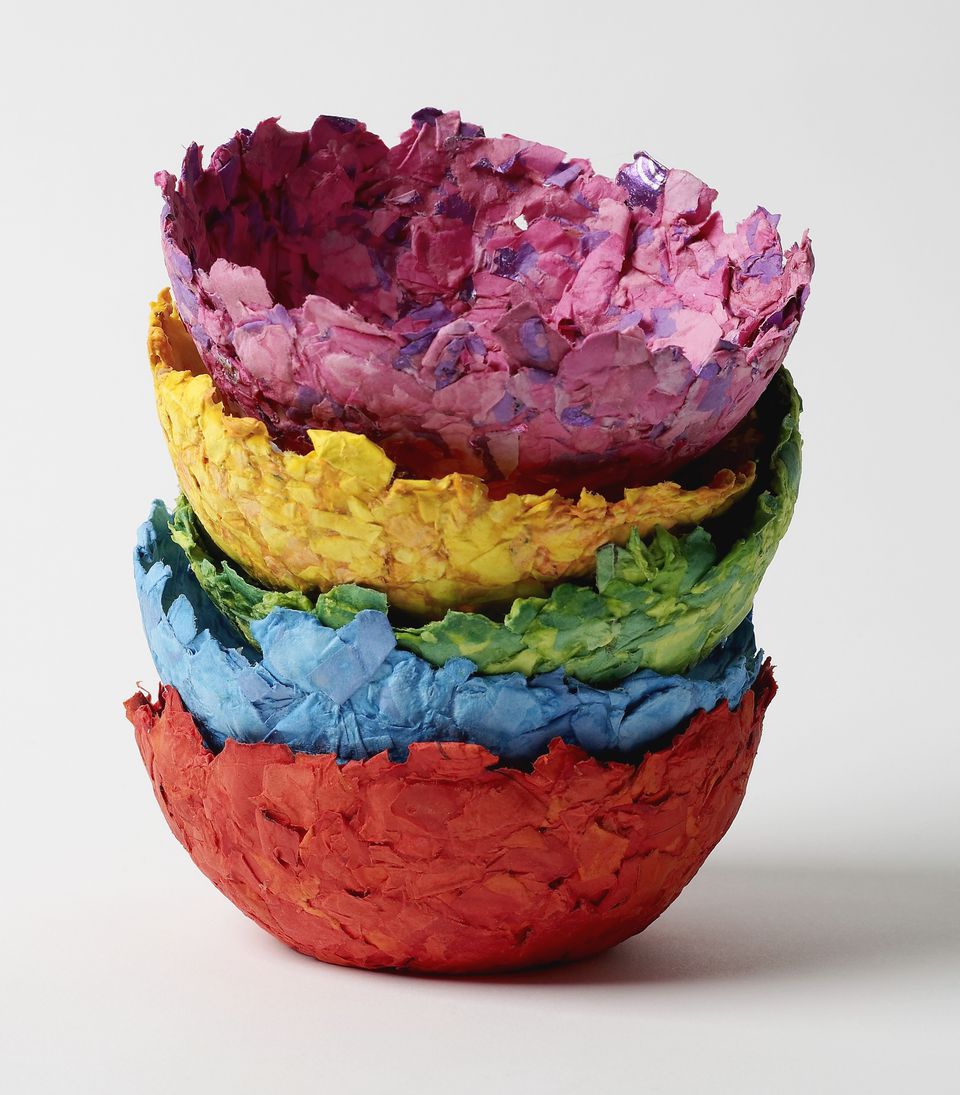
Excited to dive into paper mache with your kids? Here’s a simple project to get you started: a Classic Paper Mache Bowl.
It’s time to roll up your sleeves and let the fun begin!
Step 1: Preparing Your Workspace
Begin by covering your table with a plastic sheet or newspapers to catch any drips or spills. Paper mache can get a bit messy, and we wouldn’t want to turn our creative adventure into a cleaning nightmare, right?
Step 2: Choosing Your Base
For a bowl, you can use an existing bowl turned upside down as a mold. Remember, you’ll be removing the paper mache from this mold later, so add a light layer of oil or plastic wrap to make it easy to separate.
Step 3: Preparing Your Paper
Tear your newspaper or paper towels into strips roughly 1 inch wide by 6 inches long. Smaller or larger pieces can be used for different parts of your project, as needed.
Step 4: Mixing Your Adhesive
There are a few different recipes for paper mache paste, but a basic one is to mix one part flour with two parts water until you get a consistency similar to pancake batter. You can also add a pinch of salt to prevent mold. If you’re using white glue, mix one part water with one part glue.
Step 5: Let’s Mache!
Dip the strips of paper into your paste, gently slide off the excess with your fingers, and lay them over your bowl mold. Overlap the strips and smooth out any wrinkles or bubbles as you go along. Remember to cover your entire mold with at least two to three layers of paper strips. The more layers, the sturdier your bowl will be after drying!
Now, leave your project to dry thoroughly. This might take a day or two, but patience is key in paper mache success. Once it’s dry, you can gently remove it from the mold and start decorating!
While you wait for your bowl to dry, why not brainstorm with your kids on what your next paper mache project might be? The possibilities are endless, and each creation can be as unique as you make it.
With these simple steps, paper mache can become a beloved activity for your family, sparking creativity and building memories that stick (quite literally!) as much as the glue. So gear up for some hands-on fun and prepare to be awed by the masterpieces you and your kids will create together!
Ready for more paper mache projects and pro tips? Stick around; we’re just getting warmed up in our paper mache crafting adventure!
5 Essential Tips for Parents Preparing for Paper Mache Crafting
Embarking on a paper mache crafting journey with your little ones requires some preparation. Here are five key things parents should keep in mind to ensure the experience is as smooth and enjoyable as possible:
1. Safety First
Before you dive into crafting, remember that while paper mache is generally safe, there are a few safety precautions to take. Make sure that the space is well-ventilated, especially if you’re working with glue. For very young children, consider using taste-safe adhesives like the flour and water mixture. Always supervise your kids to make sure they’re not putting non-edible materials in their mouths.
2. Mess-Management Strategies
Be mentally and physically prepared for the mess. Dress your kids and yourself in clothes that can get spoiled, or use aprons. Keep a bowl of water and a cloth or paper towel handy to clean sticky hands mid-project. Encouraging your children to keep their work area neat can turn cleanliness into a fun part of the activity.
3. Patience and Timing
With paper mache, drying time can test the patience of eager young crafters. Prepare for this by setting realistic expectations. Consider doing the project in stages – one day for layering, another for painting. While you wait for things to dry, engage your kids in planning or drawing what they’d like to make next.
4. Encouraging Creative Freedom
While it may be tempting to direct your child’s creative choices, it’s important to let them lead the way. This fosters creativity and confidence. Don’t worry about the end result being ‘perfect’ – it’s the process that matters. Celebrate their efforts and unique creations, no matter how quirky they turn out!
5. Recycle and Upcycle
Paper mache is an excellent opportunity to teach your children about recycling. Use old newspapers, junk mail, or magazines for the project. Discuss with your little ones the importance of reusing materials and reducing waste. This way, you’re not just crafting; you’re imparting valuable life lessons.
Keep these tips in mind, and you’re ready to start a paper mache project with your family. It’s not just about creating art – it’s about spending quality time together, learning, and having a blast. Let those imaginations soar and get ready for the joyous triumph of peeling dried glue off your fingers – it’s all part of the fun!
Further Ideas and Inspiration for Your Next Paper Mache Project
Once you’ve mastered the basic bowl, why not expand your horizons with more complex paper mache projects? Craft masks for a home-made play, create festive decorations, or build an entire zoo of paper mache animals. The sky’s the limit!
Encourage your kids to come up with their own paper mache project ideas. This not only hones their creativity but also injects more excitement into the crafting process. Remember, paper mache isn’t just for kids; it’s a great outlet for adult creativity too. So, join in and fashion some of your own artwork!
Don’t forget to snap photos of your creations. Starting a family craft blog or a social media page where you share your paper mache exploits can be another joyous extension of this activity. It’s also a wonderful way to connect with other crafting families and exchange ideas.
So, go ahead and gather your materials, spread out that newspaper, and prepare to get hands-on with some good, old-fashioned paper mache fun. Who knows? The next family heirloom might just be a whimsical paper mache sculpture that started with a balloon, some newspaper, and a whole lot of love.
For more great articles please see here. For more information see here
Disclaimer
The articles available via our website provide general information only and we strongly urge readers to exercise caution and conduct their own thorough research and fact-checking. The information presented should not be taken as absolute truth, and, to the maximum extent permitted by law, we will not be held liable for any inaccuracies or errors in the content. It is essential for individuals to independently verify and validate the information before making any decisions or taking any actions based on the articles.


