
Create Cherished Memories: A Guide to Christmas Clay Decorations for Families
Oh, what fun it is to craft! ?? Ho-ho-ho, wonderful parents and guardians! As the jingle bells start ringing and the frosty windows beckon the joyful season, it’s the perfect time to roll up your sleeves and dive into the world of Christmas clay decorations. Not only is it a delightful way to bond with your kiddos, but you’ll also end up with a sleigh-full of homemade treasures to adorn your tree and home. So let’s sprinkle some creativity into your holiday season!
Why Christmas Clay Decorations Are the Perfect Family Craft
Before we get our hands all clay-ey, let’s talk about why this is such a spectacular idea! Crafting with clay allows your family the chance to:
- Be Creative Together: Collaborate on designs, mix and match colors, and let everyone’s imagination shine.
- Develop Fine Motor Skills: Especially for the little elves, manipulating clay is excellent for building those important muscles.
- Educational Experience: Learn about the art of sculpting, drying, and painting techniques – a STEAM activity in disguise.
- Start a Tradition: Make a new ornament each year and watch your collection grow as time goes by.
- Eco-Friendly Option: Clay decorations are a sustainable choice that can last for years, reducing holiday waste.
Choosing Your Clay: A Starter’s Guide
First things first, let’s pick our clay! There are a few different types that you can use for your Christmas decorations:
- Air-Dry Clay: No kiln? No problem! Air-dry clay is super accessible and, as the name suggests, dries without the need for baking.
- Oven-Bake Polymer Clay: Another family-friendly option, this clay can be baked in your home oven following specific temperature guidelines.
- Natural Clay: A more traditional route requiring a kiln to fire. Perhaps a choice for more experienced creators or as part of a workshop.
We recommend starting with air-dry clay for its simplicity and ease of use, especially if you’re crafting with little elves.
Crafting Your Masterpieces: Getting Started
Now, onto the festive fun! Roll out that festive tablecloth (because we’re all about that mess-free life) and gather your craft supplies. Here’s what you’ll need to jumpstart your Christmas clay extravaganza:
- Air-dry clay or polymer clay
- Rolling pin (a festive one adds to the joy!)
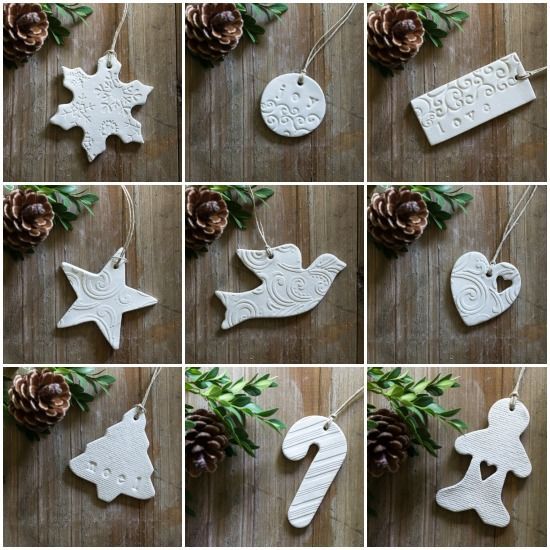
- Cookie cutters – Christmas shapes like stars, trees, and reindeer
- Straw or toothpick for making holes to hang your ornaments
- Fine-grit sandpaper for smoothing edges after drying
- Acrylic paints and brushes
- Sealant like mod podge or clear varnish to protect your decorations
- Ribbons or hooks for hanging
- A sprinkle of Christmas cheer (non-negotiable!)
Now, let’s shape our holiday spirits with some easy steps to follow:
Step 1: Shape Your Clay
On a clean, flat surface, knead your clay until it’s soft and pliable. Roll it out to an even thickness – not too thin or it might break, and not too thick or it will take ages to dry. Aim for about a quarter-inch thickness.
Step 2: Unleash the Cookie Cutters
Choose your festive cutters and press them into the clay to create your ornament shapes. Little hands love this part, so let them go wild selecting their favorites and pressing down with glee!
As we press pause on our crafting journey (just for now), remember that every ornament you make captures a moment in time, a tiny handprint, or a glint of pure holiday joy. Be ready for more holiday craft fun as we explore painting, sealing, and showcasing your wondrous creations in the next segment of our guide. Keep those spirits bright, and let the anticipation of crafting masterpieces warm your hearts until we meet again, dear festive creators!
Five Essential Prep Tips for a Holly Jolly Clay Crafting Session
Before you start sculpting, here are five essential tips to ensure your clay decoration experience is as magical as Santa’s workshop:
1. Plan Your Design Early
Spread out that Christmas cheer in advance by sketching your decoration ideas. Whether it’s a winter wonderland scene or your child’s favorite holiday character, having a visual plan helps keep the creative process jolly and organized! Collect images or draw your own for inspiration and prepare to transform those visions into charming clay creations.
2. Space, the Festive Frontier
Dedicate a cozy corner for your crafting adventures where the little ones can freely express their creativity without the fear of making a mess. Cover your crafting table with a holiday tablecloth or disposable sheets, ensuring a quick cleanup, so you can spend more time enjoying hot cocoa rather than mopping up spills.
3. Test the Clay Texture
Get a feel for the clay before the big day. Different types of clay have unique textures and drying times. Spend a little time experimenting with the clay to ensure it’s just right for your family’s fun-filled crafting day. Remember, practice makes perfect – and sometimes perfectly adorable misshapen ornaments!
4. Tools at the Ready
A successful crafting session is all about preparation. Ensure all your tools, from rolling pins to paintbrushes, are ready to go. Having everything on hand means less time searching for a missing ribbon and more time decking the halls with boughs of homemade holly!
5. Embrace the Imperfections
Your clay creations don’t need to be worthy of a museum display to hold a special place in your heart. Every ornament tells a story, and sometimes it’s the little thumbprint or lopsided star that holds the most charm. So take a deep breath, relax, and remember: it’s about making memories, not masterpieces.
Tackling Christmas clay decorations with enthusiasm and smart prep will lead to a delightful experience for all. Watch as your family’s unique handiwork brings a personalized warmth to your festive décor, creating a treasure trove of memories you’ll cherish year after year. Let the countdown to Christmas be a journey filled with fun, learning, and of course, oodles of creative merrymaking!
See more great Things to Do with Kids in New Zealand here. For more information see here
Disclaimer
The articles available via our website provide general information only and we strongly urge readers to exercise caution and conduct their own thorough research and fact-checking. The information presented should not be taken as absolute truth, and, to the maximum extent permitted by law, we will not be held liable for any inaccuracies or errors in the content. It is essential for individuals to independently verify and validate the information before making any decisions or taking any actions based on the articles.


