
Get Ready for Gooey Goodness: Making Slime with PVA Glue!
Hello all you wonderful parents out there! Are you ready to dive into the exciting world of slime-making with your kids? I can hardly contain my excitement because today we’re talking about how to make slime with PVA glue! It’s going to be a sticky, stretchy, and sensational adventure, so let’s get the fun started!
Slime: A Sensory Play Marvel
Before we jump into the slime-making process, let’s chat about why slime is such an amazing activity for kids. Slime offers a phenomenal sensory play experience that encourages exploration and creation. Not only is it perfect for tactile learning and fine motor development, but it’s also just plain fun. So, if you’re looking for an engaging activity that combines learning with giggles and squeals of delight, slime is your go-to!
What You Need to Make Slime with PVA Glue
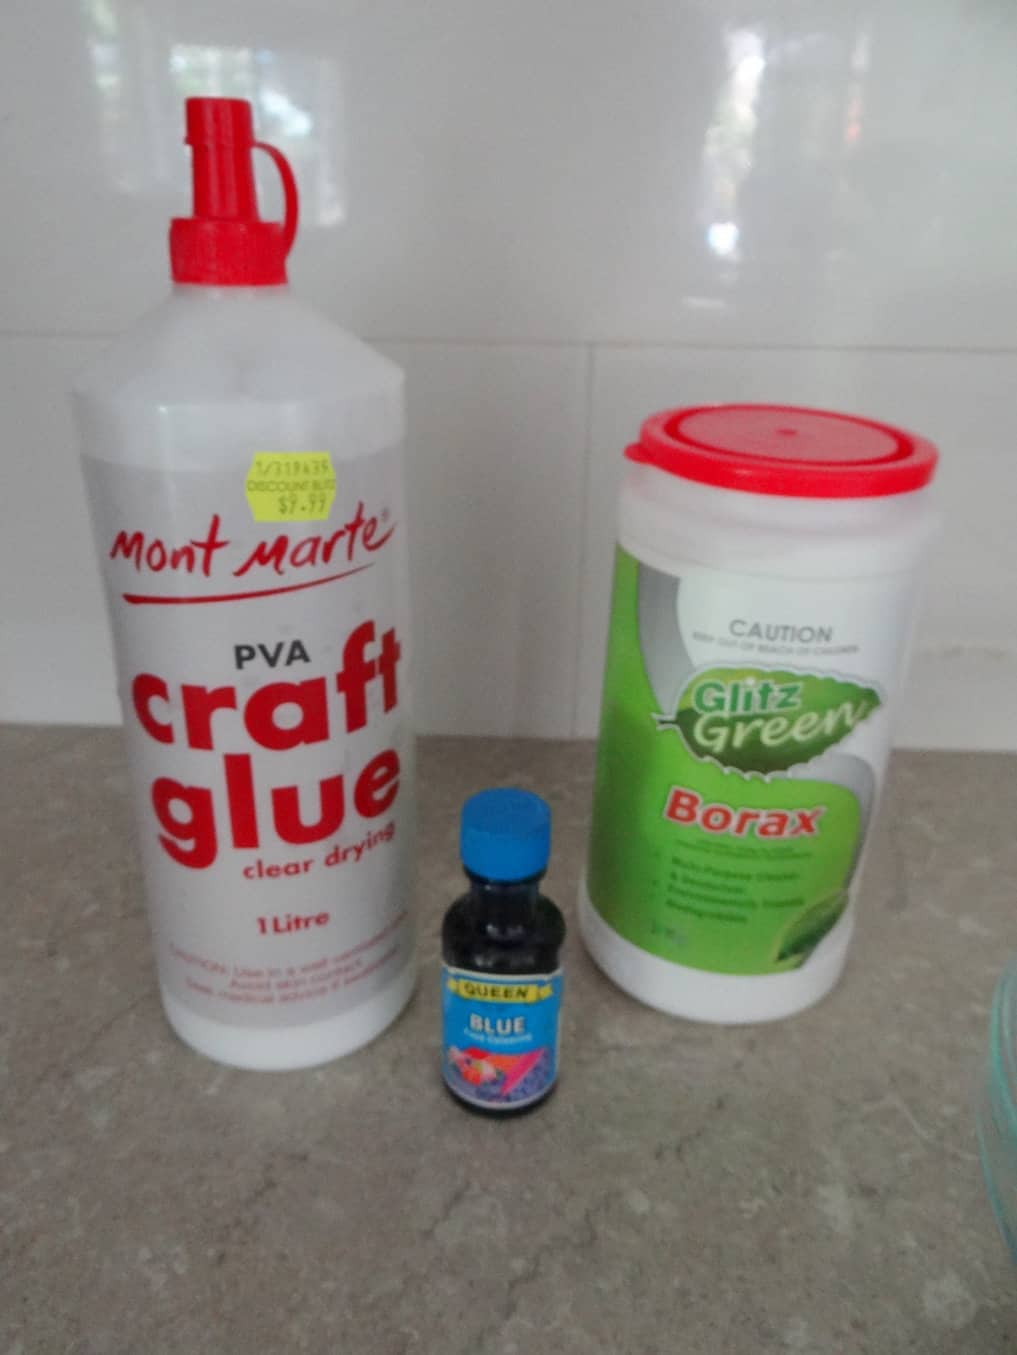
Making slime is like embarking on a mini science experiment in your own home, and the best part is you only need a few simple ingredients! Here’s what you’re going to need:
- PVA Glue: This is the slime’s base. Make sure it’s white PVA glue for the traditional slime experience.
- Activator: Good old contact lens solution (containing boric acid) or liquid laundry detergent will do the trick!
- Baking Soda: A little bit of this kitchen staple helps with the slime’s consistency.
- Food Coloring: This is optional, but if you want to add some pizzazz to your slime, a few drops of food coloring can bring your slime to vibrant life!
- Measuring Cups/Spoons: To ensure you have the right amounts of each ingredient.
- Mixing Bowl: To combine all of the ingredients.
- Mixing Utensil: A spoon or spatula to stir your slime concoction.
Easy-Peasy Slime Making Steps
Alright, team, roll up your sleeves, because it’s slime time! Follow these easy steps and you’ll be on your way to slime heaven:
- Prepare Your Workspace: Lay down some wax paper or a silicone mat to make cleanup a breeze.
- Measure Out the Glue: Pour 1/2 cup of PVA glue into your mixing bowl.
- Add Some Color: If you’re using food coloring, add a few drops into the glue and stir until you reach your desired shade.
- Baking Soda Boost: Sprinkle in 1/2 teaspoon of baking soda and mix well—it’s the little secret to perfect slime texture!
- Activator Time: Slowly add in your activator (contact lens solution or laundry detergent), stirring continuously. Begin with a few teaspoons and add more as needed until the slime begins to form and pull away from the side of the bowl.
As you mix, the slime will begin to thicken. When it starts to come together and looks to be the right consistency, it’s time to ditch the spoon and get your hands in there! Knead the slime until smooth and stretchy.
Remember, making slime is not only a fun activity but also a great opportunity for kids to learn the basics of measurements and the wonders of chemical reactions. Plus, it’s super satisfying to see the ingredients come together to form something entirely new and exciting!
There’s a whole world of slime possibilities out there—glittery slime, fluffy slime, glow-in-the-dark slime—you name it! And we’re just getting warmed up. So stick with me, dear parents, as we continue to explore the magical universe of slime making. It’s going to be a slip-sliding journey full of laughter and creativity!
Now that we’ve covered the basics of slime making with PVA glue, stay tuned as we delve deeper into tips, tricks, and troubleshooting to ensure your slime adventure is a booming success. Get ready for some more goopy, oozy fun up ahead!
5 Things Parents Should Know Before Making Slime with PVA Glue
Gearing up for a slime-tastic time with your little ones? Here are five essential things every parent should keep in mind:
- Safety First: Always supervise your children during the slime-making process, especially when using chemicals like boric acid in the activator. Make sure to keep these ingredients out of reach of young children when not in use.
- Allergies and Skin Sensitivity: Be aware of any skin allergies or sensitivities your children might have. Slime ingredients can sometimes cause reactions, so consider using gloves or searching for alternative ingredients if necessary.
- Non-Edible Alert: Remind your kids that slime is not edible. Younger kiddos might be tempted to taste the intriguing goo, so ensure they understand that slime is for playing, not eating!
- Prep Makes Perfect: Have all your ingredients and tools ready before starting. Slime making can get a little hectic, and you’ll thank yourself for being organized upfront. This helps keep the process smooth and fun!
- Clean Up Tactics: Slime can get everywhere if you’re not careful. Set up a designated space for slime play and know how to clean up slime should it get on clothes, hair, or your couch. Vinegar dissolves slime well, so keep a bottle handy just in case!
Further Fun with Slime: Variations and Add-Ins
Once you’ve mastered the basic PVA glue slime recipe, it’s time to jazz things up a bit! Here are some cool variations and add-ins:
- Glitter Galore: Add a dash of glitter to your mix for a sparkling effect that will dazzle and delight. It’s an instant upgrade to your standard slime.
- Scent-sational Slime: A few drops of essential oils can give your slime a pleasant aroma. From lavender to citrus, pick your favorite scent for a multi-sensory playtime.
- Texture Talk: Mix in foam beads, plastic beads, or even small rubber toys to create textured slime. This adds a new dimension to the gooey goodness, providing more tactile feedback for little fingers.
- Glow Time: Use glow-in-the-dark paint or pigment to create slime that lights up the night. This is perfect for pajama parties and sleepover shenanigans!
- Change It Up: Experiment with different PVA glue types, like clear glue for a translucent slime, or glue with colored sparkles for a built-in dazzle.
Troubleshooting: Common Slime Fails and Fixes
Not all slime sessions go according to plan, but don’t fret! Here are some common slime fails and how to fix them:
- Too Sticky: If your slime is a sticky mess, add a bit more activator until you reach the right consistency.
- Too Rigid: Did your slime harden like a rock? Mix in a few drops of warm water to soften it up again.
- Won’t Form: If, after a fair amount of mixing, the slime isn’t forming, make sure you’ve added enough baking soda and activator. The chemical reaction is crucial for slime to come together.
- Color Bleeding: When using food coloring, sometimes the color can transfer to hands and surfaces. Consider using washable paint or special slime dye as an alternative.
- Mess Management: If slime gets on fabric, scrape off as much as you can, soak in warm water with vinegar, and launder as usual. For hair, a bit of oil (like coconut oil) can help ease it out without cutting.
Now that you’re equipped with the know-how and the brave heart of a slime-making maestro, it’s time to create and enjoy endless hours of goopy joy with your kids. Embrace the mess, revel in the creativity, and most importantly, have a whole heap of fun! Keep experimenting with different ingredients and techniques, and your family will become slime pros in no time. What are you waiting for? Let’s make some slime!
See more great Things to Do with Kids in New Zealand here. For more information see here
Disclaimer
The articles available via our website provide general information only and we strongly urge readers to exercise caution and conduct their own thorough research and fact-checking. The information presented should not be taken as absolute truth, and, to the maximum extent permitted by law, we will not be held liable for any inaccuracies or errors in the content. It is essential for individuals to independently verify and validate the information before making any decisions or taking any actions based on the articles.


